This past week or two found me spending quite a bit of time bringing a couple projects to quilt top stage. The first one 'The Mountains Are Calling', has been in the works for a long time. First, I cut out a whole lotta free-cut strips and started in on the back of the quilt.
 |
| Tags quilt |
Just wanted to do more improv. strip piecing and sewing plus use up some more languishing fabrics. I had a vague outdoor-ish look and feel in mind for the front of the quilt, but didn't really grab a hold of anything solid until the back was
finished a couple months later. The struggle was undoubtedly made worse by the fact that the strips were cut out in red, blue and tan or cream. Isn't that more Americana rather than outdoors? Sometimes I just have to laugh at myself!
 |
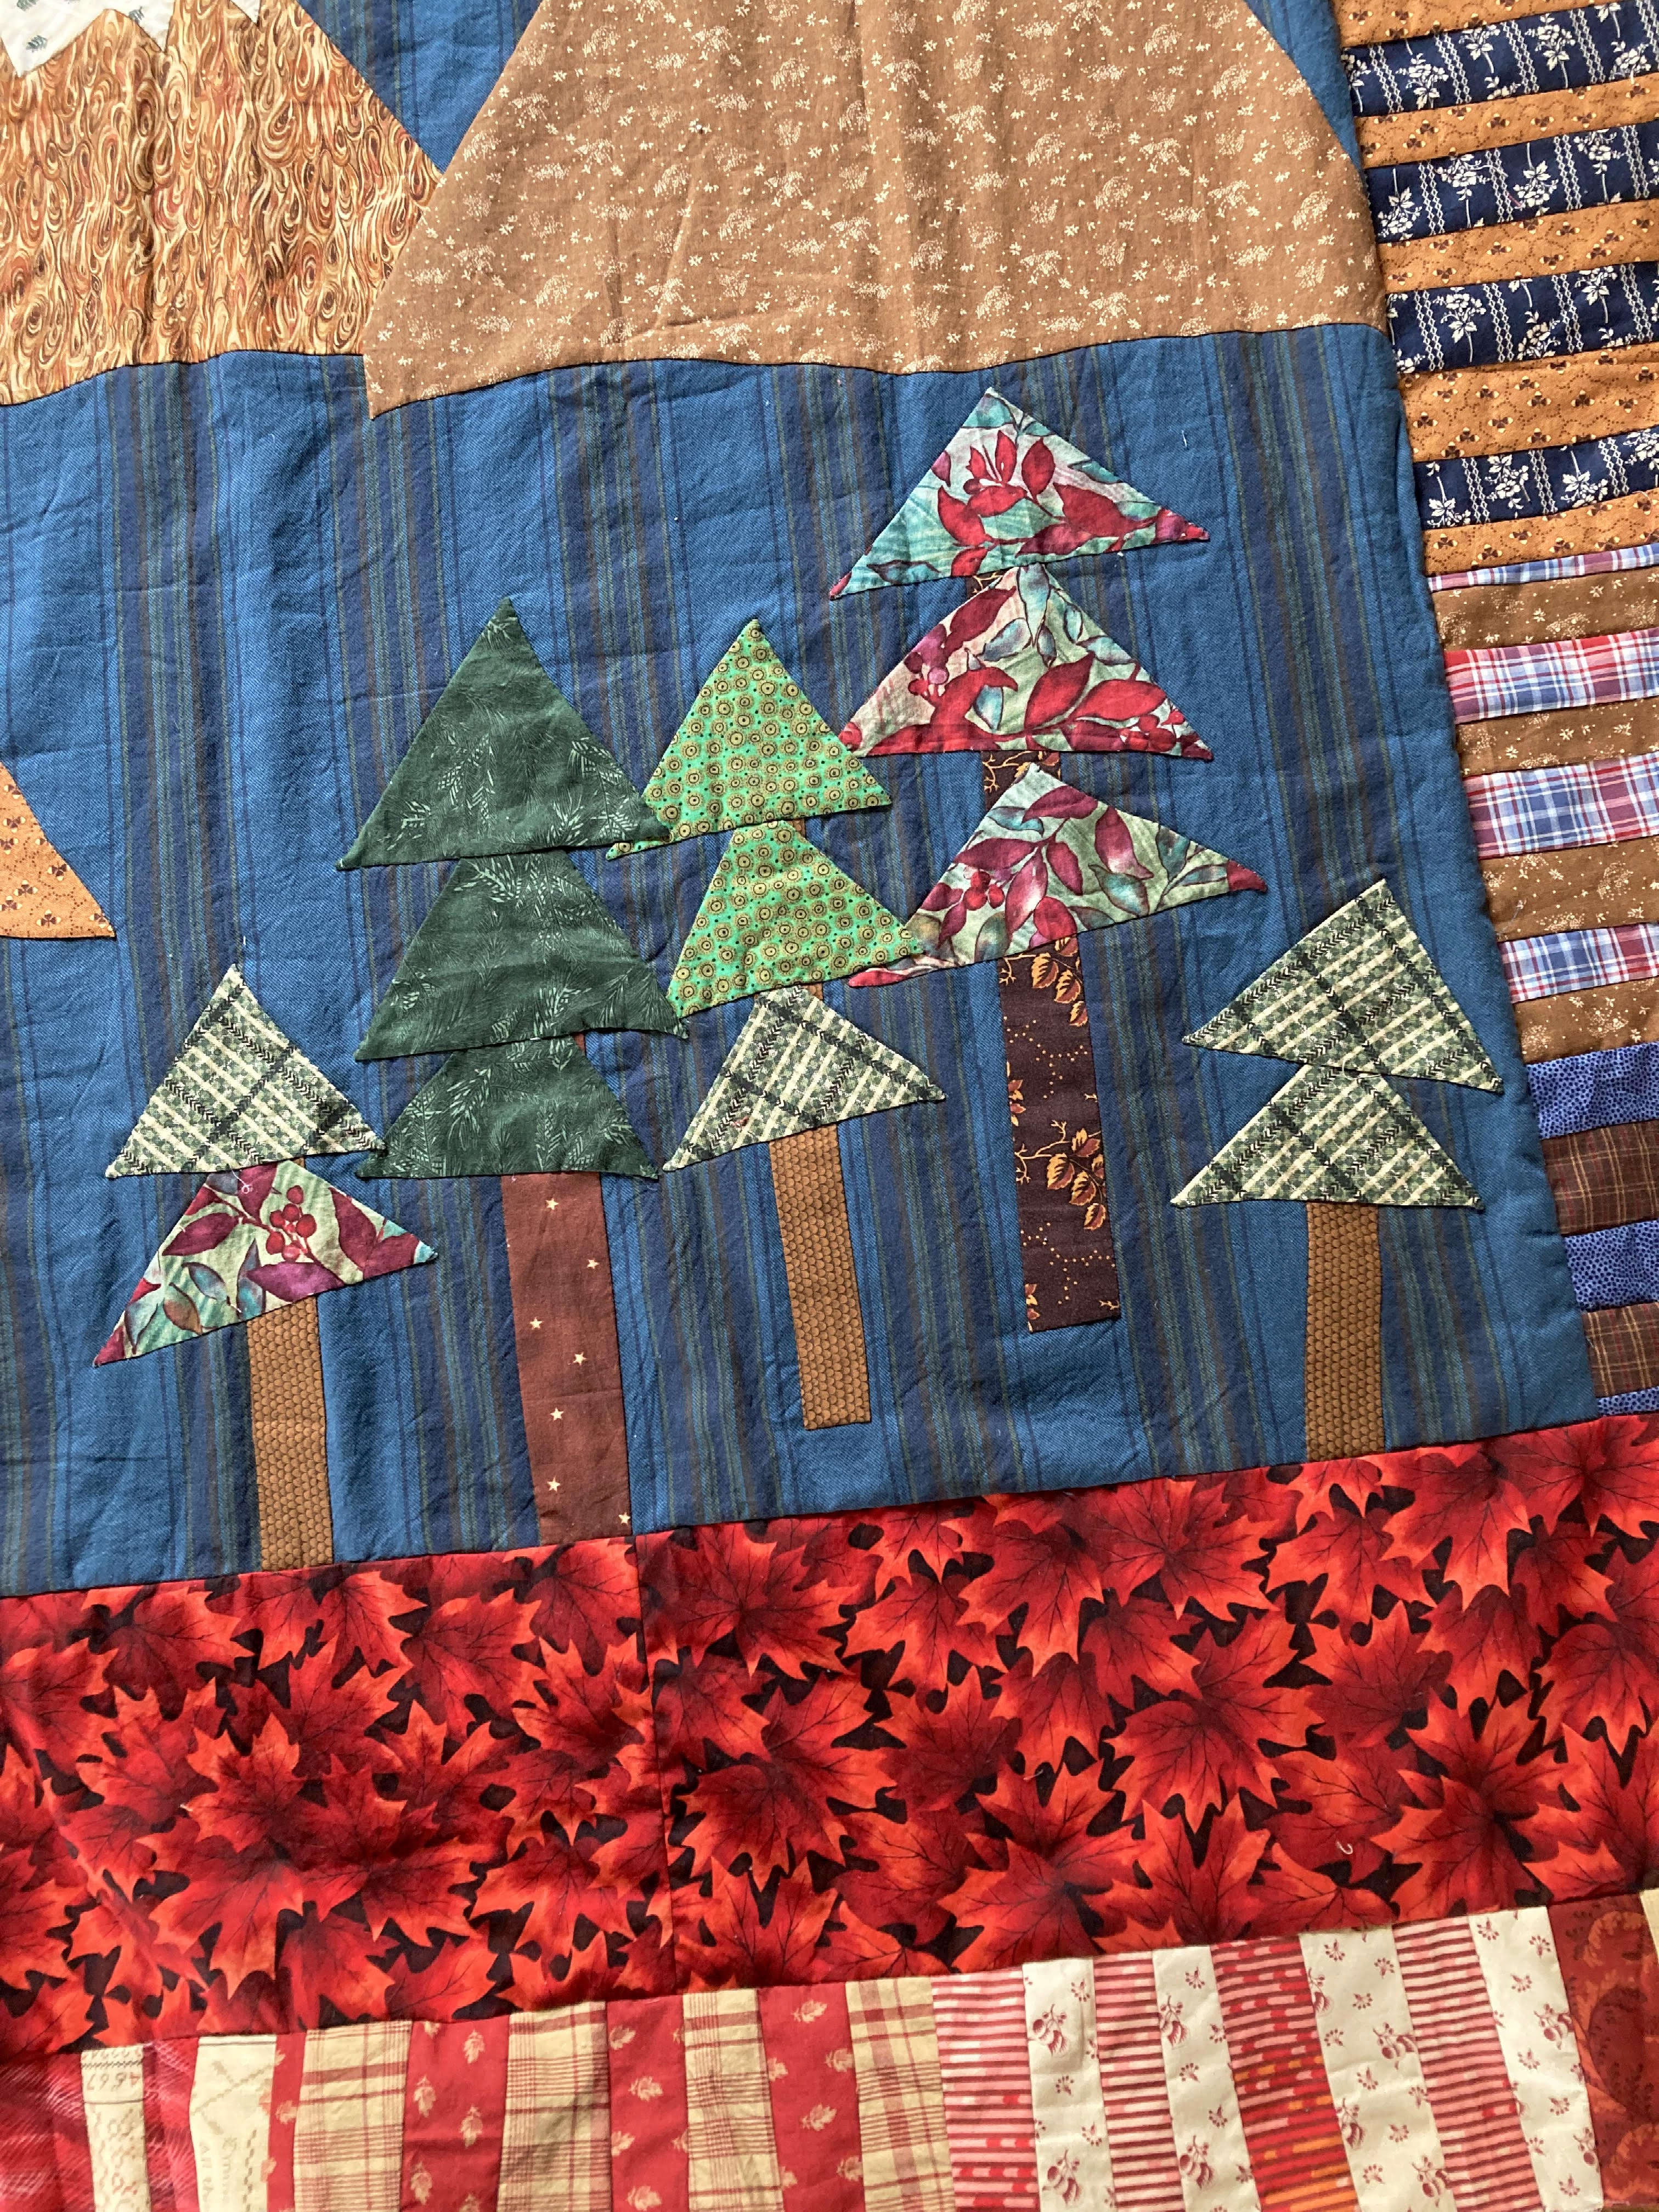
| A few interesting trees |
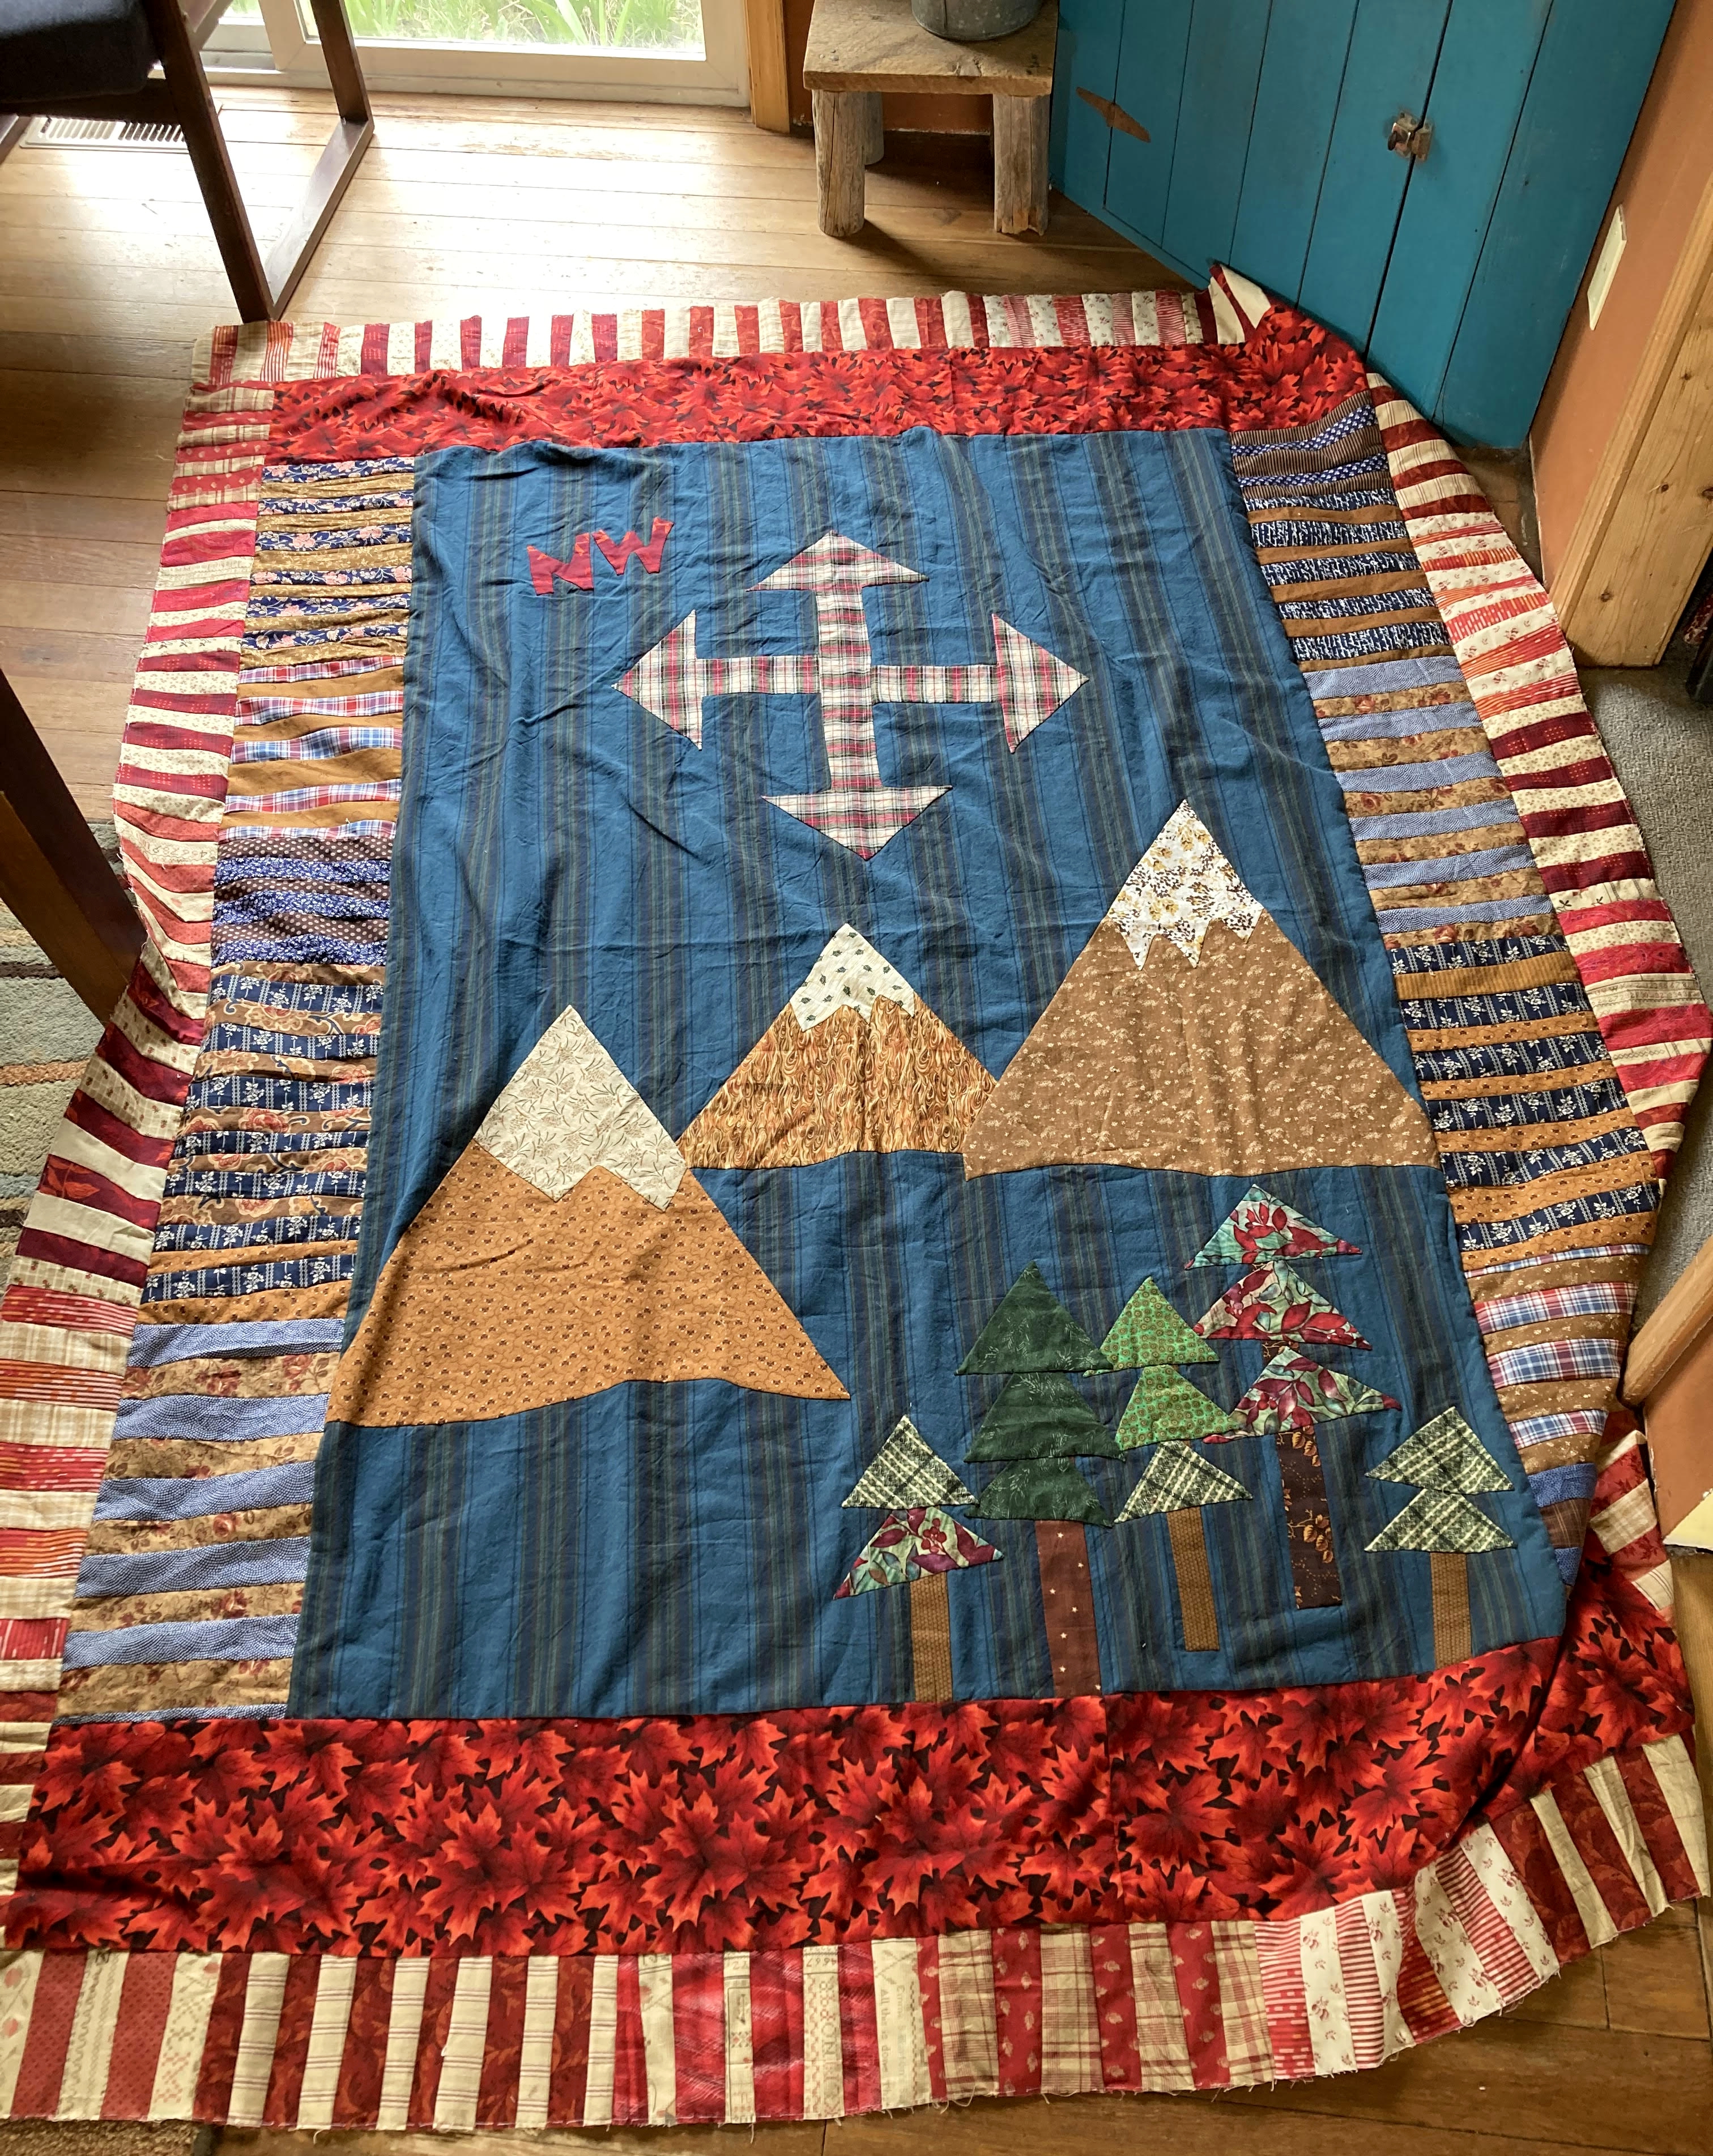
I eventually settled on a mountains and hiking vibe knowing this had always been intended for my youngest son. I kept thinking about adding words to the quilt, perhaps a hiking quote? Wouldn't that be fun and interesting? And it always felt like a little bit too much. Made it hard to gain any traction on the front as all my ideas just sort of floundered and dried up. Honestly, he just wouldn't care either way. A quilt from mom? Check. Large enough to tuck under his feet and chin both? Check. Not too girly or fussy looking? Check.
 |
| A compass |
And so it was a relief to finally decide how to make the top large enough to work with the backing and still give off a relatively simple 'guy' look and feel. Why are guy quilts so tricky when really, the key is to keep them simple? Bonus--I was able to use up most of the leftover improv. strips, plus a lot of that red leaf fabric. It's been in the stash totes for well over a decade! Now I just need to schedule in some time with the quilting hoop sometime this summer and get it handed over while he still loves to hike...
 |
| Looking across the quilt |
Next up on the list of projects that were nagging at me, was Revised. It's the Color Palette challenge from the
AHIQ blog. Once all the applique was stitched down, then it was just a matter of making time with the
design floor and the final layout.
 |
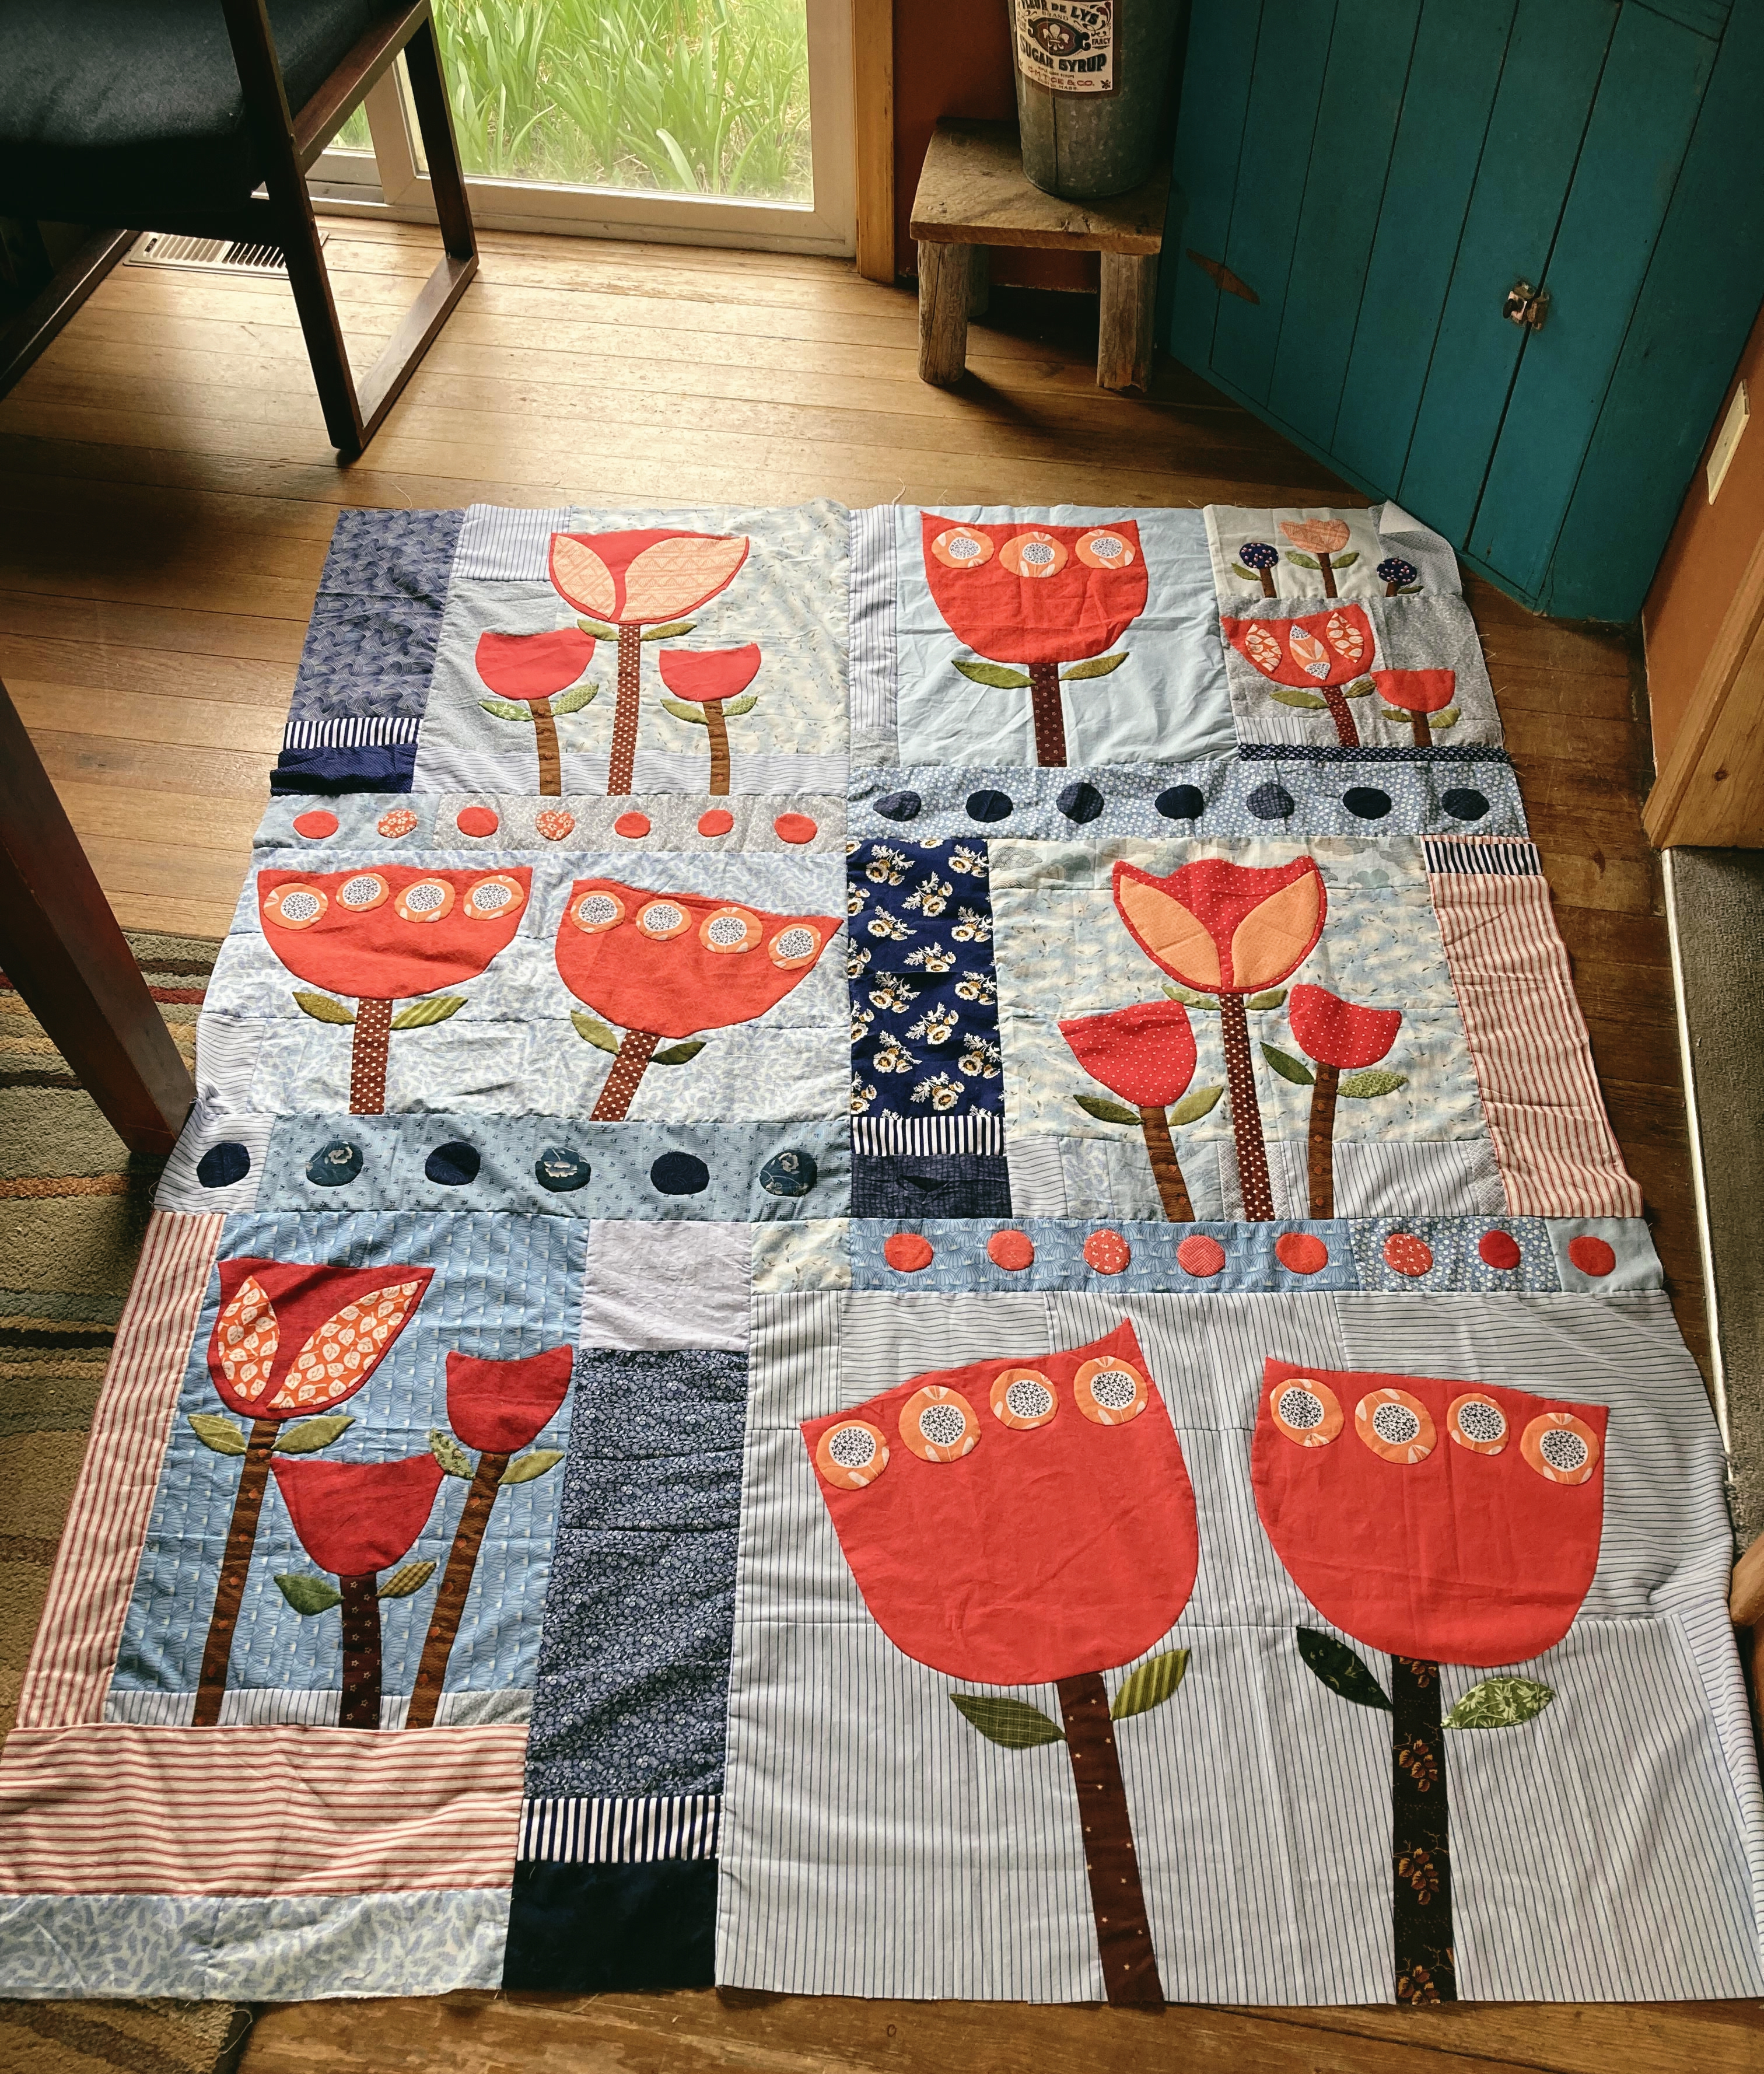
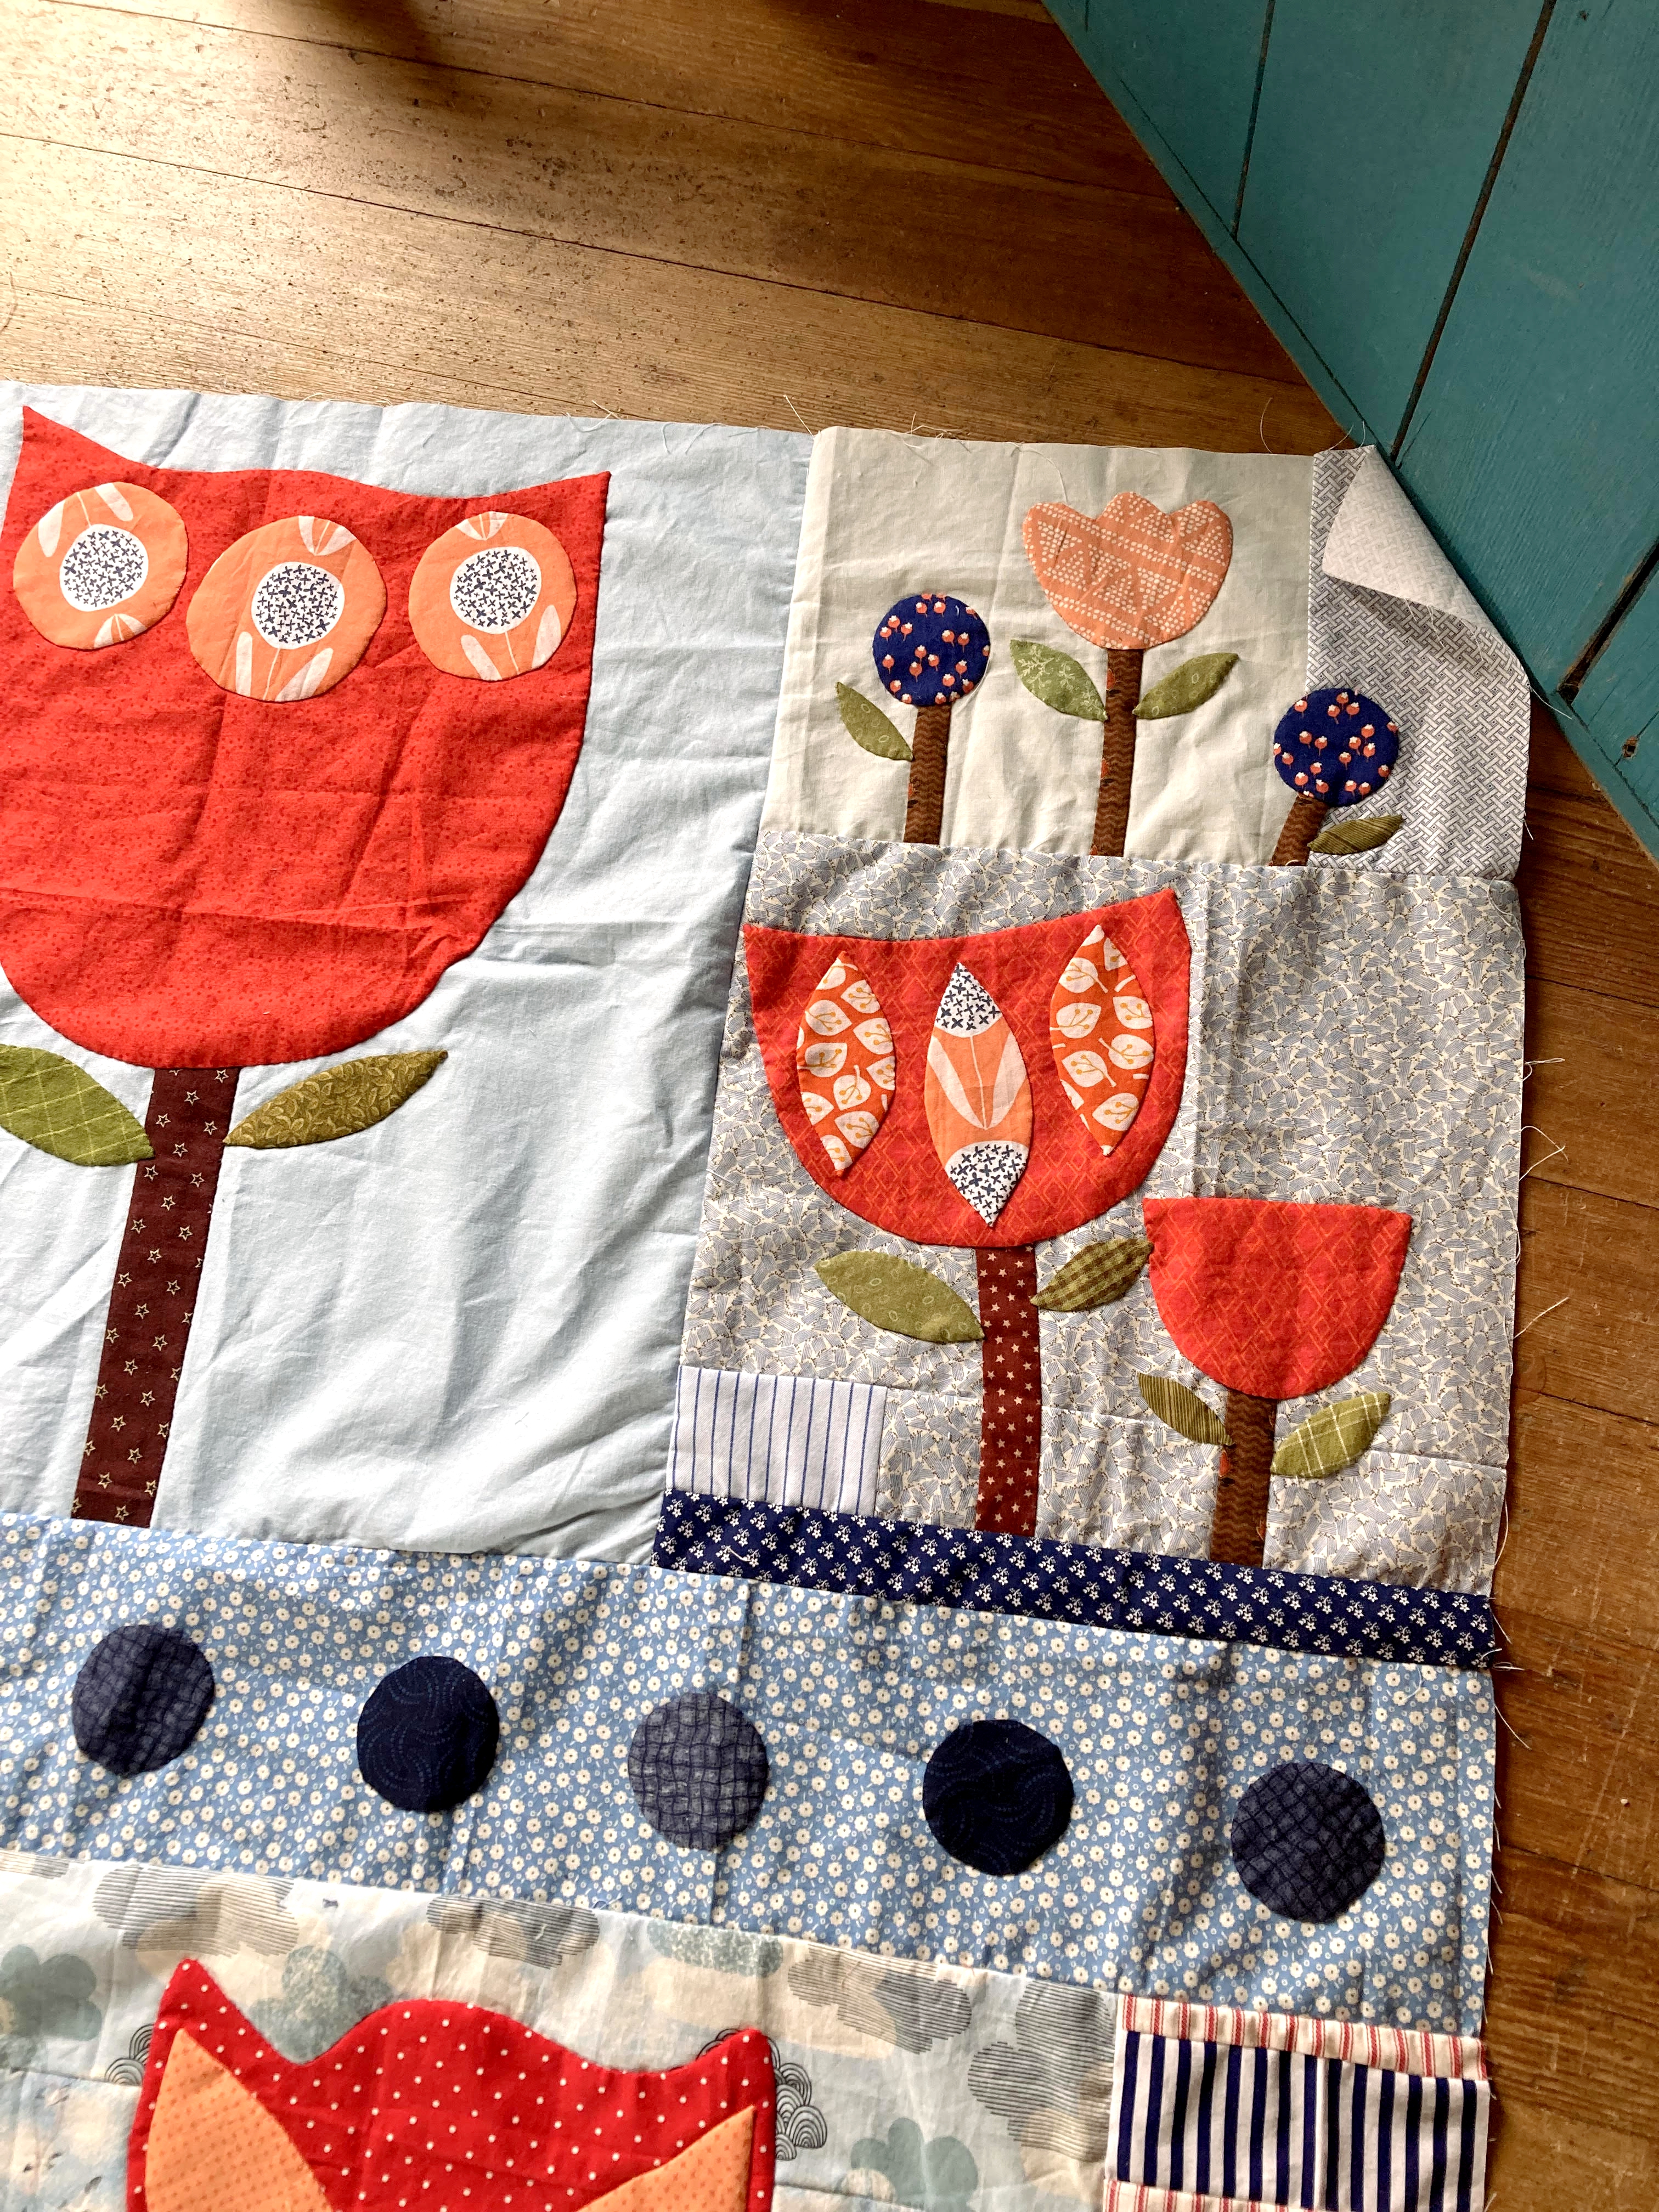
| Revised is a finished quilt top! |
It took a little bit of puzzling to get all the math figured out for the smaller filler pieces, but it wasn't difficult. All the larger applique pieces had been graphed out on paper so I knew the basic layout should work.
 |
| Loving these smaller blocks |
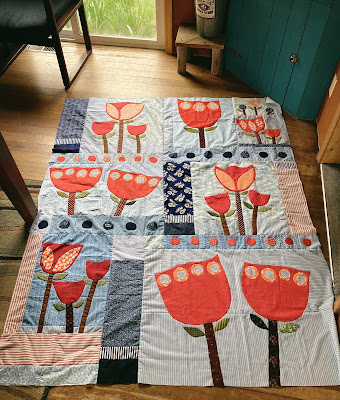
I'm still thinking that the tulips are a bit more awkward and clumsy looking than they probably should have been, but the whole look is growing on me. A little bit of a prim look combined with utility--a match made in heaven!
 |
| Simple fill-in with the directional fabric |
Not seeing this with borders, at least not at this point. Shocking, I know, but it feels rather complete already without them. We'll see what happens after it sits in the quilt top drawers for a couple months. Will it be grumbling and starting to want a little more attention?
 |
| Rough circles to break up the look of the tulips |
The only color in the original inspiration that didn't make it into the quilt was a sharp greenish yellow. Just could not find a good place to introduce it with these tulips, though I tried and tried. I'm actually contemplating adding it onto the quilt in the binding! Wouldn't that be different!
 |
| Very brash tulips |
After these two quilt projects were taken care of, then I turned my attention to the Improv. Hourglass Abstract quilt. Like I said before, just had to cut and sew another stack of improv. strips and then the top could be puzzled pieced together. It was super obvious after diving into this one, how much the previous two attempts had helped prepare my mind for just this sort of effort. I was already in the groove!
 |
| A finished background piece |
I ended up working on this for two straight evenings and most of a Saturday and Sunday. Then still another late afternoon and evening after my daughter had come home and reclaimed the floor. It was a marathon! The basic shape was blocked out before with all the hourglass units sewed into rows or chunks. Next up was trying to wrangle the top into big sections of improv. that would sew together with minimal partial piecing attempts.
 |
| Only area with partial piecing |
As I sewed, trimmed, measured and sewed some more, It occurred to me that the quilt was becoming more and more square shaped. Uggh. For the sake of the future applique, it needed more of a rectangle shape in order to flow better. So that was an interesting detour, trying to add in a good two or three inches to the length of each larger section, all without making it look like I just plopped it on as an afterthought.
Mostly though, it was a case of sewing together rows of strips, ironing them, laying them out and seeing if they were wide enough. Trimming. Adding in little piecing attempts in areas where there needed to be just a bit more filled in. Making sure the strips weren't all presenting in the same direction. Though all this is 'background' area, I didn't want it to look the least bit sloppy.
 |
| Hard to see the texture in this light |
I realize the quilt looks a bit out of balance right now, but hopefully it will all make sense when the applique start coming along. Part of the top will be completely covered up. Part of it will fade directly into white noise. What's important is that the applique has something more than just a flat one-piece of fabric to rest on.
Texture. That's the number one goal for this particular phase of the quilt.
 |
| A good attempt! |
Crossing my fingers it turns out to be a great looking quilt in the end, but regardless, this 'background' attempt would never be a mistake. Loving the text prints and subtle variations in the combined low-volume fabrics! One of the main repeating fabrics, a yellow-cream with a scrolled text printed over it in an indigo blue, had to be turned over as it was too
loud. Yeah. So weird. But it looked a hundred times better when using the back side of the fabric, so that's the way it had to be.
 |
| The new cover |
Also finally addressed the very sad state of my table top ironing board once again. Couldn't find a smaller ironing board cover here locally without buying the entire board. What a waste. Decided to do what I did last time--take a large board cover and cut it, fold it under and pin with large quilting pins. Seemed to hold up good until the top was worn out, so why not? For some reason, I don't like distracting colors on the ironing board though. Had to pay a little more for this neutral color, but I know it will be much more appreciated. Now to replace the iron. This one doesn't seem to want to get quite hot enough. I am soooo tired of buying garbage irons that just get tossed out every year or two!


You’ve gotten a lot done! I enjoyed seeing all 3 projects - each one is interesting and invites a closer look to enjoy the details. Each one is unique - bravo!
ReplyDeleteLove the tops you have been preparing.
ReplyDeleteI love how it all comes together. I am anxious to see the applique begin on your neutral pieced background. I really dislike irons now. Mostly junk. I had an oliso which lasted me just under the warranty. They would have replaced it except they didn't have any. It was at the begining of covid and when that barge canal was blocked overseas. So after asking friends and looking I bought a Chi. I liked it and used it for two years. I longarm for a quilt shop and I have my own clientele for income From the shop get a lot of wide backs still packaged on the cardboard with their customers tops. Unwashed and have deep wrinkles I need a lot of steam. The Chi was great but I was constantly filling the thing. I went to a commercial iron with hanging reservoir. I gave my Chi to a friend and after a year she says it is still great. It was about $60.
ReplyDeleteWOW to the hourglass background piece - just wow! I love LV quilts and this one as a backdrop for your amazing appliqué really delights me. And the tulips top is extra cool, too. The circles add so much and so does the filler that isn't at all symmetrical. Quilted it will be a stunner! Quiltdivajulie
ReplyDeleteExciting progress and plans, thanks for sharing.
ReplyDeleteRevised looks great with the smaller blocks.
All your projects look wonderful, your son is sure to appreciate a quilt themed just for him. My iron never seems hot enough, so I bought a wool mat and now iron my piecing using that, it seems to hold the heat and makes for a smooth crisp seam.
ReplyDeleteOh yes, the hourglass background is great.... look forward to seeing what comes next!
ReplyDeleteI like your description of prim combined with utility. All three tops are looking great. You have to strike with the iron is hot. ( well, not with the one you're using) LOL
ReplyDeleteOh your mountain quilt is just fabulous! I like the compass arrows. Great to catch up on your Tulip quilt too. Yay spring is here finally
ReplyDeleteThe mountains are very pleasingly manly and the tulips are fabulous, maybe my favourite of your tulips - all those little variations are so pleasing. Definitely audition yellowy-green for the binding; it might be just the thing. As for the hourglass piece, if I had made what you have already, I would be calling it done and feeling very pleased with myself. I am really excited to see what you have planned for the applique stage.
ReplyDeleteIt is so much fun to see your progress!! I love how the quilt for your son turned out -- he will love it! And the tulip quilt is wonderful! I am looking forward to seeing the applique progressing on the hourglass background!
ReplyDelete