Okay, I've finally figured out how to do the BBIII part of the QAL! Life happenings are a little uncertain around here for an undetermined period of time and this approach will best match the posting requirements from me.
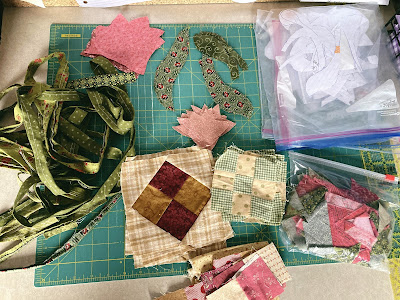
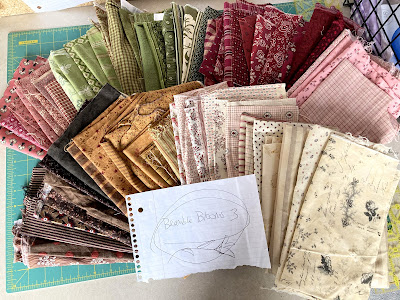 |
| Fabric pull for BBIII |
Bramble Blooms III Prompt: Now that we've established the basics of our series, it's time to get more personally creative! Make a fabric pull, whether from the original, older fabric color palette you've already been using for the QAL or a bright, shiny new one that feels more inspirational. Think about all of the elements you've previously incorporated into your BBI and BBII quilts. Take the time to consider which elements have felt especially good to play with. Have any of these blocks, motifs or color blends unexpectedly piqued your curiosity? What if you tweaked them just a little? What if you really pushed the boundaries and made them much bigger/smaller or even potentially a lot more improv. and quirky? Which elements do you particularly dislike? Perhaps it's time to drop those and move on.
Now take out some paper and an ink pen and draw up a potential design for BBIII using any or all of the previous elements. Consider this a 'doodle', not something that has to be perfectly in proportion or laid out exact as to measurement on graph paper. Let your ideas flow as with the ink from the pen. Draw one or several drawings and then choose your favorite or the one that looks most intriguing at the moment. Perhaps you will pick the design that your fabric pull will feel most at home with. Or would you rather choose the design that will feel the most challenging to combine your fabric pull with? Either way is totally fine. Finally, sew up your design and get ready to see it in quilt top form. You can totally do this!
 |
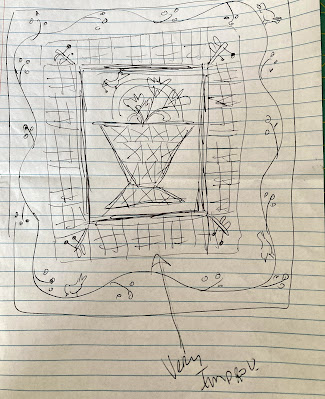
| Design doodle #1 |
Don't feel like you have to use every single element from before, including the
medallion layout. Go somewhere that feels fresh and interesting to YOU. Do keep at least one of the elements though, and concentrate on keeping some similarities there. This will add interest when comparing BBI, BBII and BBIII.
 |
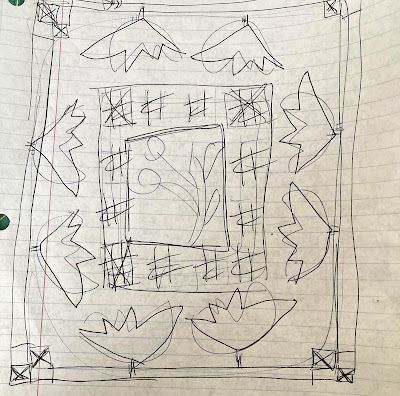
| Design doodle #2 |
Add applique or
not. In my case, I am somewhat obsessed with the flower, leaf and yes, even the bramble-ly thorn motifs. So of course that's where my imagination continues to take me! What if I do this? What if I do that? Make notes for clarification rather than trying to draw a 'perfect' design. You can always come back later and fine tune the one that you've chosen out for making.
 |
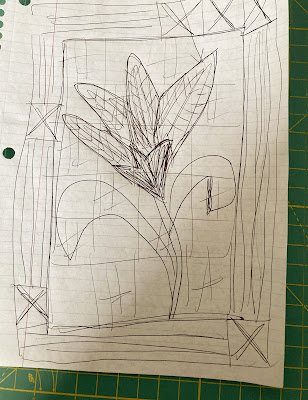
| Design doodle #3 |
Don't worry about the proportions of each individual part of the design and how it might all fit together properly together or not. Just doodle what your mind is envisioning in a very simple and basic way. Draw relatively quickly and let it be primitive. Your rough lines should easily convey the general feel of your idea as it's being created in real time because your hands are in fact, connected to your brain. It might feel forced or tricky, but believe me, this works.
 |
| Design doodle #4 |
Don't be afraid to draw several doodles and maybe even throw the worst of them away. {It actually feels really good to crumple up a terrible design into a ball and throw it away!} As you are drawing, things will probably occur to you to that might not even fit into the current doodle. Finish the one you're working on, and then go ahead and explore the next idea directly after.
If your brain feels fuzzy and sluggish {
because of the implied pressure to be creative}, make yourself draw at least one overly stilted and perhaps unimaginative doodle, and then just walk away. {It is oddly helpful to force out one pitiful rendering rather than nothing at all.} Let your brain cogitate and ponder over the next couple hours or even,
days. Then, whenever a random QAL design idea pops into your mind, hurry up and draw it out on paper immediately
so you don't lose it.
 |
| Keeping the odds, ends & orphans just in case |
When you've got a design that feels right, then feel free to dive into the making part of the equation. Don't rush into micromanaging how you're going to implement every single, little part of the quilt! Simply start from the center like we've done before with BBI and BBII. Basically, I'm urging you to FORGET about the other parts of the quilt
until you get there {except for maybe assigning potential colors to those areas}. Please don't stress to the point of positively paralyzing yourself! And remember, there are lots of tips for border making in this post
here. You can also check
here for a list of all the posts in the QAL if you need to refer back to other tips and tricks I might have dropped.
Start by making the center or possibly making blocks. Concentrate on
that alone. Now, how does that section look and feel? Good? Move on. If not, fiddle with it for a bit. Does it need a coping border? Applique? An addition of improv. piecing? Remember, auditioning is your friend. What's next? Decide on the components and colors for the next phase, and then sew up each and every part of the quilt as it
connects to the previous portion. Listen to your quilt and pay attention to the feelings in your gut of '
something is needed' OR '
something isn't right'. Take plenty of time for pondering if you're unsure.
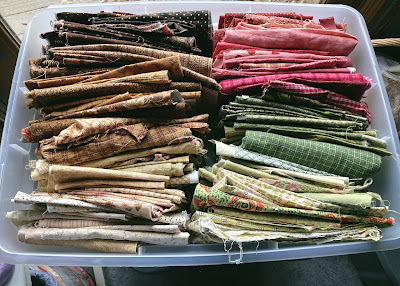 |
All the leftover fabrics to date from the original 3 quilt fabric pull
Enough fabric left to easily make a couple more in this series! |
It's very important to understand that your chosen 'doodle' isn't set in stone. Ever. Consider this just a starting place! At any point along the way, you can change things up or even eliminate part of the design. Play with how to interpret your design so that it has the very personal vibe and voice of YOU. That could be as simple as choosing out special fabric prints or mixing areas of formality with make-do backgrounds. It's completely up to you how closely the lines are followed in your original drawn design. And yes, if you really, truly, positively want to make up one of my designs, then feel free. Go ahead if you have to! Give me the design credit of course, but seriously, wouldn't it be so much more rewarding to make a YOU quilt?
The tentative plan is to host the BBIII link-up party sometime in the middle of June. This will give five months for putting together a quilt top. I will be posting about my own Bramble Blooms progress along the way, along with any other quilting progress made around here as well. As the link-up time gets closer, I will try to post a heads up as to the actual posting date for the third part of the QAL. Don't know how many people are actually interested in this particular part of the QAL, but everyone is welcome, whether they have completed BBI or BBII quilts or not. Lets dig into this from a slightly different approach and see where we all end up. I bet some of you are going to be surprised!
For myself, I can already see that I'll probably have to make more than one of these designs eventually.*sigh Will probably continue to hang on to all the leftover fabrics from these Bramble Blooms quilts until I can get this series properly worked out of my head. {Could be interesting to see how much of this fabric could actually be used up and how many quilts that would be?}
Thanks so much for coming along on this oldy, moldy fabrics adventure with me. Some of you have even left a tip in the tip jar! Not necessary, but very sweet! The more I play with older fabrics, the more intriguing it is to see if I can truly end up with a quilt top that looks 'intentional' as to fabric choice, and not just a sorry use-it-up story. The resulting quilt tops from all of you has been absolutely fascinating to see. I love how much personality I'm seeing, the random bits and pieces you've gleaned from my tips about making your fabric work for you! Love it! And hearing about your struggles with the process. We've all been there before or will be eventually. It's all good stuff. Hope you've learned a valuable tip or two in the journey to making your own very personal and unique quilts. It's a lovely, sweet thing to know our finished quilt is the only one like it in the whole entire world! Fingers crossed this hasn't been a huge waste of time for anyone. I know I'm still learning something with almost every quilt made....


