Showing posts with label BBI. Show all posts

Monday, April 29, 2024

Bramble Blooms I Link Party is Now Open!

You've all seen the results for my Bramble Blooms I quilt, but here it is again. It's time for the link party! Hopefully you have a completed top to share with us, but if not, go ahead and share whatever progress that you have made. There is no shame that some projects just take their own sweet time!

Bramble Blooms I quilt top finish

I have been swallowed up in family things lately and so haven't had much time to bounce around to all of the blogs and check out newly completed BBI quilt tops. Am so looking forward to seeing all the creativity in one place! Believe me when I say that I have been absolutely staggered by the personal, creative responses to following along with my little exercise in using up older quilt fabrics. Hopefully there has been something of value learned along the way. It's really hard to guess exactly what 'everybody knows already'. When and if to just go ahead and pass along a little tip or trick that works for me and the way that I personally approach quilting. Has it been too much? 

With this quilt top finish, we will have an excellent frame of reference for moving forward with the second quilt in the series. If some of you are still up for that? I have started the very beginnings of my own BBII and hope to post more about that in a couple weeks. Need time to organize the pertinent info needed for everyone attempting to make their own version! Crossing my fingers there will be ample opportunity to get through all the details by then. If life continues the way it has the past several months, it might actually be June before BBII makes its appearance. Uggh.  I am so out of patience with lack of quilting time. 

Okay, enough complaining. Let's see what you have to share with us! I know a couple of you actually have a total quilt finish to show off....

This party will be open through May 14, 2024 for all the slower bloomers to have a chance to share too.  And another thing, I set the Linky Party up so that if there happen to be any Bramble Blooms QAL followers out there without a blog or Instagram to post to, they can just add a picture here of their quilt top. We'd love to see your work as well! Please do add a link if you have one though--that would be all of you QAL'ers listed over at the side bar! 

You are invited to the Inlinkz link party!

Click here to enter


Wednesday, November 8, 2023

Can't Believe It's Already November!

I've been trying to make a little bit of progress on the growing list of applique projects. Why oh why does it never seem to shrink by much? Hmm.. Maybe if I'd quit adding to it so cheerfully?

Putting the applique in the sashing this time!
I finally got the first section of the Melon Patch Blossom quilt sewn together this week. It's not very wide so of course I will probably want to add on a border. These blocks are quite simple, but the orange fabric felt like a good choice to help make the applique pieces pop. I'm not sure what the little circle things are. At first the idea was to make little pomegranates and then this shape came into play. My daughter says it looks like a tomato which now, I cannot un-see!
Loving the happy colors
The 'petals' in the sashing are some leftovers from the original Melon Patch quilt, of which there had been many changes even getting up to that point! In fact, as many of you know, this will be the third Melon Patch quilt using up parts and pieces. The second one in the series is here if you'd like to take a look. All I know is, all three quilts together are already much, much more interesting than the original quilt idea ever would have been. Nothing at all like what I expected to end up with though!
Thinking about a border solution
I'm getting closer and closer to a quilt top with Good Vibes, another of the Circle Game quilts. Each quilt is made out of the cut-out circles from behind the one before. Some day I'll have to post my series quilts in order at the top of the blog just so I can keep track! These blocks are 19 1/2" inches so I may be making Circle Game quilts for a long time as it will take a very long time for there to be nothing decent left to work with. It's definitely been an intriguing bit of play, but sometimes it feels hard to be increasingly creative with large circles. Still have a couple ideas left in the tank though and of course, all the doing will undoubtedly generate something more. Isn't that the way it's supposed to work?
Getting ready to sew some sashing to the blocks
I've also been trying to get the hand sewing done for the centerpiece to Bramble Blooms I. Several projects waiting patiently in line right behind it. Most all of the leaves and stems are sewn down and then next up will be the flowers. At this point I'm very seriously considering cutting the flowers out just a skootch bigger as I like them just this way. Don't want to lose any impact when the seam allowance is sewn under! It happens so often around here, you'd think I'd be prepared, but nope! Always surprises me to think I have to cut out another, slightly larger set.
BBI centerpiece
And, I finally, finally got all the hand quilting completed on the Positive Thinking quilt. Don't know why, but the hand quilting was not quite as soothing and meditative as it normally would be with this particular quilt. Love how it looks now that it's finished up, but I think the thread didn't show up quite as well as I generally prefer. So pleased to have it almost wrapped up now. 

This was a 2020 AHIQ Challenge that started the whole idea and I am quite, quite positive it would never have happened without that particular prompt. Still running a little behind with the other challenges. There's a sun I need to do {working on the applique prep right now} and now, an Improv. border to incorporate into a quilt. Hmm.. I can totally envision creating an entire quilt just to play with a special Improv. border!...... 
Next up is the hand sewing on the binding
I was super happy to find all the binding needed in the leftover binding tote. It has pink, blue and purple binding sewn on now and doesn't seem to be the least bit bothered by the scrappy, make-do look. Kind of goes with the upcycled shirts already used in it! Always thrills me to be able to use up any of the leftover bits and pieces of binding, applique parts and/or quilting blocks. Yay for frugality and making do!

Okay, that's the quick wrap up for what's been happening in the quilt room around here. I have been spending boat loads of time getting the posts figured out for the Bramble Blooms QAL. SO much work. I don't know why I didn't think about how much time the posts alone might take! Hopefully everyone participating is finding the QAL fun or at the very least, maybe being coaxed out of their comfort zone? I am absolutely blown away by all of the interest and creativity happening by the participants. Wowsers, how amazing is that we have close to 25 Bramble Blooms quilters on the list already? Love it! 


Friday, November 3, 2023

Bramble Blooms QAL--The Applique Centerpiece

Are you ready for the next BBI QAL prompt? It's pretty much what you'd expect: Add simple floral applique to your centerpiece background. That's it. Easy peasy! There are a couple options here. No doubt there are patterns at home you can browse through to borrow applique elements for this exercise. Or, you can do something much more fun and interesting. Learn how to implement it in a freehand, free-spirited way! Whatever you do, try to keep the final applique relatively uncomplicated so as to not spend unnecessary hours attempting to get the pieces sewn down. We want this stage to be finished up in approximately a month or so--six weeks if the holidays interfere too much. 

Also, keep in mind that this is the first element being adding for the purposes of series work. Make sure it's something you might be interested in expanding on, repeating, or playing with in a slight revision. I am assuming you have, at the very least, a rudimentary knowledge in basic applique skills or are interested in pursuing the details on your own.

If you think that I'm being a bit bossy about the applique having to be 'floral', let me explain. This is not a 'mystery' QAL per se, it's much more of a nudge toward getting comfortable with improvised quilt-making. By narrowing the choices, it's serving to provide gentle guiderails for the less experienced. Trying something new and out of our comfort zone can be a bit terrifying. Our mind often reacts with stress and/or complete overwhelm. When I suggest make something with a 'floral' look, then it immediately eliminates literally thousands of ideas you don't even have to contemplate anymore.

Neglecting to give you the blueprint for this quilt isn't me being difficult. This is me helping you learn how to be open to the process of figuring out what might come next--after this phase is totally finished up. Then you can more readily {and organically} react to what came before. I don't want to enable anyone to plan too far in advance! Also, floral applique is a rather lovely way to find that cozy, comfy feel so many of us seem to admire and aspire to. Lets get to it, shall we?

Example of some of my applique doodles
The definition of Improvisation {Improv.} according to Wiki: The activity of making do or doing something not planned beforehand; using whatever can be found. 

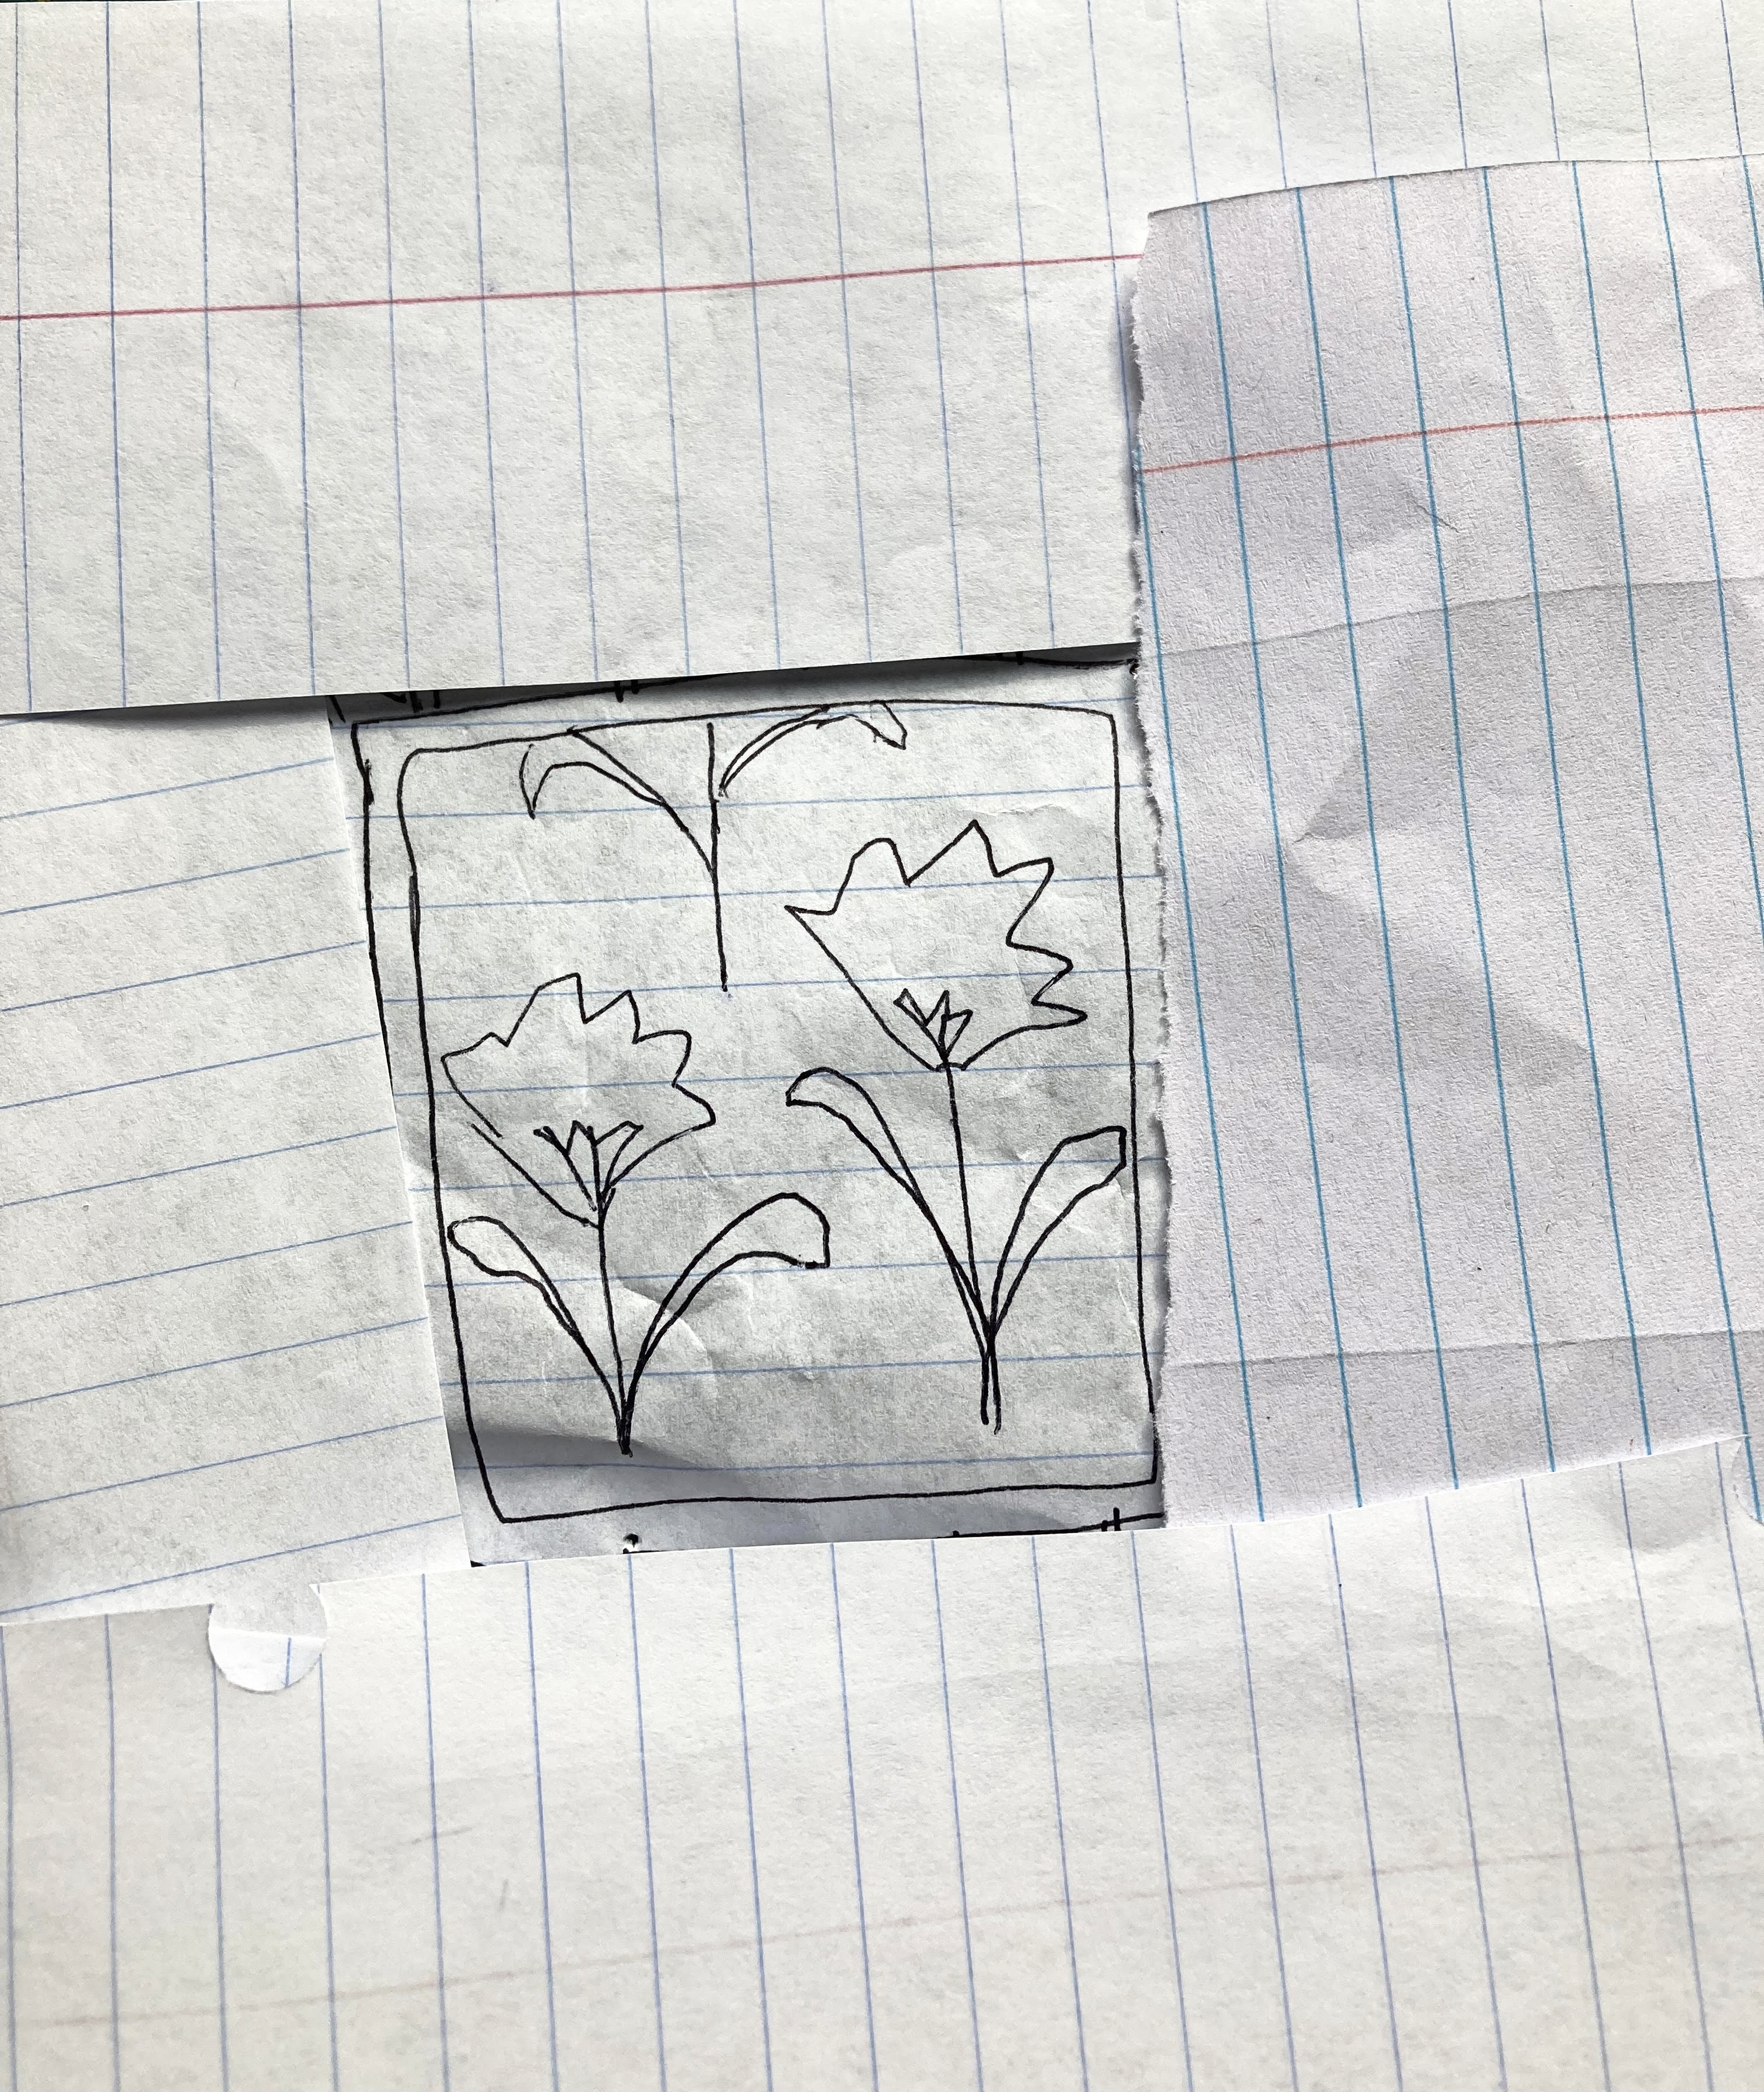
So... Freehand Applique? Any takers? I'll walk you through the steps of how this happens over here at Quilty Folk. Often, the very first thing I do is get out a notebook and start doodling. No, I'm not a trained artist. However, there is something really fascinating about the way the brain communicates with our hands. It's important to trust this instinctive thing that helps give us a visual to our thoughts. With barely any practice, you'll be able to draw up wispy little doodles of the ideas and elements percolating in your very own head. After making this a regular habit, you'll be able to do this quite unforced. 

You're the only one who thinks like YOU do, so it makes sense that these drawings will most reflect that--no matter how naive or primitive they might initially appear. If you're having trouble conjuring up ideas, maybe browse through quilt books, quilt magazines or even Pinterest. I personally find antique quilts to be some of the very best inspiration!
This is the one that gets to shine this time
Choose out the favorite drawing to turn into a quilt or perhaps a portion of a quilt--in this instance the center of a medallion quilt. Now it's time to somehow make these little doodle shapes become the right size and proportion needed! It's not nearly as difficult or scary as you might think.

Free Cutting Applique Shapes: At times, it's easiest to pick up a pair of scissors and just start free cutting. Use scissors and do that mind/hand thing just like you did with the doodling. Uh huh. You'll be surprised at some of the results, especially if the intended outcome is a simplistic shape. I have massacred many a stack of fabric scraps in pursuit of the perfect leaf, berry or flower! And it's easier than you think once you get the hang of it. 

Free cut leaves can be cut straight from random widths/lengths of rectangular sized scraps and berries are super easy to cut from rough cut squares. No, they won't be exactly identical to other elements in the quilt, but the shape will be similar and the human touch will definitely shine through. Flowers are a bit more complicated, but with practice comes a lot of interest and personality. Don't practice on your 'good' fabric unless you have a lot of it and don't particularly care about waste. And don't be surprised when your scrap bin leaves end up finding a place in your quilt after all. They can be fairly charming at times!
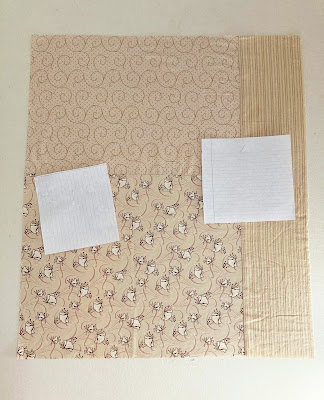

Trying to figure out proportion
Making Paper Applique Templates: The other method that I use quite a lot is to cut paper templates first--before cutting and/or wasting good fabrics. Can you tell that my frugal side takes over sometimes? Referring to your doodle picture, {I'm using notebook paper primarily as it's cheap and the lines can be helpful}, draw each individual shape over and over until you get something decent. Surprisingly, this CAN happen as you're only copying at this point. I promise it gets easier and easier with practice, and eventually you'll get to the point of only having to draw a shape one to three times before getting it right!

If it's a tricky shape {or a larger size} and you're worried about proper proportion, here's a good tip. Cut out paper squares, rectangles etc. in the approximate, intended size and place them onto the made background fabric. Step back from your design wall or floor and take a look. Keep going until you think the proportions are within the desired range, then try drawing the wanted {planned} shape onto those same papers. You're still copying a pre-determined shape, but now you have a box to keep it inside of. Sometimes that feels helpful and other times can be annoying. You'll want to take the papers off of the background of course, before drawing. For very large sizes, I've used everything from freezer paper, butcher paper, light weight cardboard and even the back of gridded Christmas paper! 
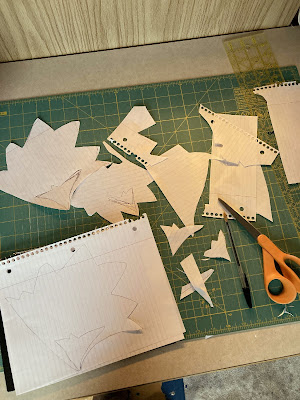
Drawing, cutting and more drawing
When there is finally a shape that seems satisfactory, go ahead and cut it out in paper shape. Don't worry about seam allowances at this point! Also, remember that this shape doesn't have to be identical to the one in your doodle. In repeated drawings, your hand/mind connection will make constant little adjustments and revisions to make it ever more pleasing to your discriminating eye.

 Place all the shapes onto the background fabric in as close to the right spot as possible. Move shapes side to side and up and down until everything looks fine. Be sure to step back and look at it with some distance too. Sometimes there will be a small adjustment needed that's not immediately obvious when looking at close range.
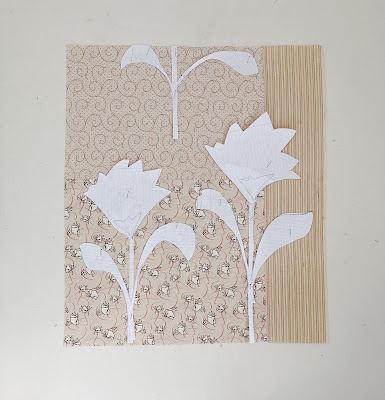
The paper template audition
If certain shapes are bothering you {for whatever reason} then it might be necessary to make small tweaks to them. Use your scissors judiciously at this point. Sometimes it's better to keep a shape that almost works than permanently ruin any hope of ever achieving it again! If something needs to be made a little bit larger or smaller, then washi tape might be your friend. Extra paper can be added behind to stretch a design, careful folds can be introduced, another triangle can be taped into just the right place.... Play until you can relax and smile or take a break and come back later with fresh eyes.
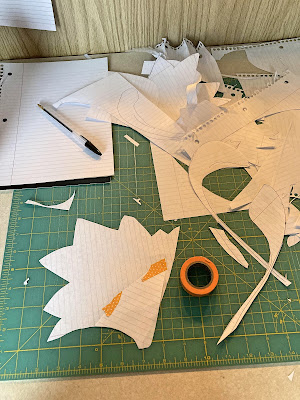
Making adjustments to paper templates
Choosing fabric for applique: Probably want to get your fabric choices sorted first. For a centerpiece in a medallion style quilt, look for slightly bolder, darker, brighter or perhaps lighter fabric blendings than might be used in the rest of the quilt. Doesn't have to be more than a degree or two, but you want these applique elements to 'pop'. You want them to matter. Using all medium value prints just won't pull off enough of a look-at-me vibe here in this spot! Look through your fabric stack and deliberately use value changes to your advantage. Might be a good idea to dig deeper in the stash if there seems to be any lack. 

Occasionally a fabric will seem to be way too obnoxious to be added into a marinating stack of fabric, but will work really, really well here. I often lay fabric options right over the top of those paper shapes still resting against the background fabric. You can kind of scrunch the fabrics around or fold them into smaller pieces to get an idea of how they might look in the proportionate size.

I much prefer the scrappy look for applique. Lots of different fabric use for leaves and flowers especially as I love the subtlety of 'similar but different' and the opportunity for highlighting minor value changes. It can effortlessly add lots of spark, energy and soul to a quilt by mixing things up. In this case I used three different fabrics for the stems. If the quilt seems to need specific areas of calm, then try a single-fabric use for all the stems or whichever element needs to be more in the background.

The method for which you intend to apply your applique might determine the fabric you choose for applique too. Many people will recommend using Batik fabrics as they are very resistant to fraying. Ughh. They are horrible to hand sew. Don't use painted on fabrics either unless you are applying your applique by machine. Soft, supple fabrics, upcycled fabrics, wovens--all of these will feel and handle ridiculously better if sewing by hand, and the time spent stitching will be cut in half.

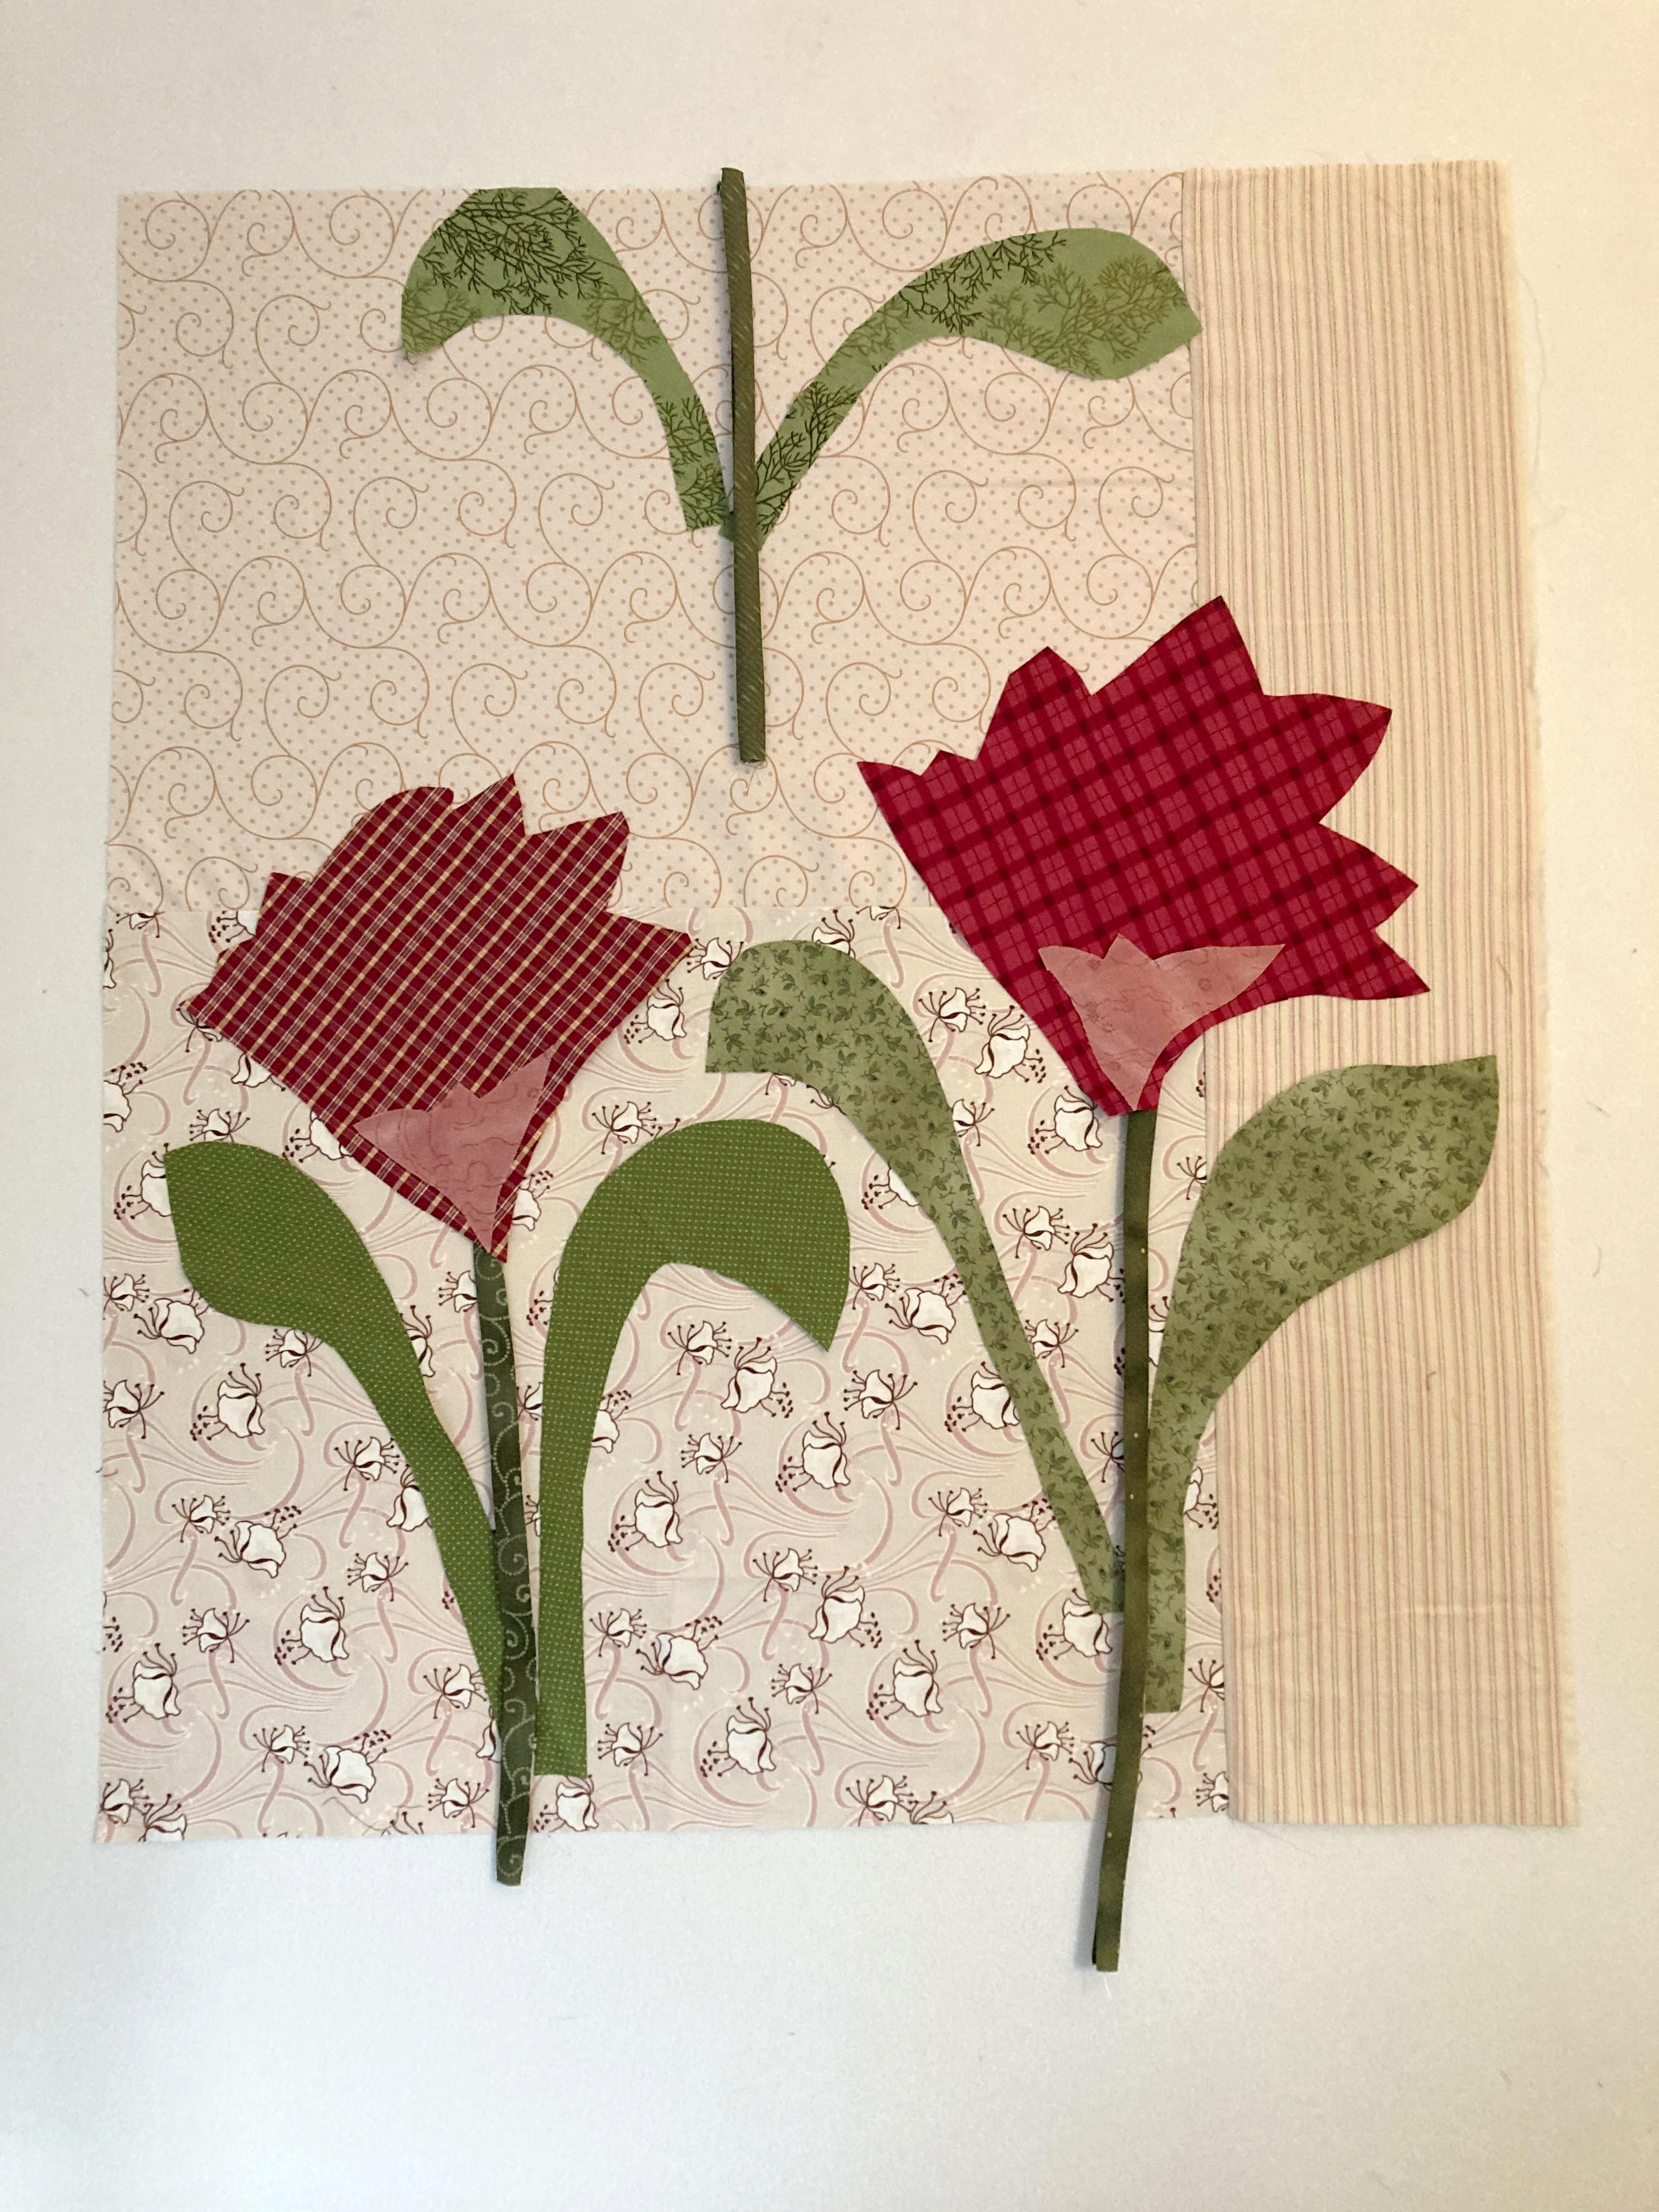
In the picture below, you can see my first choice fabrics cut out in the designated applique shapes and sort of thrown onto the background fabric. All of these are cut out with a seam allowance included, so of course after sewing, they will shrink slightly in appearance.
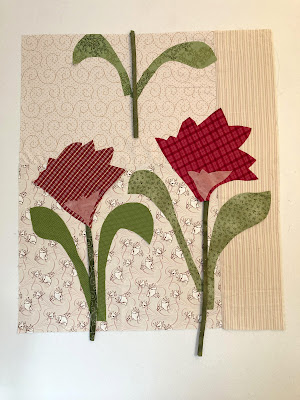
Getting the shapes cut out into fabric
Three common methods to transfer paper shapes onto fabric:
Draw your paper shapes directly onto the backside of the chosen fabric {ball point pen is perfectly fine} and cut out, adding a scant quarter inch extra for seam allowance. Remember to use the reverse side of the template when marking the template lines so the applique shape will present the right way!

Another common way to transfer the template is to draw the paper cut-out shape onto the top of freezer paper {dull side}. Cut freezer paper out exactly at the marked lines and then iron over the top of the appropriate fabric. Don't slide the iron back and forth, but try to cover the shape with the iron and hold still for a moment. Pick up and move the iron again if needed. When the freezer paper is sticking to the fabric, then you can cut out your fabric shapes, once again adding the scant quarter inch extra for seam allowance. Gently peal off the freezer paper and use over and over again, if necessary.

The third way to transfer a paper template, is to draw the paper shapes directly onto what's called 'template plastic ' sold in sheets at JoAnn Fabrics etc. Carefully cut out your new, more long-lasting templates and proceed the same as with the paper templates.
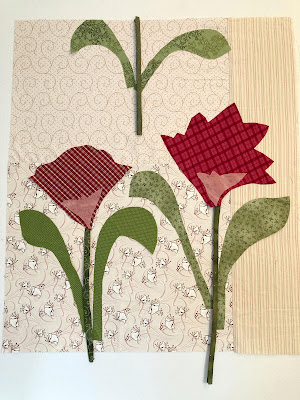
Option of smoothing the look of applique
You can simplify applique shapes: Occasionally you will find that an applique template is just the right size and proportion, but maybe a little too complicated for your skill level. Or maybe it's going too take up time spent sewing that you're not wanting to commit to at the moment. Perhaps you want a naive, prim look. It's easy enough to smooth out the sharp, trickier edges with a pair of scissors, either directly on the paper template or the cut-out fabric shape itself. This goes for applique templates you've borrowed from other patterns, or even ones you've made yourself. There is no shame in simplifying the look of any applique design. In fact, altering templates in this way can serve to heighten a cozy vibe or quickly personalize a look.

Fine tuning the applique representation before sewing: In the picture below, I still haven't positioned or pinned things in the exact spot for sewing. Before doing that, I often take a deeper look. Is it doing what I want or need it to do? Matching up to what I had envisioned in my head?  Here, I was questioning the look of that first flower stem fabric, which I still didn't like. You probably didn't notice, but this is my 2nd choice fabric. Sometimes you have to actually see it cut out in the true size, then place it in the intended spot, before you say 'meh!. That won't work either.'*sigh  In this case, I went back to the first choice and called it good.
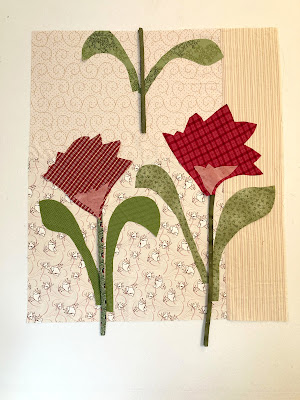
Looking at a stem in different fabric
Making Simple Straight Grain Stems: My basic rule of thumb for making straight grain stems is to cut out the intended width x 2, plus a quarter inch extra. These particular stems ended up being cut out at 1 1/4" x whatever length was needed. Each long, rectangular fabric unit is then folded in half with wrong sides together. Sew those wrong sides together with a very scant seam {move your needle over if possible}. Next, iron the thin tubes of fabric flat, making sure the seam ends up in the middle of the back side. 

You can skip this step and cut out stems with seam allowance only {like how you sew flower shapes etc.}. The trouble is, inevitably, long straight applique pieces want to ripple and warple even with good pinning. Sewing a tube of fabric helps stabilize things and give off a sharper appearance. I will endeavor to explain a simple method for making bias stems at a later date.
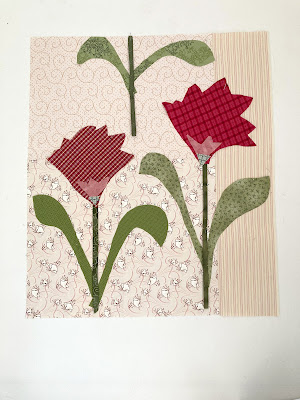
Figuring out how add another color
Letting your intuition do its thing: Improv. works best when you pay attention to the little niggle of feeling that says 'You know, this could probably look a lot better'. It's not usually some majorly complicated thing. Many times, in fact, it's a relatively easy fix that involves more of something or less of something. Perhaps one of the elements simply wants for a slight value change or hmmm.. a completely different color or print of fabric used altogether? Tiny adjustments can have a big impact. Play a little but don't ever think you have to start completely from scratch. If you're willing to cut up a little bit of fabric, do a little 'trial and error', you'll no doubt find the answer.

As to my centerpiece, a bit of contemplation helped me understand that the overall look was clearly too bland. It needed a spark to lift the look. Rifling through my fabric stack didn't conjure up anything exciting, and so back to the stash totes I went for inspiration. Finally, I pulled out this much lighter, kind of blue-ish green fabric that didn't feel specially complementary to the original fabric pull. Funny how it seems to work fabulously in this setting though! In the picture above, you can see where I cut out little triangles and tried placing them at the base of each flower. Hmmm... that's better, but still not quite right. What else could I do?
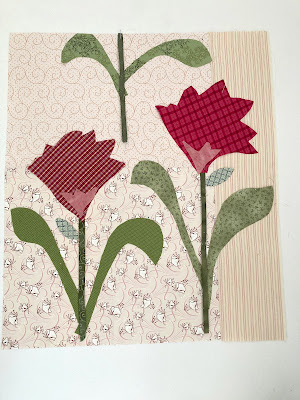
Finally getting the look I want

I left the composition up on the wall and ignored it for the evening. Much, much later in the night, the thought casually popped into my head that many natural flowers have little, barely-there leaves up near the base of a flower. Replicating that look could hopefully {fingers crossed} make a little, much needed sort of magic start happening. Just a miniscule addition and now the whole thing resonates incredibly better. 
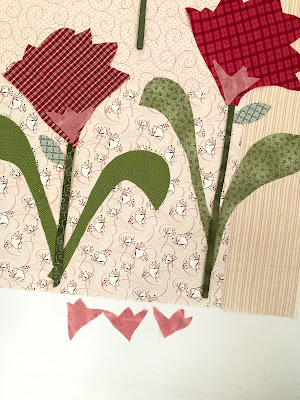
Playing with minute changes to an applique element
Another thing you might have noticed that I tinkered with, was the pink motif at the base of the flowers. I kept cutting out slightly different, but similar shapes until finding the ones that had the just the right energy. One of the shapes was basically the same size/shape, only in reverse! Such a simple thing, but it helps to keep playing until a quilt says 'enough'! And there is definitely a time to stop and move on. No sense in driving yourself crazy!

When everything looks just right color-wise and design-wise, then it's time to position the applique exactly where it needs sewing. Pin in place and stitch the bottom layer first, then the next layer, and so on till it's all finished. 
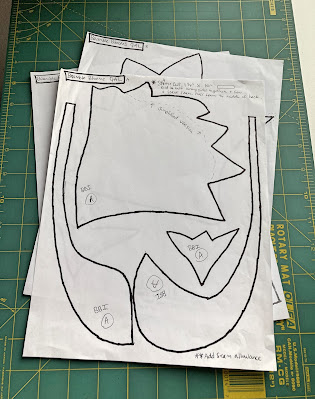
BBI templates all ready to go
Feel free to apply the applique to your quilt in any manner you like, be it hand sewing or machine sewing. I use a form of needle-turn applique as I love the slight imperfections that seem to organically happen, but you do you. Lots of good tutorials and options floating around on the Internet these days. Also, I have the templates converted to pdf's for anyone who doesn't have the time or energies to dive into Freehand Applique right at the moment. Please request these in my email at audkateaster at gmail dot com, NOT in the comment section. This QAL is generally free to all, but I respectfully ask that you consider dropping a couple dollars in the tip jar if you are specifically wanting the pdf's. Hopefully this will be set up by next week if my un-techy self can figure things out!

Yes, it's a rather lengthy post about the process of Improv. when it comes to applique play. It's kind of my passion! Such a wonderful way to add lots of personalization and the also the charming benefits of the human touch to our makes. You did want to know how to do things the 'Quilty Folk' way, right? 

Next up {after some normal quilty posts}, will be another prompt in the QAL. Which incidentally, is the first border to our medallion design. For those just joining up, please send an email when you have posted your start to this QAL. That email is the only way I will add you to the link list of participants. If you're not especially interested in being included in the link list, but want to follow along with the QAL regardless, that's perfectly fine too. I get it! Stepping outside of our comfort zone and sharing our work at the same time can probably feel somewhat brutal. Ughh  Don't know how many times I've winced when pressing the 'publish' button. As per usual, sometimes I'll need a couple days to respond. 

**There are still comments on posts where I am unable to link back to the person or specific blog. Sharon from Pflugerville and Chel Smith from Texas--Sorry, I don't have a way to contact either of you. Please email if you want to join the link list. Sorry, don't have a clue how to make the commenting easier for everyone without opening the blog up to mountains of spam. 

Thursday, October 26, 2023

Getting Started with the Bramble Blooms QAL!

Welcome to the Bramble Blooms QAL! Right from the start, I want everyone to know that this is an informal quilt-a-long, meaning there will be no hard dates for posting from phase to phase. It could take anywhere from a year, to possibly a year and a half to complete. If that drives you crazy, then maybe rethink joining up! Beyond any other measure, this will be a process based QAL, as that is where I believe creative quilting truly grows and flourishes.

Not sure who wrote this, but it says everything!
Everyone is welcome to play along, beginners, intermediate and experienced quilters alike. For those who have more practice in the improv. approach to quilting, feel free to skip through the wordy babbling and get straight to the heart of the matter! 

THINGS TO KNOW:
  • This is a structured, yet unquestionably, Improv. style QAL with the intention of using older, languishing fabrics from the stash.
  • It will be presented in the form of series work with emphasis on process--three quilts being the ultimate goal. Why three quilts? Engages the curiosity, plants seeds of creativity and makes it easier to see the results of playing off of similarities and differences as each successive quilt takes shape.
  • Every quilt will involve some sort of applique, piecing, medallion quilt layout, and an intuitive approach to decision making. Traditional or improv. piecing are both acceptable. 
  • Your quilts will have the ability to look almost exactly like mine, but also the potential to look much more like a YOU quilt if so desired.
  • Expected quilt size is intended to be in the range of a throw quilt. Small or large? We'll see, but that's ultimately going to be your choice based on decisions made along the way.
  • There will be a Bramble Blooms page at the top of the blog linking to all relevant QAL posts in the event you fall behind or need more time for ideas to marinate.
  • There will hopefully be a link party at or near the finale of each quilt top {3 total}.
  • There will be a Bramble Blooms {QAL participants} 'link list' at the sidebar here at Quilty Folk. The focus of this entire exercise should be the personal journey and not a competition for 'best of'. Visit who/what strikes a chord and don't feel compelled to visit everyone in an endless loop. Due to the lengthy nature of this QAL, it seems best to support and inspire without excess obligation involved.
  • Above all, my hope is to practice mindfulness, make space for personal voice and let go of pre-determined outcome wherever possible {bearing in mind the predetermined medallion quilt layout}.
  • This project is absolutely free though I intend to set up a tip jar for the pdf's that will be shared throughout the QAL. I get that some of you might not want to dive into the deep end of making your own applique templates and that's totally fine. Hoping I can inspire a few of you to try though!
The fabric stacks for three quilts in the series
 GATHER FABRIC STACKS FROM OLDER STASH FABRIC:
If you'd like to try for the goal of three quilts in the series, dig through your stash and gather together three fabric stacks that are similar to each other in color palette. They don't have to be similar in color to my fabric stacks at all, feel free to do your own thing! If you'd like to begin with a fabric stack for one quilt rather than three, that works too. Just don't have such a large fabric stack that you get easily overwhelmed. Don't worry about how much yardage per stack, this is mostly just a starting place. We can always search for more later! For those interested, these stacks are made up of primarily whole and partial fat quarters, third of a yard cuts and random larger pieces of yardage. Very, very few pieces of larger cut fabrics, which yes, sometimes becomes problematic in the outer borders of a quilt top. We'll cross that bridge when we get to it!

Try to focus on the color palette as a whole {per fabric stack} and don't worry about how uninspiring individual fabrics might be. With older, stale dated fabrics, it really helps to zero in on how the fabric colors work together rather than how boring it might feel. Make sure there is a good range of light, dark, medium and bright fabric in each stack as this will provide the needed spark to help make things work well overall. Be sure to have a good mixture of fabric prints as well, really don't want all polka dots or whatever your fave is. And try not to have stacks of truly hideous stuff! Do throw in a newer fat quarter or two to make it more palatable as needed.

This is the fabric stack for Bramble Blooms I
IT'S ALL ABOUT THE PROCESS:
I've found that series work is an excellent way to use up oldy moldy fabrics because inevitably, the structure encourages focus on the elements at play, rather than the fabric itself. There is a momentum that naturally happens as we meet each particular quilt challenge, greatly helping to kick in our curiosity as we move along. We start out with a basic, almost going-through-the-motions sort of quilt idea for quilt #1. Then, if we follow small moments of interest, usually something a bit more interesting and personal begins to come into being as we gain confidence in trying to implement our ideas. 

Pairing series work with using up long neglected fabric also helps takes the initial pressure off of us to try and make something impressive. How many times do we start with the assumption that our project needs to be 'worthwhile' for the amount of money that we've hitherto invested? This distraction, if you will, lets us focus in on color or value for purposes of design rather than how dull a fabric might be. It increases our odds of being willing to take risks and gives permission to cut things up willy nilly or perhaps 'waste fabric'? meh! Who cares! It wasn't being used anyway!

I encourage everyone to dig deep, try extra hard to MAKE-DO and always be open to surprising possibilities for the older fabrics. No doubt there's something lovely and comforting about a few of these pieces that inspired us to buy them so long ago in the first place? That being said, please feel free to go buy something brand new later on if your quilt is adamantly insisting on something special in regards to color or fabric print. If you need to. No judging or shaming here!

GETTING STARTED WITH THE FIRST QUILT IN THE SERIES {BBI}:
First off, you'll need to prepare a background for the centerpiece of the first Bramble Blooms quilt. Grab the first fabric stack and tuck the other two away. This will be the foundation for your first quilt in the series--your base and your color story. In regards to color for a background, I'm going with a fairly reliable {old-faithful}, kind of a pinkish, cream color. You can start with whatever color strikes your fancy, doesn't have to be traditional at all. Cut out something in one piece of yardage, or perhaps piece together some smaller pieces like what is pictured below. Whatever you do, don't sew it out of four identical sized pieces of fabric! An odd number of fabrics generally works much, much better in this instance.
These odd, not so blendy fabrics make
for a decent looking background
This centerpiece can be whatever size you want to start with. Seriously. There are absolutely no 'have-to' measurements it needs to be. Simply ensure that it is something that looks and feels right to you. Think about how large of a quilt you might end up with if you start very large, or perhaps how very small it might end up if you begin in the miniature.  I recommend something around 20-25". After sewing, my centerpiece {below} measures at 22 1/2" x 26". See how I did that? Already breaking the rules!*wink  Do you want to end up with a square or a rectangle shaped quilt? Much easier to make that choice right now than try to fix something later on, though of course it can be done.

It's okay for there to be a slight value change 
in your choices. Gives instant depth to your quilt!
If you're very new to this approach to quilt-making, it might feel a bit fake-ish to purposely cut and sew together for a make-do background like shown above. I remember that feeling so many years ago, of thinking that I was trying a little too hard. In this case I honestly didn't have to expend much effort at all. One fabric was used 'as is', another made it easy to take advantage of the skinny remains, and the other fabric simply made up the difference needed to get to a good measurement. {Part of the bottom fabric was tucked under while I was auditioning the look.} The thing to remember is that 'make-do' is oftentimes a great start for a quilt purposefully built around limitations. Don't overthink it.

If this feels a little too open ended, this might not be quite the right QAL for you. I'm trying something a little different with this invite, and it probably makes some of you want to break out in hives! However, if you're looking to join me for a journey of creative play and doing things the Quilty Folk way? That's the way this entire QAL is going to be, a little loosey-goosey as to measurements etc. Might as well start out the way we're going to keep going! 

There are almost definitely going to be times in this particular QAL when you will run out of a certain fabric and have to make substitutions. Why do you think I start with a fabric stack and not exact yardage? Hmm? Self imposed limitations can make for very interesting quilts! Why not start now with a good strong vibe committing to the art of making do

Next up will be a post about free-style applique. {Probably in a couple days to a week from now.} You had to know what this centerpiece was for! After your first post showing off your fabric stacks or centerpiece background, let me know so I can add your name to the Bramble Blooms QAL participants Link List. It looks like I can link to Instagram accounts too, so doesn't have to be a blog. My email is audkateaster at gmail dot com. Always give me several days to respond as life gets pretty busy around here.