There is so little time to write posts these days! When and where that I do find the time, it ends up being ridiculously long and I have to keep coming back to proofread and/or add stuff that I've forgotten. Don't really love this cycle, but at least I haven't totally quit! Here is the latest quilt finish, 'Seedpod Flower'. It was started back in 2019 when I had that yellow/gold circle cut out from behind another quilt motif.
 |
| All the crumpled goodness! |
You know how it goes around here. That mixed print circle sat on my design wall for days, tempting me with interesting ideas for a brand new quilt start! One evening it starting clicking, all from a piece of fabric I saw that had an interesting flower in the print design. Anxiously awaiting the morning and a more courteous time to get into my quilt room only intensified the desire to see where this idea would go!
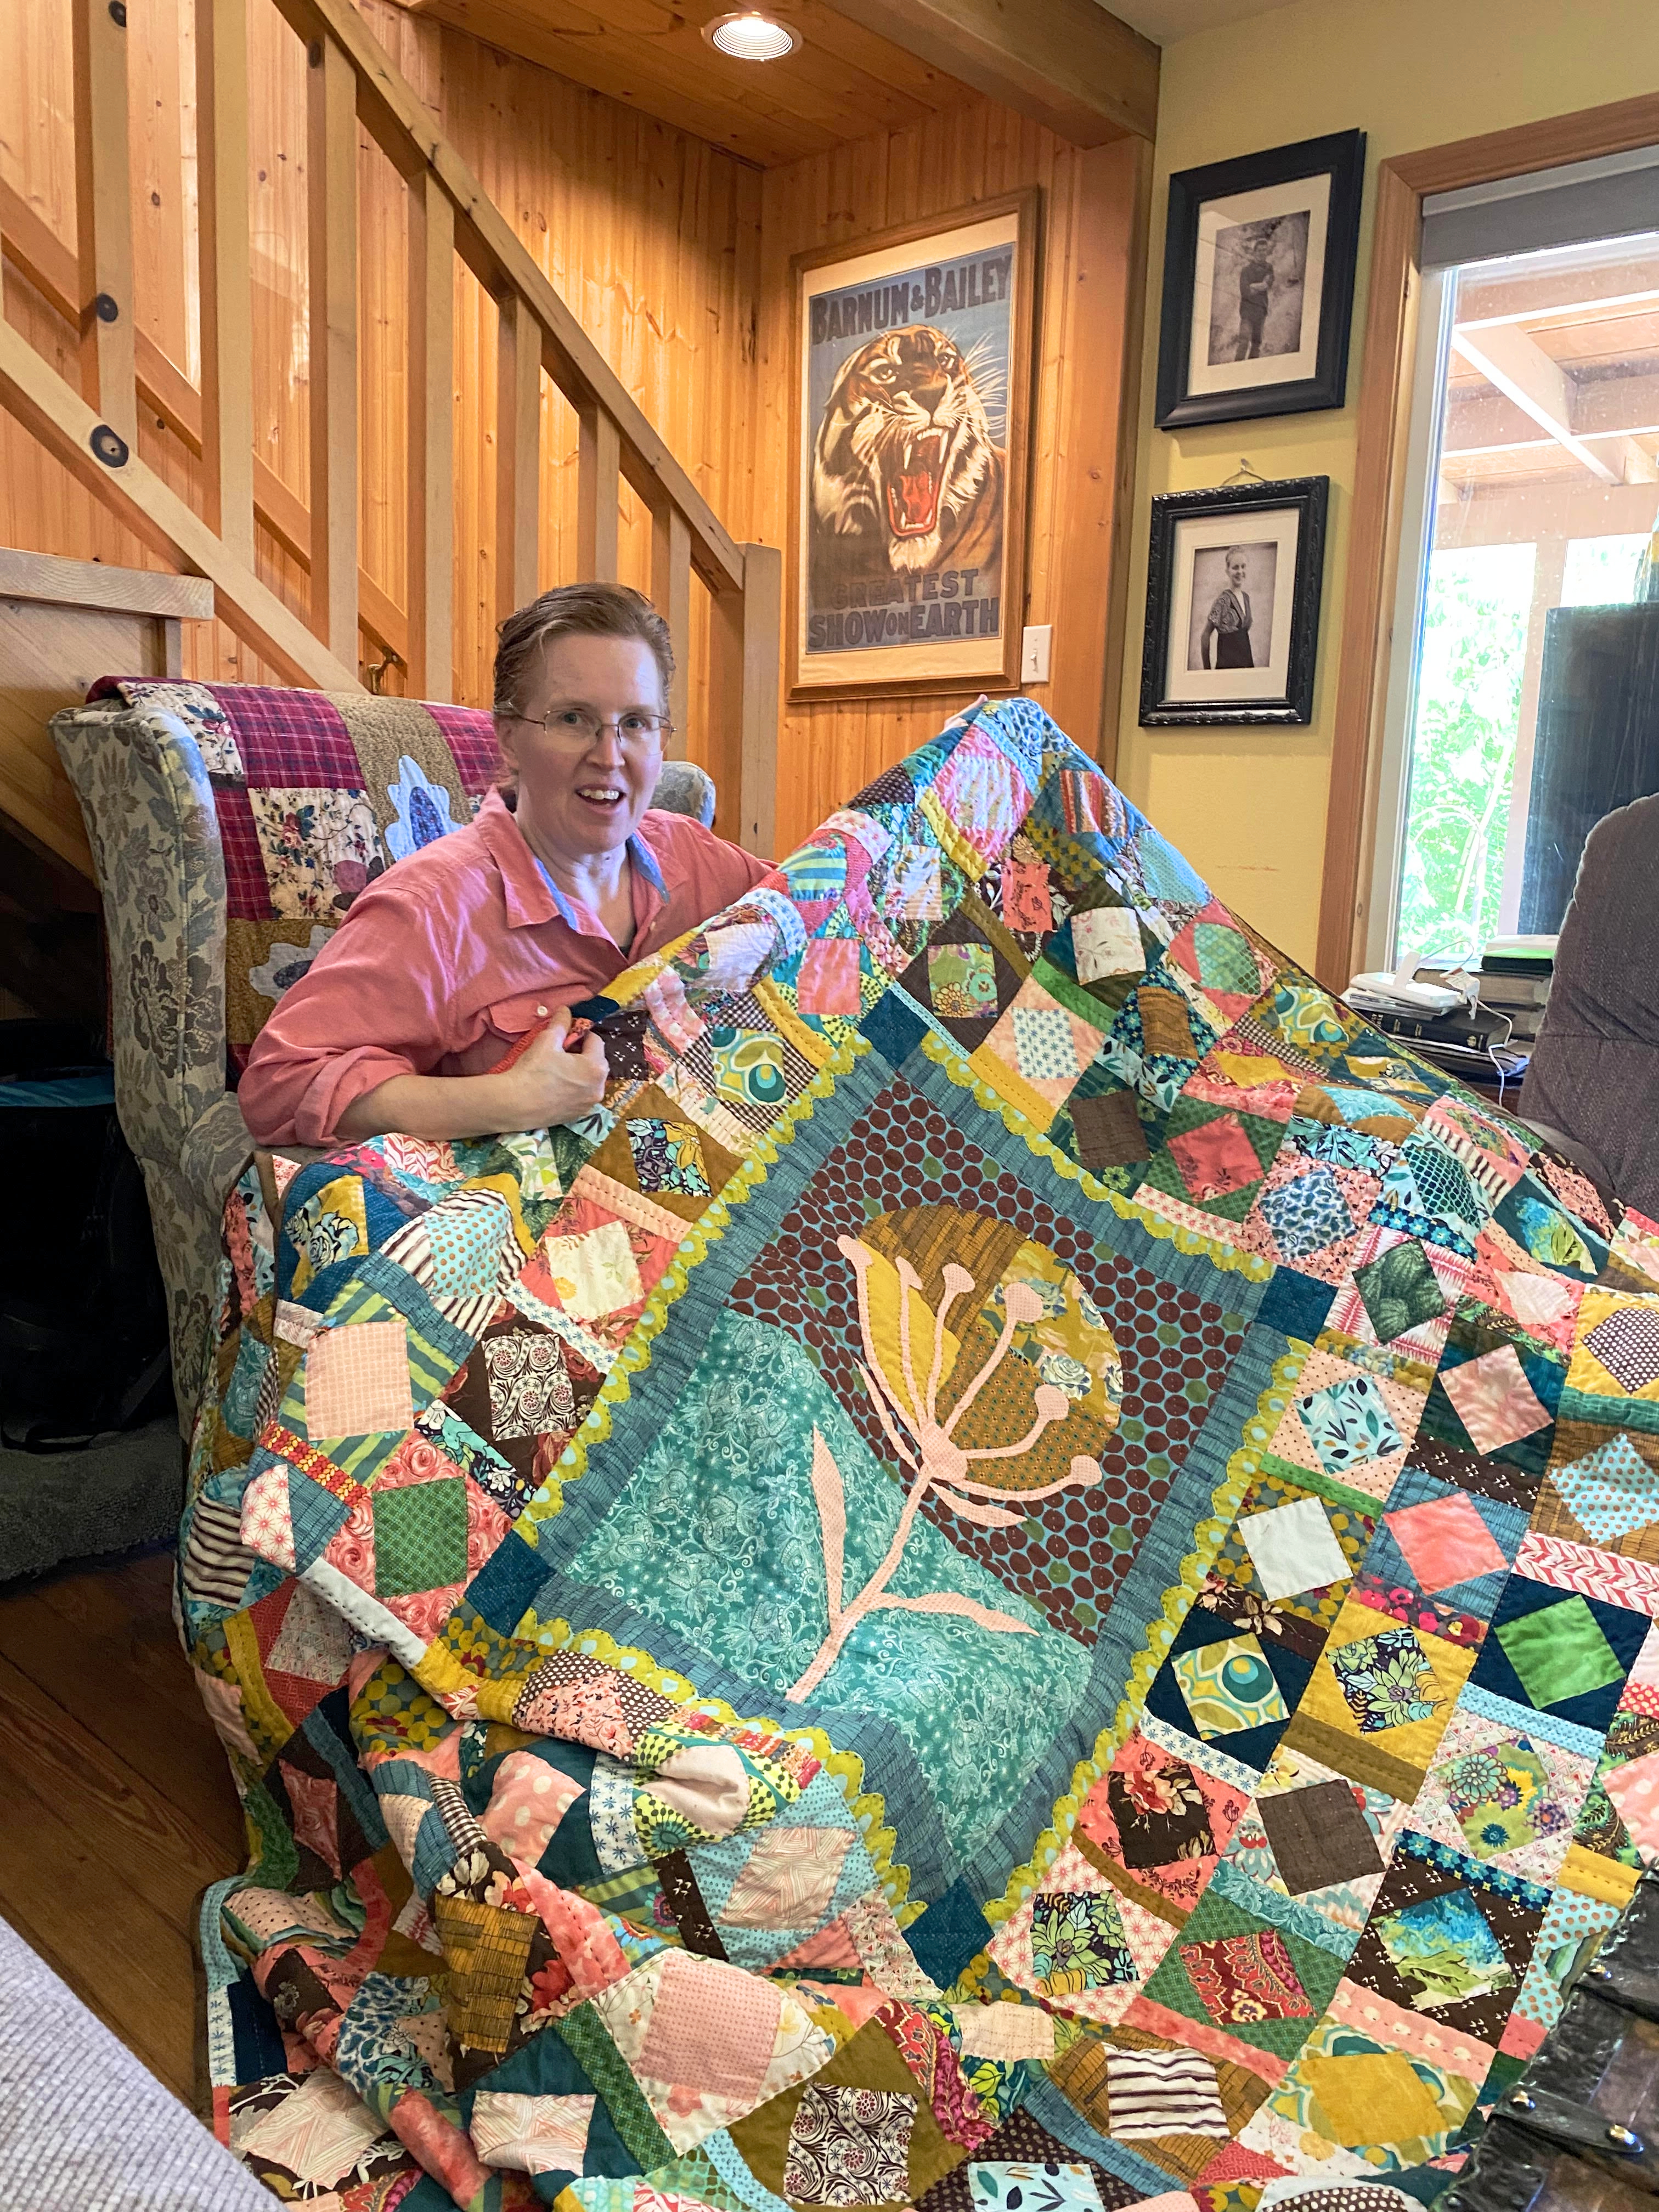
 |
| Seedpod Flower quilt |
Once morning arrived and my son had vacated his upstairs bedroom, I was able to head into the quilt room. With the cutout circle as the starting point, I was able to rough draw the Seedpod flower onto paper and essentially set up the 'center' of the quilt. After a bit of thought, I decided to grab an already marinating stack of fabric from the countertops {something that went really well with the gold circle} and dive right in. It was an easy enough jump {after sewing that specific part} to decide that maybe it was time to try and recreate a lovely utility
quilt from Pinterest. You know, to make up the rest of the quilt! There was just something about the carefree layout and simplicity of that particular quilt that called to me. Also, it looked like it had excellent potential to nicely frame and showcase the seedpod flower. Win, win.
 |
| Looking across |
Mine doesn't have quite as much energy and fluidity as the original, but I am charmed by the structure and the blend where the colors tie back into each other. Believe it or not, figuring this part of the quilt out was by far the most stressful part of the entire Seedpod quilt. Measurements! Row perimeters! Total improv. or not! All the little details that have to be figured out if you want a good flow.
 |
| Probably could have used some thicker strips |
Once I made the determination to make all the economy blocks the same size and only leave the strip widths up to chance and improv., then it really starting moving forward. Many things that make those older utility quilts shine sort of get lost in translation if you can't find the
key. For this quilt I decided that must be the imperfectly staggered rows? If I could just get that one part right, then the rest would hopefully fall into place.
 |
| Still loving the flower! |
One thing after another till I finally worked my way through the details. Just puzzling it out as usual and crossing my fingers the end result would reflect something that looked interesting. If I remember correctly, the zingy yellow and blue scalloped edge on the centerpiece border was hand sewn on just before putting the entire quilt together. That solid blue border strip just wasn't quite
enough if you know what I mean, but now it looks like it was always meant to be. It's these sort of details that you have to really pay attention to because that wasn't part of any of the original inspiration--the seedpod flower or the old utility quilt picture! Somehow it brings everything together in a positive way though. Can you even imagine the quilt without it?
 |
| All finished up! |
Though I don't get nearly as excited about finishing a quilt these days as I did 20 or more years ago, there is still a
very deep feeling of satisfaction. My daughter caught the look just after I put the final binding stitches in. Yep! Still feeling all the feels 'cuz it never gets old to look at our hand-made creations. This quilt has a very strong, warm, cozy vibe. Wish so much that the pictures would have shown that better!
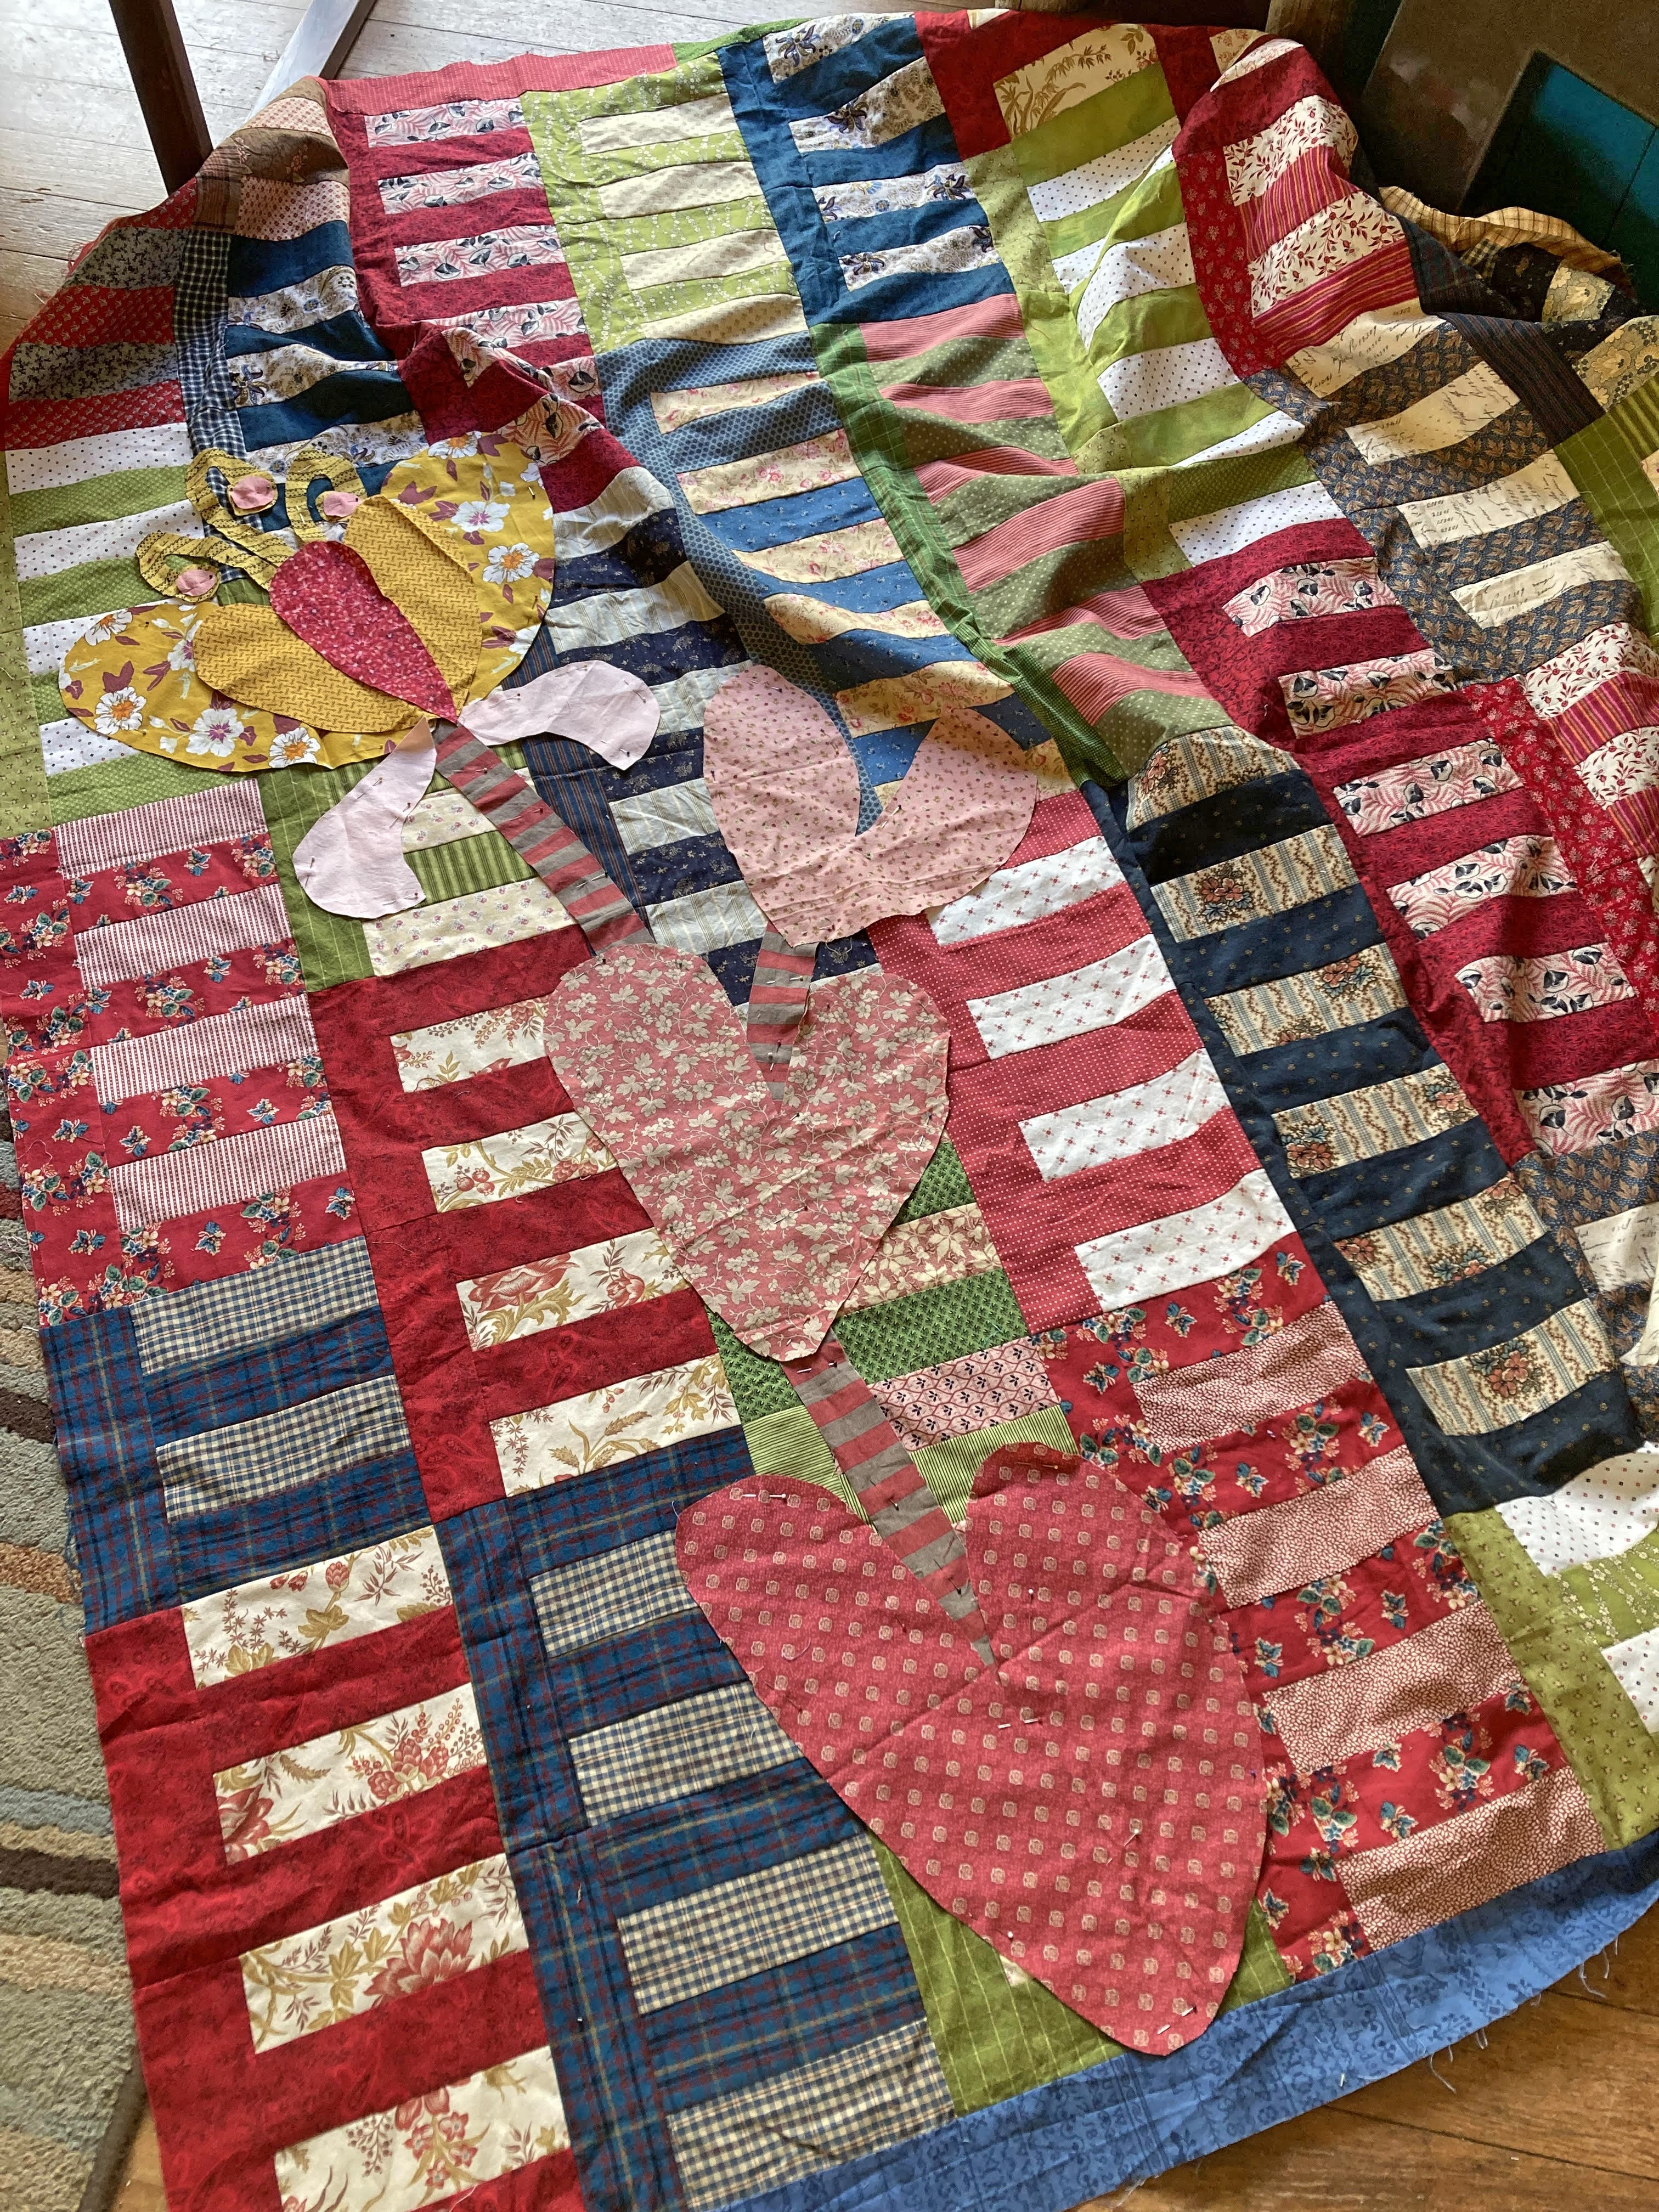
 |
| Improv. Strips--Blue #2 |
Also managed to bring this to quilt top stage, Blue #2! I wasn't 100 percent sure about adding the formal looking flower until it was all stitched down. Why does it have to happen that way occasionally? Now I can see that it definitely lifts the quilt to a better place and if that place happens to be heavily feminine in nature? Oh well. I just can't seem to help myself from doing the flower thing these days.
 |
| Good place for some of that older fabric |
Here's a quick pic of the
HST Medallion quilt finished up last year. I had gifted it to my daughter and her new husband for a wedding present with the stipulation that they let me keep it for another year so it could hang in the regional quilt show. As she ended up with three quilts instead of one {2 older quilts to take immediately in compensation for having to wait}, my daughter was fine with the plan. Then the quilt show didn't happen again this year and cue the dismay. Keep it another year and hope the show eventually gets going again? Yeah. I wasn't feeling good about that after a three year pause. Soooo, I let them take the quilt home after this latest visit. Told them it had to go on the plane in a carry-on, not checked, or
no go. Just don't trust the airlines these days! So sad that I won't ever see it hanging in a show, but I know they are thrilled with getting to use this quilt. This is absolutely a quilt that feels particularly hard to let go. Some are just like that I guess because they are special in some way or another.
 |
| Still amazed by this finish |
We had so many good visits and it was especially fun to let my daughter raid the perle cotton thread for doing a visible mending project. It's amazing how addictive that chunky, colorful thread is! I keep telling her, she needs to get her own stash going! I often wonder how it is that I can even
afford to quilt, but honestly, I'll buy quilting supplies over almost anything else on the list if given half a chance. Thank goodness you can't buy good thread at the grocery store or we'd never have enough food!
 |
| Good times! |
The applique blocks there on the couch beside me are the ones hanging up on the design wall right now. There are nine blocks in all, with five of them currently finished up. I love, love,
love, seeing them on the wall when I step around the corner into my quilt room. Ooh, the mixed print backgrounds just add to the charm and character for me!
These are the 2rd set of cut-out circles that I'm putting into a brand new quilt, part of a series that I'm calling 'The Circle Game'. The first top in the series was completed in
December of last year, called Gold Crossroads. It coincidently had about four cut-out circles from a older quilt top called the
Rising Sun. All those larger circles had been put into the stash totes and I've slowly been whittling away at them for various and assorted quilts. After seeing a brand new stack of large circle cut-aways from behind the Crossroads quilt it made me think. Hmm... What if I keep this circle play going? Uh huh. Gotta take advantage of the fresh inspiration while it lasts!
 |
| Lillabelle--#2 in the Circle Game series |
Okay, that's all for the July catch up. I've been thinking quite a bit about the fact that as of July 19th, I've been doing this quilty blog thing for 12 years now! Woohoo! Obviously my posts have decreased substantially from the years back regularity of three or four times a week.*sigh Just don't have time like before and that's that. Not even gonna apologize for it anymore 'cuz I'm here and that's all that matters!
 |
| My first full sized quilt finish |
In celebration of the 12 years of quilt blogging I've decided to answer a question or two every new post from here until I run out of either the energy or inclination. The questions have been gathered from
here and I have to say that that list is very comprehensive. Definitely not going to answer every one, but I'm game to get started. Hope some of you will be interested in following along!
1. How long have you been making quilts? Would you describe your learning process?I started making a few baby quilts at the end of 1992 or early 1993 so I guess it's been close to 30 years? They were very simply done in the coverlet style with very poofy batting and were made primarily to lay inside a crib. The first full size quilt that I made and finished {pictured above} was completed in 1995. Probably. So hard to remember now! At that time I would reliably check out Marsha McCloskey or Judy Martin quilting books from the Eugene, Oregon library and dream of having the courage to make a beautiful quilt just for me. There were a lot of artsy quilt books there, but I kept gravitating toward the old time, more classic, 'usable' looking quilts. Those two quilters in specific made me think it might be possible to be a 'quilter', so after a couple years of just dreaming, I finally got serious. I can't overstate how hard it was to actually say, 'I'm going to do this regardless of how little I know!'
When I finally found the grit and planned out how to proceed, I went to JoAnn Fabrics for the fabric. Of course! That's all that I could afford! Didn't tell anyone of my family or friends because I was sooo afraid of failure. The fabric buying was extremely stressful 'cuz nothing matched very well. Little did I know that was actually a good thing! Whatever. With only five fabrics needed, I eventually figured something out that I thought I could live with.
I drew paper templates and pinned and then cut all the shapes with scissors. Just like I used to cut out my clothing pattern pieces! Finally ended up with a 'top' and absolutely no idea how to sandwich and quilt the thing. Yeah. It was brutal. And we were fairly poor too. One day I decided to take the comforter from our bed and just attach the quilt top to that. Turned the edges over for a wide, rolled hem and then machine sewed it into place. Then I came back and put in yarn quilt ties about every 10-12 inches or so! Total victory of course because it was FINISHED! This is one quilt that I've never, ever given up, even when one of my kids practically begged me for it. It's been used half to death and I'm still crazy proud of it. Always good to remember where we started and how it was that we committed ourselves to the craft. It would be a few years before I used a rotary cutter and started learning in earnest, but this quilt. Yeah, this quilt!! This is was what did it for me....