Showing posts with label Crazy Daisy. Show all posts

Saturday, January 18, 2025

Starting January With a Couple Finishes!

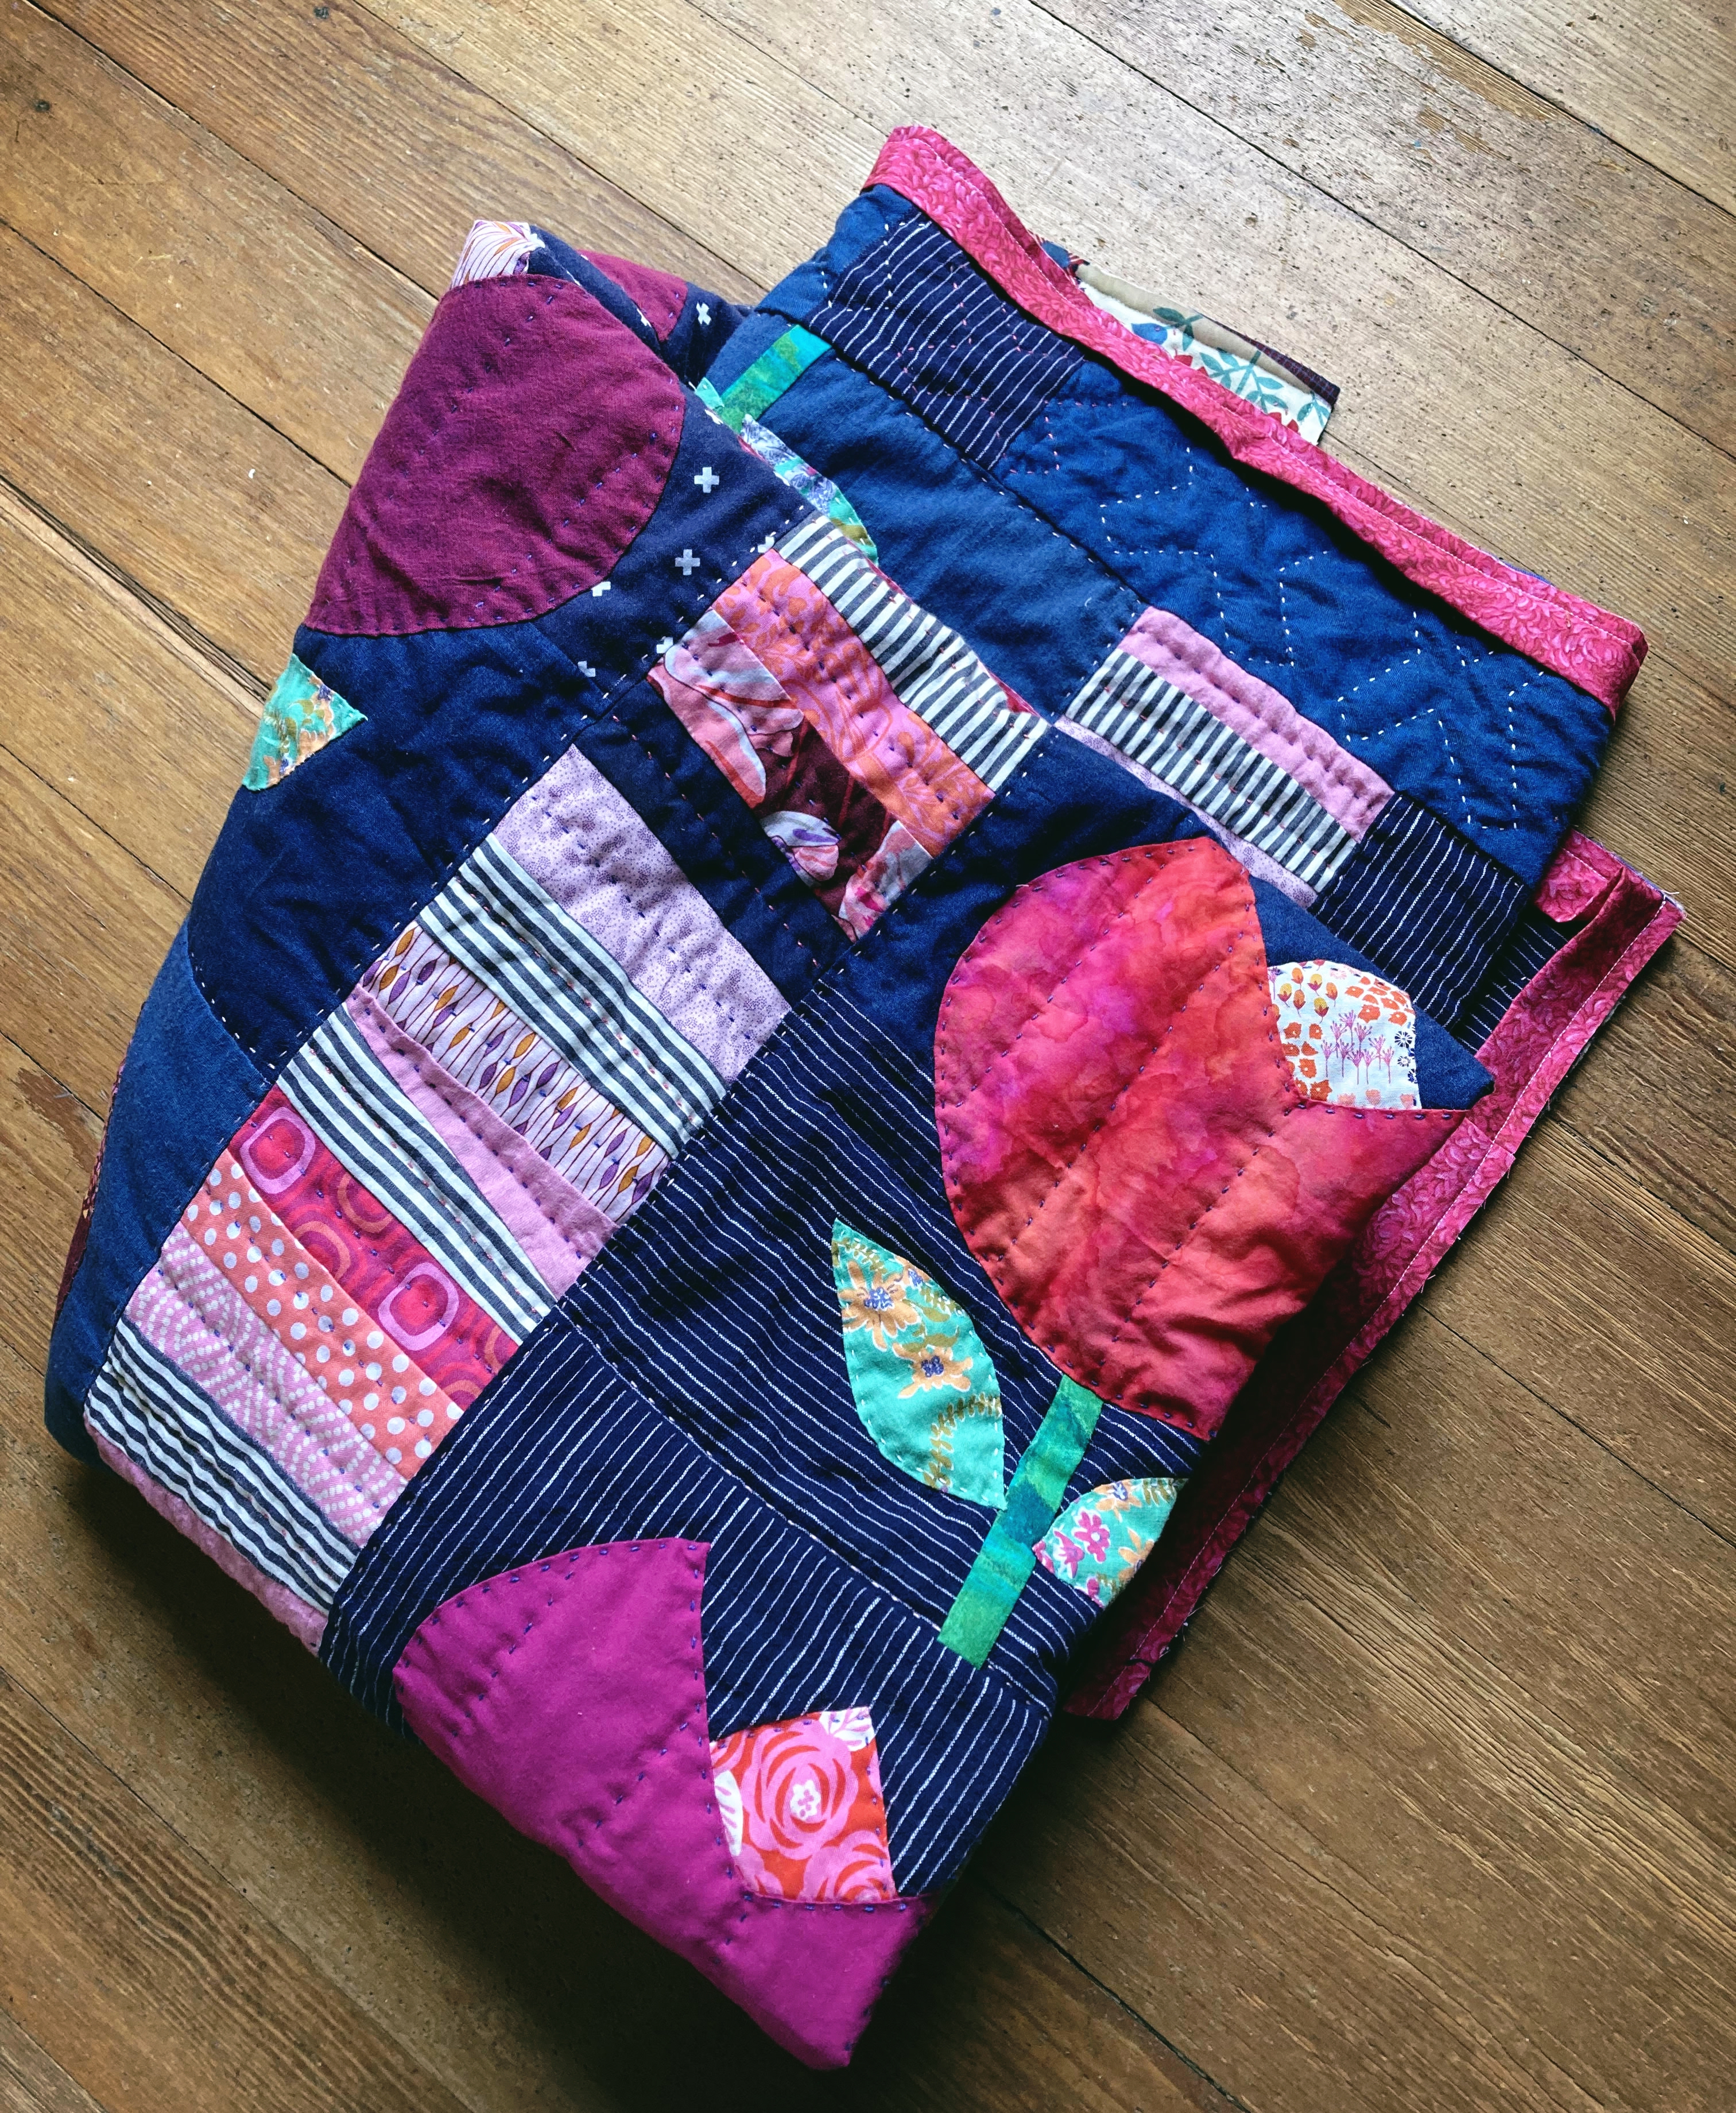
This may be the brightest quilt I've ever made! Whew! It was a doozy to work on. In fact, I didn't even realize how not relaxing it was to hand quilt, until I was more than halfway through. I kept wondering, why am I always putting off picking up my hoop? 

Cannot believe that this is a quilt made
by me. Unreal. So bright you need sunglasses!
I finally weathered through and wowsers! Does it have the sweetest, just washed and dried texture! I hand quilted around a lot of the flowers in the border print and that seemed like a good touch too. 

Very sweet cuddly vibe to it when crumpled
This quilt was started in October of 2020 after a weekend with family at the Oregon coast. I'm pretty sure the blue background fabrics were directly influenced by all the gorgeous coastal blues we experienced. 

Once again, the hand quilting helps
make the quilt look soooo much better!
Though the quilt top has been done since December of 2021, it definitely took me a lot of time to come around to wanting to dive into the hand quilting. And not just because of the loud colors! The only way I could think to hand quilt the blocks was to do echo stitching around the inside of the applique. Ughh. All those layers of fabric. Otherwise it probably would have had to be some sort of crosshatch pattern and that didn't interest me at all for this quilt. 

A little matchy matchy in the setting
triangles and border, but who cares??
Regardless, it turned out to be a very obnoxious, though deceptively sweet quilt that should make my granddaughter grin when she receives it. In fact, she already knows it's hers 'cuz she's been over here visiting a time or two while it was in the hoop. She's only three but she comes over to me while I'm quilting, and pats it a little possessively.  So cute. I'm pretty sure she likes it just fine!

Orphaned bits and pieces
A new great-niece arrived just after Christmas. Once it settled down around here, I made a plan for a new little, baby girl quilt. Just kidding. You know me. I basically raided the orphaned applique totes, sewed up three quick flower-in-a-basket blocks and then belatedly started wondering about the rest of the quilt. 

Backing made out of pieces from the stash
I ended up scrounging around till I found enough orphans for the center of the quilt too. The leftover patches just happened to be from the older sisters baby quilt, which I thought an interesting connection. 

Love the little applique blocks...
I decided to make four-patches but totally forgot about seam allowance when cutting. That made me grab the old fashioned lavender prints to enable making the 4-patch units large enough for adequately sized repeats. 

Softer looking in a crumple...
Bit by bit I assembled the top, making lots of mistakes along the way. Thankfully nothing that turned out to be a complete disaster, just time-sucking things that made me question my sanity. Remind me again why I make baby quilts for every niece & nephew plus the greats? Yeah I know, 'cuz they are sweet little critters and I love my family. 

The quilt was turned out kinda cozy but a little dull looking. Big surprise. All the deliberate color clashing that I just love to play with made for just way too much tension in the quilt. Thankfully I have tricks to fool everybody into thinking the quilt looks better than it does. Just add applique. It's like magic.*wink

Even the rosy pink binding played a part
in making it look better!
In the end, I deliberately added the green striped fabric in the center applique, which just so happened to be a match to some fabric in the older brothers baby quilt. So interesting that I still had some to play with! That fabric had just enough energy to play well with the rest of the quilt and take care of the 'dulled down' factor. That and the purple tulip cut down and reshaped from a bird motif basically saved the entire quilt. 

Still needs help
You can see it above just before sewing the rows together. I'd already switched the light, white squares from a busy print in an effort to lighten things up. It should have been obvious right then but I'm kinda stubborn sometimes. Especially when I'm in a hurry. Was trying to save on postage by sending the quilt with the grandparents!

Had to sandwich and pin 2 quilts before
moving the furniture back
Also managed to get another quilt in the hoop. This one is a little folksy. A little funky. And a little awkward looking which might actually make it more loveable? 

Next up in the hoop!
Hand quilting is moving along fairly well--all freehand Baptist fan quilting with no marking. I'm having a bit of a stretch problem in this striped fabric behind the large tulip duo though. It's not 100% cotton so that's my own fault. It's a {repurposed} 3x large mechanics shirt I found for cheap at the 2nd hand store years ago. Just could not resist throwing it into a quilt! Ah well. It's going to end up 'good enough' and it's not like this quilt is going to set the world on fire, right? Having fun with my quilting therapy and that's the only goal these days...


Thursday, November 14, 2024

Always Playing Catch Up!

So it's been one thing after another here, like always these days. Our washer broke down and two service calls later, we might as well have bought a new washer. Well, 15 years ago. Now it's half what we paid for the thing 2-3 years ago. But seriously. What are they making anymore? A bucket to rinse our clothes in and if we actually use it, then it breaks down and costs hundreds of dollars?

Almost finished up!
Yeah, yeah. We should have bought the extended warranty but honestly, we just couldn't afford it. So now we're crying cuz actually, yes. That would have been cheaper in the long run. Never gamble with the newer appliances. They are not made to last. Anyway, lots of everyday, but heavy drama going on over here and I'm just trying to keep my head above water and keep posting a couple times a month about quilting. So crazy when I used to post three times a week no problem!

Next up in the hoop
It's still my sanity saver even though it has slowed down so very much this year. {The quilting and the sanity. Don't even hardly know who I am anymore!} Anyway.... Flower Power is sitting in a basket waiting for the final hand stitching on the binding. I had a hard time knowing what quilting motif to put in the dark blue border, but finally went with freestyle X's. I really like the look but one side has more X's than the other which makes me laugh. Oh well.

A closer look at the daisies
Next up in the hoop is Crazy Daisy, which came to a quilt top completion in 2021. Think it was started that year too? Who knows. Sometimes I don't link things like is best for future origin questions. The pics of this quilt are not quite 'right' somehow. Just a little more orange than reality. It will probably go to one of my granddaughters. She's three right now, but next up in line for a 'grown up quilt' from Grandma. I'm thinking this will make her very happy as it's so bright and busy, but also, hopefully grow with her for a few years.

Bramble Blooms II-A
Bramble Blooms II-A has seen quite a bit of applique work lately. Thought the pic only shows two of the border units, I actually have all four stitched down now. Had to go back and add in some little basic leaves here and there as it looked a little too spare. I'm crossing my fingers to have time today to sew the borders onto the main part of the quilt and then there will just be a bit of applique to finish up on the ends of the other two borders. Bit of an overlap {on purpose}, though it doesn't completely wrap around the quilt like the applique in Bramble Blooms II-B will. 

Don't know who else is still working on Bramble Blooms quilts these days? I know many have dropped out or put the quilts off for later in order to concentrate on more inspiring projects. Totally okay. It's pretty difficult to power through three quilts in a series, back to back like we're doing. I myself can get very down on the project at times too. Sometimes it takes quite a lot of effort in order to start seeing the good stuff happen when you're primarily working with old, tired looking fabrics. If you have to take a break, don't get down on yourself. Some of the best stuff just takes time and lots of pondering!

Friend quilt
I hesitated to post about this project, but it's really been taking up the bulk of my time lately. Kind of a favor, kind of a commission, mostly trying to be a friend--this project is an answer to all of that. Blocks are from 2016. The person who organized the project is mentally not up to the task anymore and I was asked to finish up. I haven't made a formal looking sampler quilt in years and years so it's been difficult to be excited about, though the colors are fresh and lovely in their own way. I'm finally nearing completion--just taking a break now and working on some of my own projects for a bit. Will be soo glad to get back to a list of whatever-feels-good-to-work-on-today sort of mentality!

Joy Basket
I had all sorts of ideas for making the Joy Basket quilt larger, but each and every one has fizzled out. Then, a couple days ago, I saw the lovely green floral fabric in the project tote and felt like it needed to be attached next, but perhaps not in a complete surround. It happens to be a little bit clashy with the rest of the quilt, but wowsers, I am just loving the look! Can we call it a completion already? hehe  I stuck the 'joy' letters up on the quilt and it just looks like they belong there as to attitude and spirit. The white and gray of the letters are not quite the thing compared to the yellow creams in the rest of the quilt, so will have to think on this for awhile yet. So far so good with this project. Haven't managed to ruin it yet! You probably won't believe this, but I have been worried about pulling the vibe of the quilt down with generic looking borders. I mean, who does that? 

Thursday, December 9, 2021

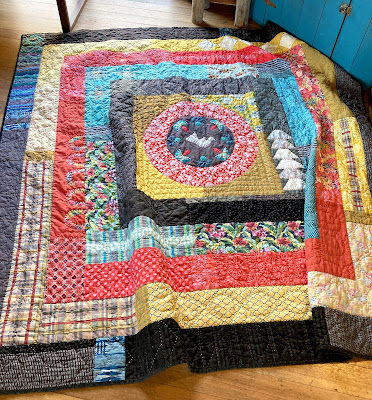
Bullseye Medallion is Finished Up!

Loving this latest finish! When the last stitches went into the binding I thought to put it immediately on our bed. Alas, too many blue markings that needed washing out.

Love how the center turned out!
Thankfully it washed up very well and though there was a bit of dye in the Color Catchers, nothing seemed to make its way into the lighter colored fabrics. 

The colors seem so intense, it's hard to see it in the pictures
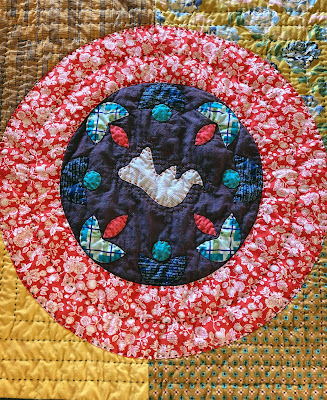
I'm obviously very drawn to the look of circles in my quilts. This center motif was such a simple look to pull off, though you'll probably notice the circle is not exactly perfect. What is around here? That red and white print has been in the stash totes for years. Not even sure now where it came from {or from whom?} but I love the impact it makes on this particular quilt.

Enjoying the look of the hand quilting
I saved the circle template and will try something else with it some day in the future. Mostly, I wanted to experiment with a wide, stripped down piecing look for the borders on this quilt and thought an applique center would help give the quilt some pizazz. Focus. A place to establish the overall vibe. Plus I wanted to play with an element I saw in an antique quilt years ago. You know how it is!

A different pieced or applique element for each border
The border width exact repeats was an interesting challenge. Having the colors change so dramatically each border helped give the quilt energy for sure. I really enjoyed trying to achieve a bit of a 'blend' from one border to the next in that area where the basket handles landed. Things like that always make me smile!

A couple pieces of vintage fabric!
As always, I started with a stack of fabrics that had been simmering and ready to go forever. These were pretty much chomping at the bit for their place in line! As each border developed, I tried to figure out ways to incorporate the most interesting fabrics into each border. It didn't take long before I realized that some fabrics needed a solid break between them as they didn't transition as smoothly as others. Simple to insert a rectangle of a completely different fabric and try to make that rough transition seem more 'purposeful'.

So fun to use up difficult fabrics....
The entire quilt is hand quilted with Perle Cotton #8 and #12 as per usual around here. When I ran out of the first variegated red Perle Cotton ball, I switched to the other similar red that I had available. Same brand, number etc., but this ball of thread went from red fading to white, instead of red fading into light pink. At first I was dismayed, but then quickly started preferring the more dramatic escalation of color and then lack of. So lovely to see it helping to 'pop' the texture on the black background! I can only assume the dye lots were different or perhaps I bought them at separate times?

The variegated threads are the best!
Obviously this isn't a super complex top, but I feel that I learned a lot making this quilt. It's always a bit of a thrill when a personal challenge project ends up working out so well. This was started in the month of January 2019 and took most of a year to plow through all the details, often involving a pep talk or two on the merits of keeping to the stated boundaries. There were definitely times that I wasn't at all in the mood to put the time in, push myself, or think outside my comfort zone. But that fabric!!! It just kept demanding that it needed to be used!

Finally got the last border on Crazy Daisy this week too. After cutting the strips out, there was just over an inch wide x 42" of fabric plus another small piece leftover from the border width. So close! This was one border fabric that clearly didn't need another fabric involved to spoil the look.

The floral fabric was a one yard piece that I had picked up on a clearance sale where you had to buy the minimum to get the 'deal'. So fascinating to see it finish off this Crazy Daisy quilt in the best possible way.

I love how the extra bit of pink saturation at the border helps make the blue background fabrics shine, which of course, is what I always intended from the start, sort of fallen short of the goal along the way, and then wallah! found my way once again.*sigh  Some quilts just wanna take the hard road! This is a busy, loud, bossy sort of quilt and I can't wait to see what the quilting texture will do for it later on.

Right when I was sewing on the final 12" or so of the last border, I found a frayed hole in the border fabric. Just a little smaller than the size of an eraser on a pencil, nevertheless, it was a  big problem. After a moment of contemplation, I admitted utter defeat and just spliced in the little tiny chunk of border fabric that had been leftover from the yardage. I hate, hate, hate doing that! So tacky looking! The fabric is so busy that it's not immediately obvious, but it does annoy me that it was necessary. So thankful that I caught it NOW and not while I was attempting to quilt it! One of the good things about pre-washing fabric!

A corner fix. Don't worry, everything lays
nice and flat after it's ironed properly...
There is a couple more projects that I'm trying to bring to 'completed quilt top stage' by the end of the year and hopefully one more true blue quilt finish as well. Since we had most of our Christmas with the immediate family at Thanksgiving, there should be a bit more time available for quilting during this holiday than what I normally end up with. Still have one more Christmas shopping trip to work into the schedule, but the husband is self employed and it seems that we're always waiting on the next check. Also, we gave in and bought a fake Christmas tree this year and then ended up with one with a cracked base. Had to send it back and now we're waiting on the replacement. Hmm... That's a little scary with all the supply chain issues these days but what do you do? Hope the new one arrives next week like it's supposed to!!

Tuesday, November 23, 2021

Cozier Looking Than I Thought It Might Be

 Baby quilt is done, washed up and already gift wrapped! Big, big sigh here. It was on the get-done-before-Thanksgiving list and I didn't want to have to bump it off till Christmas or try and mail it through the USPS during the holidays.

Baby quilt is finished!
It's got a slightly different look than what I normally do for baby quilts, but it still seems to work. Definitely turned out to be cozier looking than I ever expected.  Crossing my finger baby's mama will like this one, though thankfully baby Ellie won't care a whit!

Hand quilted with perle cotton
I tried to hand quilt in a way that would hold down all the bulky seams and yet still allow for a lovely drape after being well used. If I was an absolute perfectionist, there would have to be something temporarily stitched down at the edges of the border so that there wouldn't be any pull or stretch in the outside border. Uh huh. That's so not me.

A simple 'x' to help keep the corners secure
The dark green background is the part that still makes me sort of scratch my head, but it's nice to use something other than cream for the backgrounds. Love, love, love that all of the fabric in this quilt is from the stash. The cream fabric at the border is part of what I received from my aunt with the moth ball smell. After all that washing and bleaching, it's super soft and smells just fine.

Extra stitched flowers just for fun
And yep, I know what you're thinking. The cream background look still happened at the borders.*sigh  When we have a style, look, vibe we gravitate to, it's hard to deviate too drastically, right? And it softens the look of the quilts nicely. Don't you like the stitched lollipop flowers mimicking the appliqued ones? It's been a long time since I tried that. Always makes me smile!

Looks wonderful in certain lighting...
Crazy Daisy took a few days to plow through the sewing of the borders. It's such an important step and we want to make sure and do it properly. No sense taking care with the rest of the quilt if our rows can't match up and align properly.

Trying to sew up the row lengths, one by one
At first I pinned at every single seam and then I stopped and really thought it through. Hmmm... maybe only the seams at the cornerstones and wherever the seams have been ironed the opposite direction? I probably need to put some serious thought into my sewing table set up as my shoulders and neck always hurt after too much time doing this. Have to get up and stretch, roll my shoulders before getting back to it!

Love when it becomes one piece!
Amazing how much better it looks after the seam allowance disappears! It's hard to get this quilt to cooperate with the lighting, but I did my very best.

Ready to trim up the edges
Couldn't be happier with the setting triangle fabric. There's just something about a 'directional' fabric that makes my heart go pitter patter! And the rich look of the rosy red/pink colors help accent the daisy blocks quite well.

Didn't even try to match up the stripes on the edges
I really thought this one was going to be a finished quilt top at the setting triangles, but then I had a random idea. What if?

Always adding a border or two...
And you know there would be just barely enough fabric in the cheddar and the pink/red print to make it happen. Of course!  So I'd better be sure before cutting anything out! Okay, that's the last post before the holidays are in full swing. I'm planning on eating lots of goodies and spending prime time with the kids and grandkids. Sounds like all my siblings will be hanging out at mom and dads this year, so it's shaping up to be a hopping busy time all around. All the best to my American readers! Hope you have a great holiday too!


Thursday, November 18, 2021

It's Always Better To Have the Prep Work Behind You

I've been busy, busy. Trying to get lots of applique prep done over the last weekend while my daughter was away on vacation. It was waaay past time to pull out Coronacrazy and just get moving on it. While the centerpiece has been done since January, the only thing accomplished since that particular push was the foundation work for this applique border. Letting it sit around and gather dust was only making me feel guilty and even more apprehensive about how it was going to turn out.

Will have to stitch down the corners later
The thing is, the applique border to-be, was really only a figment of my imagination and an odd little scribble on paper. I believe the genesis for the free flowing leaves idea was from a calendar hanging on my wall throughout 2020? but I can't really remember anymore. All I knew for sure was that there was gonna have to be a lot of floor space for this prep work to happen, lots of internal debate and hopefully a surge of creativity and illumination. Yep, I was absolutely dreading it.

A few flowers for interest
It took up the greater part of the upstairs floor, right at the top of the stairs for most of three days. It's an ugly carpet, so sorry for that, but design space isn't usually terribly fussy around here. I started out a little different with this particular border. First I spent some time free-cutting about 25 different shape and lengths of leaves in paper and then placing them along a vine. Okay, yes. More of that. This is the flowy vibe that I'm aiming for. No, not that, more like this? and so on till it started to click. 

Normally I would get a feel for the look that I wanted {on a paper drawing or maybe a quick audition} and then cut out a whole stack of leaves in whatever fabric I had stacked up and ready to use for the border. Just place fabric shapes randomly and make things work. And though I had the pre-selected fabric at the ready, I also knew that I wanted the leaves arranged in a bit of a color wash. Okay. That could be a bit more tricky as the lengths of the leaves needed to vary as well. What comes first, the chicken or the egg? 

Trying to figure out the look and feel of the borders
This time, as you can see, I started with arranging paper leaves on one side of the top border until the look was just so. Then, I carefully selected the preferred fabrics and colors as I went, tracing the proper leaf shape onto the back of that fabric. Uh huh. I basically went leaf by leafsometimes getting into a groove where I could cut two or three out at the same time. Woo hoo! It was painstaking because I didn't have enough fabric to just waste it in a big flurry of optimistic cutting. 

With the shape decisions out of the way, cutting one leaf at a time in the 'hopefully correct' color let me immediately see if the color wash was happening like intended. The ironic thing was, after getting all the leaves in place for the first total quilt view, I immediately started rearranging a few chosen leaves until the overall color was was simply a variegated look instead. Oh well. No one ever said the design process was easy, simple, straightforward or even made a lick of sense. You just have to roll with it till you hopefully come out the other side!

The overall picture of the intended applique
After getting through one half of the top border {and leaving the cut out leaves in place as a reference point}, I switched to the other side. Though I tried not to get too 'matchy, matchy', it helped to use repeating colors for cohesion. Then I worked on the bottom border etc. etc., always choosing to determine the tips of the vine leaf colors first. If I got stuck or spectacularly frazzled somewhere on a vine, I would switch to the other end of the border and work backward until I found a way to transition more gracefully. No sense working myself into a snit because a certain leaf didn't want to behave! Might as well take my attention elsewhere and give us both time to reflect.

It really did take a lot of time, hours and hours and hours in all. Now you know why I needed the upstairs floor completely free for days at a time! At first I just did a rough cut around the traced leaf shape on the fabric and placed them on the border as-is, thinking I could clean up the shapes later. Which I did in some places and others not so much. 

As the borders started developing, leaves got shuffled and moved into better position, leaves got trimmed a little curvier or slimmer or shorter or whatever seemed to be needed. More leaves got squeezed into the space, or less. Other times a whole group of leaves was jettisoned completely because suddenly there was a brilliant idea that needed addressing! Some areas I fussed with entirely too much, causing the invariable confusion and despair. An opportune time to leave and take a good long break. Coming back later with fresh eyes usually helped tremendously to see immediately what the problem was and well, have a hope of actually solving it?

All in all, there is only about six or seven unused or discarded leaves at the finish, so I count that as a win! And I didn't run completely out of any important fabric, pull out any hair on my head or even have a temper tantrum just trying to have clarity in what I was trying to convey!! hehe  So yeah. Prep work is totally done, the leaves are removed from the corner areas and carefully labeled for later stitching. These borders are finally in the backup handwork bag and waiting for their turn in the hand stitching queue. YAY! I can't even imagine what was possibly holding me back from this particular phase of the quilt, can you?

Baby quilt should be a finish by Thankgiving
I also finished up with the simple applique on the borders of the baby quilt, all borders attached and it's even sandwiched and pinned! This one is already in the hoop and I've been hand quilting on it for a couple nights now. So sad to have to put a pause on Bullseye Medallion quilt as I had finally made it all the way out to the outside borders. At this point it always feels like an easy couple nights till it's all completely finished, but I know better. I know, I know... The outside area generally takes much longer than we expect and well, it will still be there and waiting for me when the baby quilt is all done and ready for gifting.

Can't wait to get back to the stitching on this one
While I still had the floor available, I went ahead and made time for stitching up the sashing strips on CrazyDaisy. Though I was pretty sure they would be a go, you just never know for sure till the auditioning moment. 

Crazy Daisy starting to come together
Though it's not obvious in the picture, the cheddar and lavender squares seem a little bit 'flat' in comparison to the Daisy blocks. Overall I think that's a good thing. Gives the applique a chance to shine brighter. Like they need that? Hmm... Originally I intended to cut the sashing from a stripey fabric and make them fairly narrow strips. This way gives a little more breathing room, yet still keeps the energy high.

This is the setting triangle fabric that I settled for
After seeing the blocks with the sashing strips and the cheddar cornerstone squares, I was not impressed with how blah that cornerstone color was. I finally settled on a deep purple batik fabric to use {probably not an outstanding choice}, but it does exactly as intended. Helps 'pop' the dark curved strips in the blocks and further define the flowers. Not every color/fabric used has to be exceptional to work extremely well 'in situ'. 

These cornerstones look better to me
This quilt was supposed to be a very blue quilt and I'm not quite sure what happened? Somehow it veered off into this wildly exuberant explosion of color. So very, very energetic and crazy, I'm actually starting to call it 'circus, circus' in my mind! So far the only thing that I regret about this quilt though, is the fact that it's going to end up square. I probably should have gritted my teeth and stitched the extra blocks just to make the quilt come out rectangular. I did consider that for awhile, even thought about leaving off one row of blocks, but no. That would mean ditching seven applique blocks! Ha. Not happening. I'm actually very ready to move beyond these wild {for me} colors and work on some projects in more benign colors for awhile!

Tuesday, October 26, 2021

One of the Baby Quilts is Finished!

This baby quilt was finished up right before I left town to spend time at my oldest sons in Oregon. Though it wasn't gifted until I returned home, it felt really good to attach the label and check it off the list.

Baby quilt finished up!
It has a sort of busy, young vibe to it, so hopefully will grow well with baby. My baby quilts usually end up somewhere around 42-44 inches wide and 46 plus inches long. Plenty of quilt to be used in a toddler bed.

My little brother has gotten more baby quilts from me.....
The long sashing strips are machine stitched in-the-ditch on either side and also around the peachy horizontal strips. Everywhere else is hand quilted very simply with #8 or #12 perle cotton. It's getting so very, very difficult for me to not add hand quilting somewhere. It just feels wrong! So you know me. I don't even bother fighting it. What's another couple hours with the hoop? hehe

Loving the texture
I passed this quilt off on the Sunday after returning home and the smile I received in return was sweet and perfect. Baby #5 gets to have a little something handmade from her A. Audrey and I know that means something to my sister-in-law. It's never worthwhile when it starts feel expected and unappreciated, right?

Just had to add the lime green, couldn't resist
In a nod to the fact that it was supposed to be for 'baby', I went ahead and used an old retro looking kitty cat fabric for the binding. As I've mentioned before, conversation prints look cute and all, but they just don't feel easy to work with. Most of the time I leave them behind in the store and think wistfully about how much easier to must be if only I could wrap my mind around the concept! 

A little bit of whimsy
I ended up being gone eleven days I think, arriving at my sons house the day before their newest daughter was born! Between the other grandma {who came and went everyday}, we kept our kids and granddaughters well taken care of. Lest you think we pushed ourselves onto them, we didn't. I would never have stayed so long without a genuine invitation of 'help'!

My precious granddaughters!
Getting a kindergartener off to school and picked up from the bus stop everyday, keeping up with the housework, plus chasing around a very active two year old is a lot of work for the grandmas, much less a recovering mama! Dad just switched jobs a couple months ago, so didn't have much time available to take off.

Miss Eleanor Olivia {Ellie}
I would say it was a hardship, but in reality, it was lovely getting so much hands on time with all my granddaughters. I hate that we can't see them more often. What a joy to snuggle a brand new baby, see a little girl getting ready for soccer practice with her daddy, watch the 2 year old slowly figure out that this grandma is completely wrapped around her little finger! So hard to say no to those sweet little faces! Also, our youngest son moved down to the same area about a month ago, so it was great to check in with him and see that he's doing well too.*sigh  Why can't they be happy living in the back of beyond like us?  Oh well. That's the way we were too. Couldn't wait to move away to a more populated area when we were younger! Super nice to back home though, as nothing is ever quite as good as home sweet home...

All the applique finished up and the blocks squared up!
As you can imagine, there was very little time for quilting. Once in a great while I managed to stitch some of the brown curved strips onto Crazy Daisy. This part actually went very fast and though I mostly stitched in terrible lighting {dim lights while the adults were watching tv}, I don't think any of it is so terrible as to justify ripping out. After I got home and got caught up on the laundry, I finished all the rest in a hurry and stuck a few blocks up on the wall. I played with a couple potential setting triangle fabrics, but my heart wasn't in it. All that will have to wait until the sashing is settled.

Online shopping just doesn't seem to work
out for me...
If you look at the picture above, the fabric on the left is the fabric that I went ahead and ordered for the sashing. The colors seemed perfect to me, so why fiddle around? In what now seems super ironic, the fabric that I ordered came in a much different look than the original fabric, very muted in contrast. Both numbers on the fabric were identical so I figured it must be a batch {dye} discrepancy. So I ordered another yard of the same fabric from a totally different store. Uh huh. Same issue. Which is why I so rarely try to buy the 'perfect' fabric on line. This never works out well for me and so once again, I have retreated to make-do, make-it-work with what you have method. All the strips for the new sashing are now cut out and read to go, all from the stash, which is what I should have done originally!

The start of a new baby quilt
So glad I didn't get started on the baby quilt for my new granddaughter before I left! This quilt should be a lot easier to put together now that I have a better idea what the nursery theme will be. I've cut out parts for simple 'wrench' blocks with the darker greens as the background. Hopefully they will go quickly and then I can lighten the vibe as things progress toward a border. 

My quilting attention is unfortunately a bit spotty since I've been home. Doesn't take much to get out of the routine does it? I'm finally starting to do some hand quilting in the evenings and remind my fingers what a quilting callous is. Surprise! {not really}, after a short break I am enjoying the hoop even more than before. Nope. Not giving up the hand quilting anytime soon....

Thankfully, before I left town, all the mending was finished up in a flurry and now that's one thing out of the way and off the counters in the quilting room. Did you think I never had any? If you are short like I am, barely 5'2", and tired of stepping on your jean hems? This tutorial worked well. I mean, like, amazing well! Someone told me about this method of hemming years ago and honestly, I just didn't think it could possibly turn out very nice looking. So I nodded at all the right moments and then promptly ignored their advice. I have been putting off hemming several pairs of jeans and finally, had no choice but to hem something, destroy my hems, or buy new. Yeah, right.

My old method of cutting off the bottoms of the jeans and turning under a couple times worked to shorten the jeans, but never looked as sharp without the original distressing and commercial thread used. After this hemming session, I did go back and do the extra hand stitching {mentioned at the end of the video} on a couple pairs of jeans, just so the hem doesn't flip up during washing. On one darker pair of jeans, I added an {almost invisible} extra, stabilizing top stitch, which... yeah, I can already tell was probably needed. Okay, why am I so excited about this? I have five pair of jeans now that fall exactly where I want them to at the top of my shoes? I'm not stepping on them. And the hem doesn't look obviously 'hand mended'. Do you know how rare that is for us short people? So tempted to go back and hem a couple of my older jeans as well, but I probably won't. I'd much rather be quilting!