Showing posts with label Flower Power. Show all posts

Thursday, November 14, 2024

Always Playing Catch Up!

So it's been one thing after another here, like always these days. Our washer broke down and two service calls later, we might as well have bought a new washer. Well, 15 years ago. Now it's half what we paid for the thing 2-3 years ago. But seriously. What are they making anymore? A bucket to rinse our clothes in and if we actually use it, then it breaks down and costs hundreds of dollars?

Almost finished up!
Yeah, yeah. We should have bought the extended warranty but honestly, we just couldn't afford it. So now we're crying cuz actually, yes. That would have been cheaper in the long run. Never gamble with the newer appliances. They are not made to last. Anyway, lots of everyday, but heavy drama going on over here and I'm just trying to keep my head above water and keep posting a couple times a month about quilting. So crazy when I used to post three times a week no problem!

Next up in the hoop
It's still my sanity saver even though it has slowed down so very much this year. {The quilting and the sanity. Don't even hardly know who I am anymore!} Anyway.... Flower Power is sitting in a basket waiting for the final hand stitching on the binding. I had a hard time knowing what quilting motif to put in the dark blue border, but finally went with freestyle X's. I really like the look but one side has more X's than the other which makes me laugh. Oh well.

A closer look at the daisies
Next up in the hoop is Crazy Daisy, which came to a quilt top completion in 2021. Think it was started that year too? Who knows. Sometimes I don't link things like is best for future origin questions. The pics of this quilt are not quite 'right' somehow. Just a little more orange than reality. It will probably go to one of my granddaughters. She's three right now, but next up in line for a 'grown up quilt' from Grandma. I'm thinking this will make her very happy as it's so bright and busy, but also, hopefully grow with her for a few years.

Bramble Blooms II-A
Bramble Blooms II-A has seen quite a bit of applique work lately. Thought the pic only shows two of the border units, I actually have all four stitched down now. Had to go back and add in some little basic leaves here and there as it looked a little too spare. I'm crossing my fingers to have time today to sew the borders onto the main part of the quilt and then there will just be a bit of applique to finish up on the ends of the other two borders. Bit of an overlap {on purpose}, though it doesn't completely wrap around the quilt like the applique in Bramble Blooms II-B will. 

Don't know who else is still working on Bramble Blooms quilts these days? I know many have dropped out or put the quilts off for later in order to concentrate on more inspiring projects. Totally okay. It's pretty difficult to power through three quilts in a series, back to back like we're doing. I myself can get very down on the project at times too. Sometimes it takes quite a lot of effort in order to start seeing the good stuff happen when you're primarily working with old, tired looking fabrics. If you have to take a break, don't get down on yourself. Some of the best stuff just takes time and lots of pondering!

Friend quilt
I hesitated to post about this project, but it's really been taking up the bulk of my time lately. Kind of a favor, kind of a commission, mostly trying to be a friend--this project is an answer to all of that. Blocks are from 2016. The person who organized the project is mentally not up to the task anymore and I was asked to finish up. I haven't made a formal looking sampler quilt in years and years so it's been difficult to be excited about, though the colors are fresh and lovely in their own way. I'm finally nearing completion--just taking a break now and working on some of my own projects for a bit. Will be soo glad to get back to a list of whatever-feels-good-to-work-on-today sort of mentality!

Joy Basket
I had all sorts of ideas for making the Joy Basket quilt larger, but each and every one has fizzled out. Then, a couple days ago, I saw the lovely green floral fabric in the project tote and felt like it needed to be attached next, but perhaps not in a complete surround. It happens to be a little bit clashy with the rest of the quilt, but wowsers, I am just loving the look! Can we call it a completion already? hehe  I stuck the 'joy' letters up on the quilt and it just looks like they belong there as to attitude and spirit. The white and gray of the letters are not quite the thing compared to the yellow creams in the rest of the quilt, so will have to think on this for awhile yet. So far so good with this project. Haven't managed to ruin it yet! You probably won't believe this, but I have been worried about pulling the vibe of the quilt down with generic looking borders. I mean, who does that? 

Tuesday, October 29, 2024

October Quilting Efforts

 Another finish to show off! Gold Crossroads ended up being even sweeter than I expected. The original inspiration was from an old quilt I stumbled across in a second hand quilting book years ago. Still love it!

Gold Crossroads
I find it super interesting that I was hand quilting this particular quilt when the DS Wagon Wheel SAL started. How crazy is that? My quilt was made out of cut-out circles and also, it is appliqued to the background rather than machine sewn like the Denise Schmidt pattern. Super classic look though and it seems to look amazing in many, many color palettes.
Another 2024 finish!
Some day maybe I'll make a brighter version like hers, but for now, I'm just crushing on the texture the hand quilting brings! Quilting in a simple grid isn't something that I do very often for whatever reason. Laziness? Or more because I really, really hate marking my quilts. Such a chore. Ughh! Every now and then a quilt just calls out for the look though and wowsers, this was the right move for sure.
Sweet, simple color palette
This quilt is the first one in my 'Circle Games' series where I'm starting each quilt with cut-out circles from behind other quilts. Lovely to have it come to a true-blue finish and see that I'm not just wasting my time.

Sometimes it pays to mark the quilt....
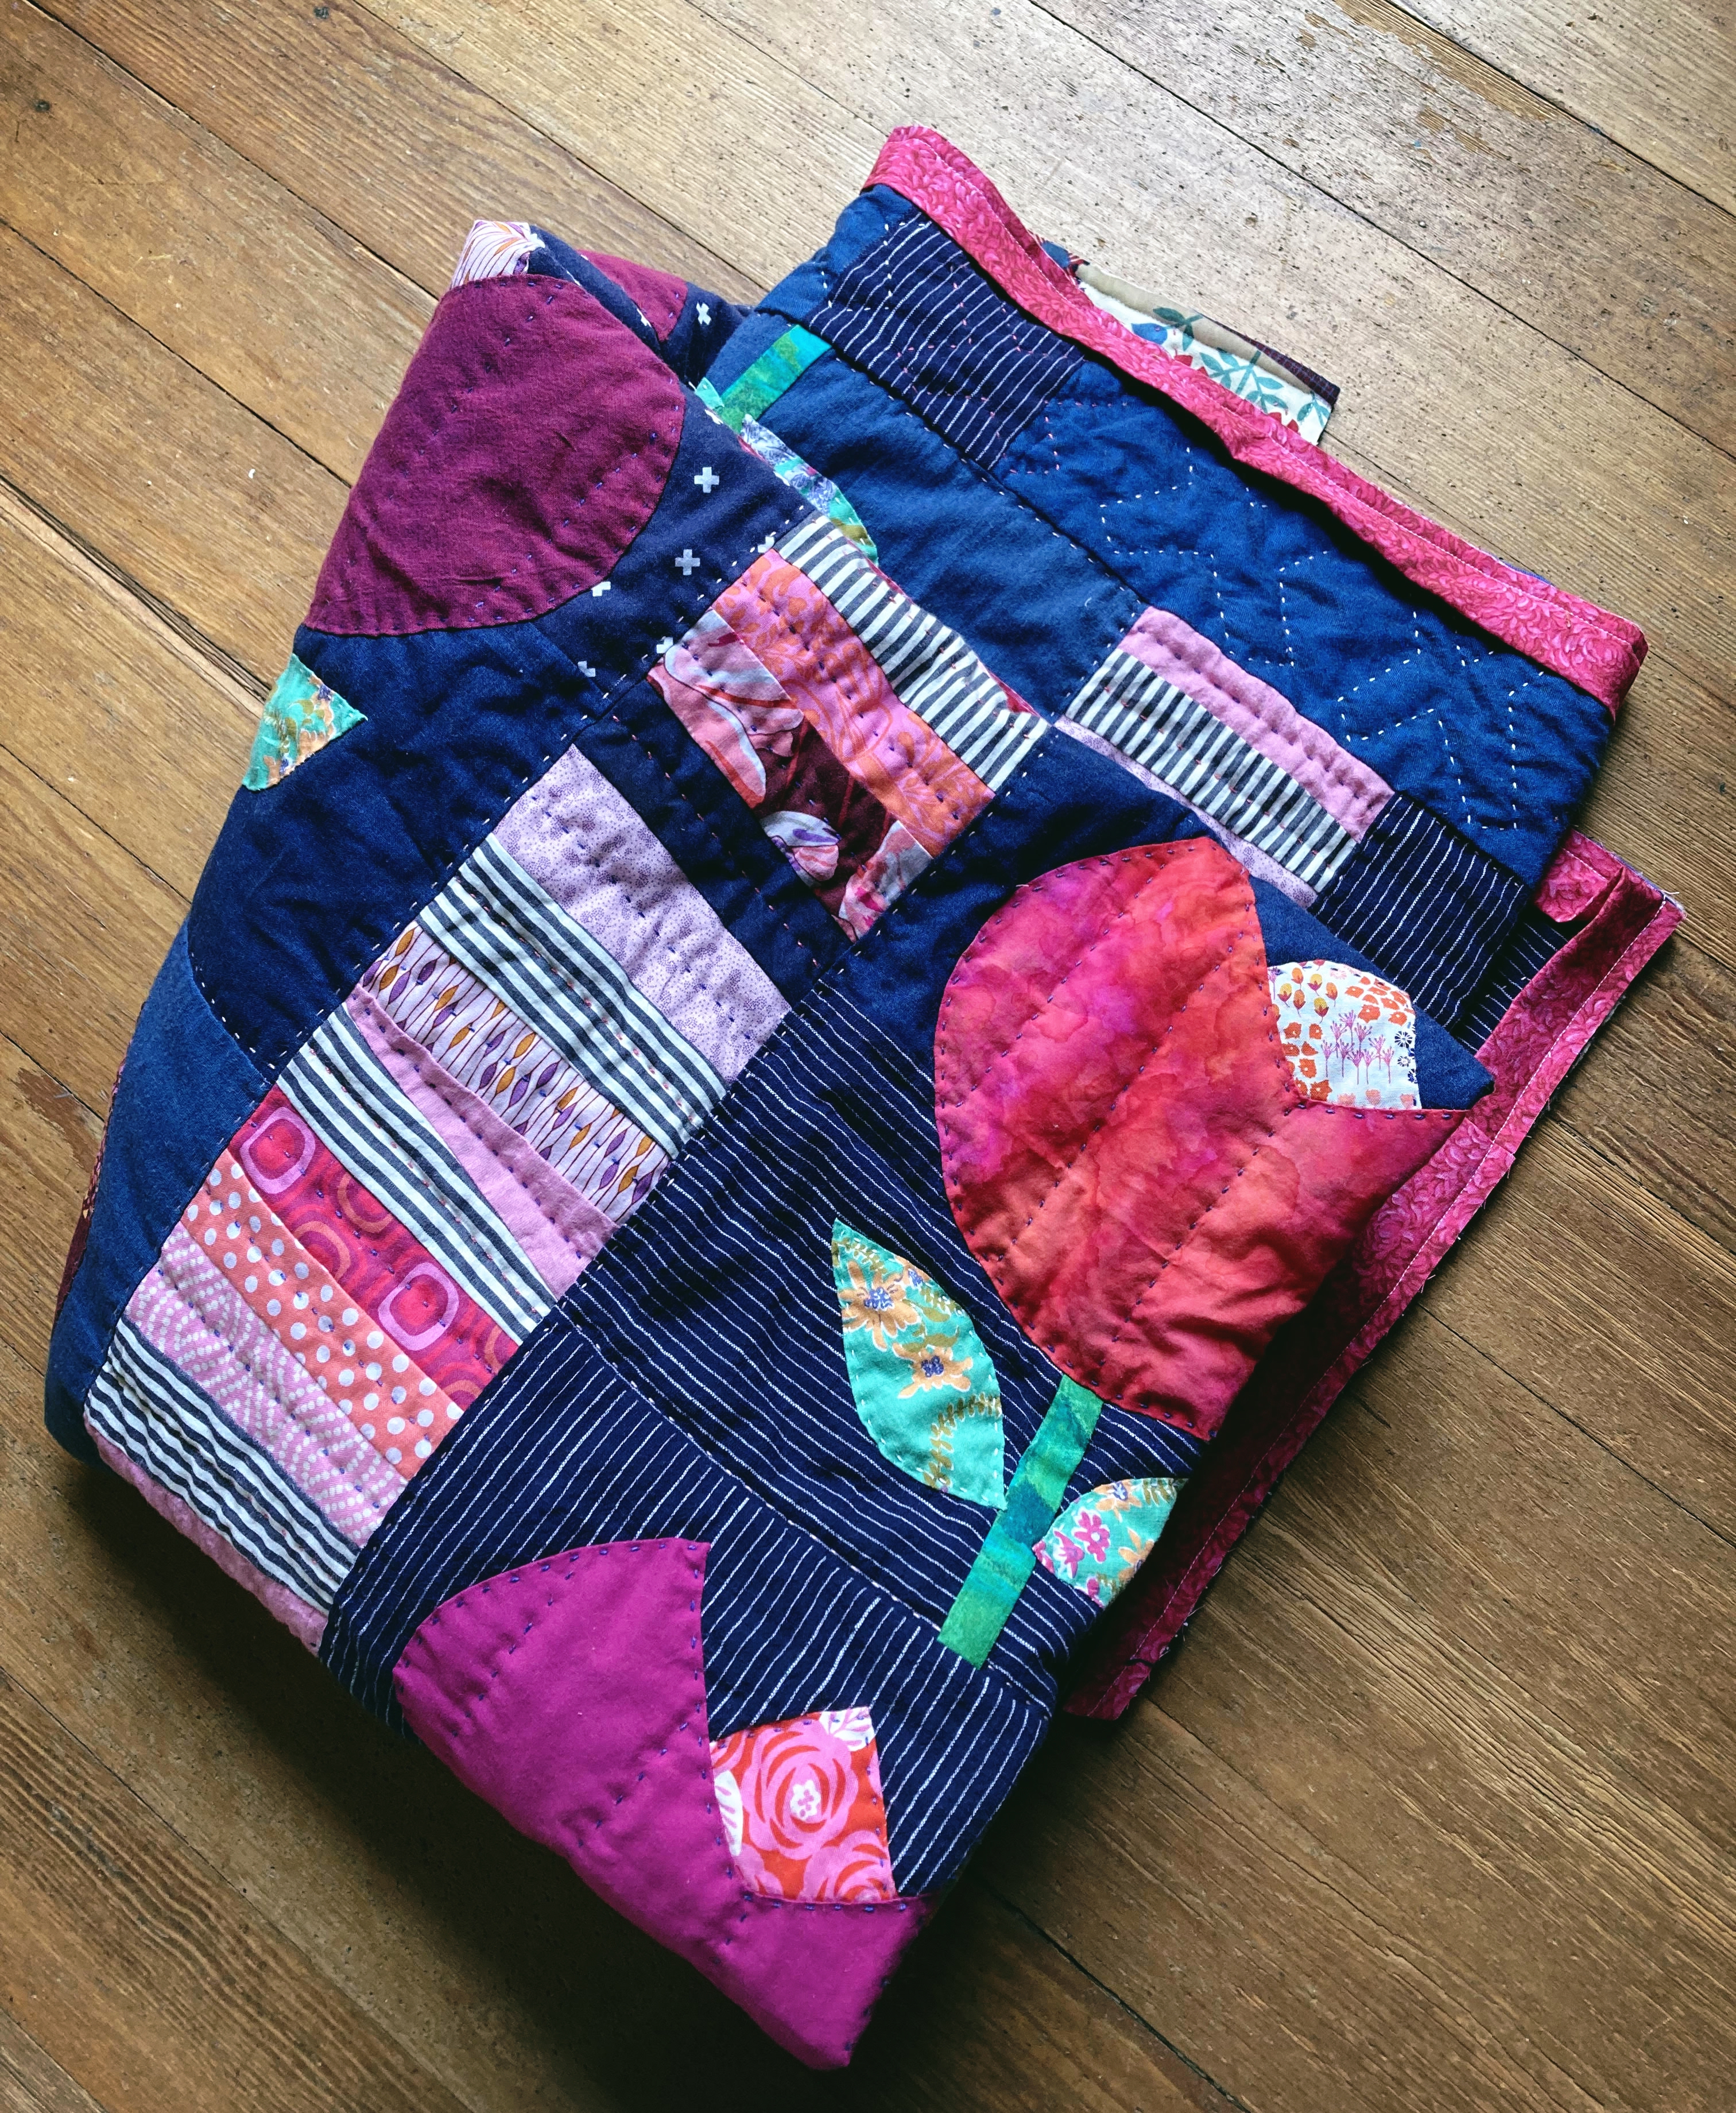
Flower Power is coming along with the hand quilting too. It was the 'next up' in the hoop. It's pretty hard to see what I've been doing as the quilt is so dark. Trying to do very simple quilting with perle cotton as always. Nothing fancy here either. Strings are great fun to quilt organic straight lines through. Always makes me wish for more of them!

In the hoop
Old Fashioned Wildflowers is all ready for an outside border now. I went ahead and powered through the applique. Sometimes its easier to not think about the time involved and just takes big bites out of it till it's all done. Will probably put off figuring out the border till some other stuff gets wrapped up. There's a couple ideas percolating in the back of my brain so I'm feeling pretty good about it coming together properly. Will just keep the fabrics together with the quilt top until I'm ready to attack the next phase of the quilt. Sometimes that urge comes from out of the blue, you just never know.

All the hand work is done!
Not a great picture below, but I wanted to show the prep work for Bramble Blooms II-A. I'm already putting in the hand stitching. After finishing Old Fashioned I really wanted to dive right into something easier and the skinny borders feel so much better on my hands already.

Ready to pin
All the details and prep work are done for Bramble Blooms II-B too. I used the same flowers and just made them a bit smaller than those on the original quilt. Seems to suit these quilts better. I ended up incorporating the same leaf shapes from the first Bramble Blooms quilt too {very important to me for this project!}. I'm really liking how interesting these leaves look instead of my normal simple leaf look. It's also something that I feel will help keep this series of quilts more connected, having a continuity in the applique motifs. It's the simple things!

Getting it ready for hand stitching...
It always takes a chunk of time to get all the leaves and flowers cut out out and the vine pinned down into place. Much more time than I ever expect! Once the stitching starts though, it's free sailing for those of us who enjoy applique. I'm definitely eager to see if these two quilts look as good in person as I'm hoping for. Using older, less exciting fabrics usually means quite the slow build up and then lots of second guessing. Are these fabrics actually going to look good in these special little flower shapes? Yes, no, maybe so? I wanted to get these two quilts in particular moving along and then I want to start a couple new projects with fall colored palettes. I am positively antsy at the thought that fall might be over before I get a chance to start something new. I mean, there's only so many open-ended projects my brain can handle at a time!

Meanwhile, we've been having a little bit of company the past week or two and that of course means less time for quilting. Then today I spent most of an hour on the phone with Verizon whose customer service is frankly, quite pathetic. Isn't customer service just so terrible compared to how it was 30-40 years ago? Why in the world would I want to try and communicate with a machine?


Thursday, August 4, 2022

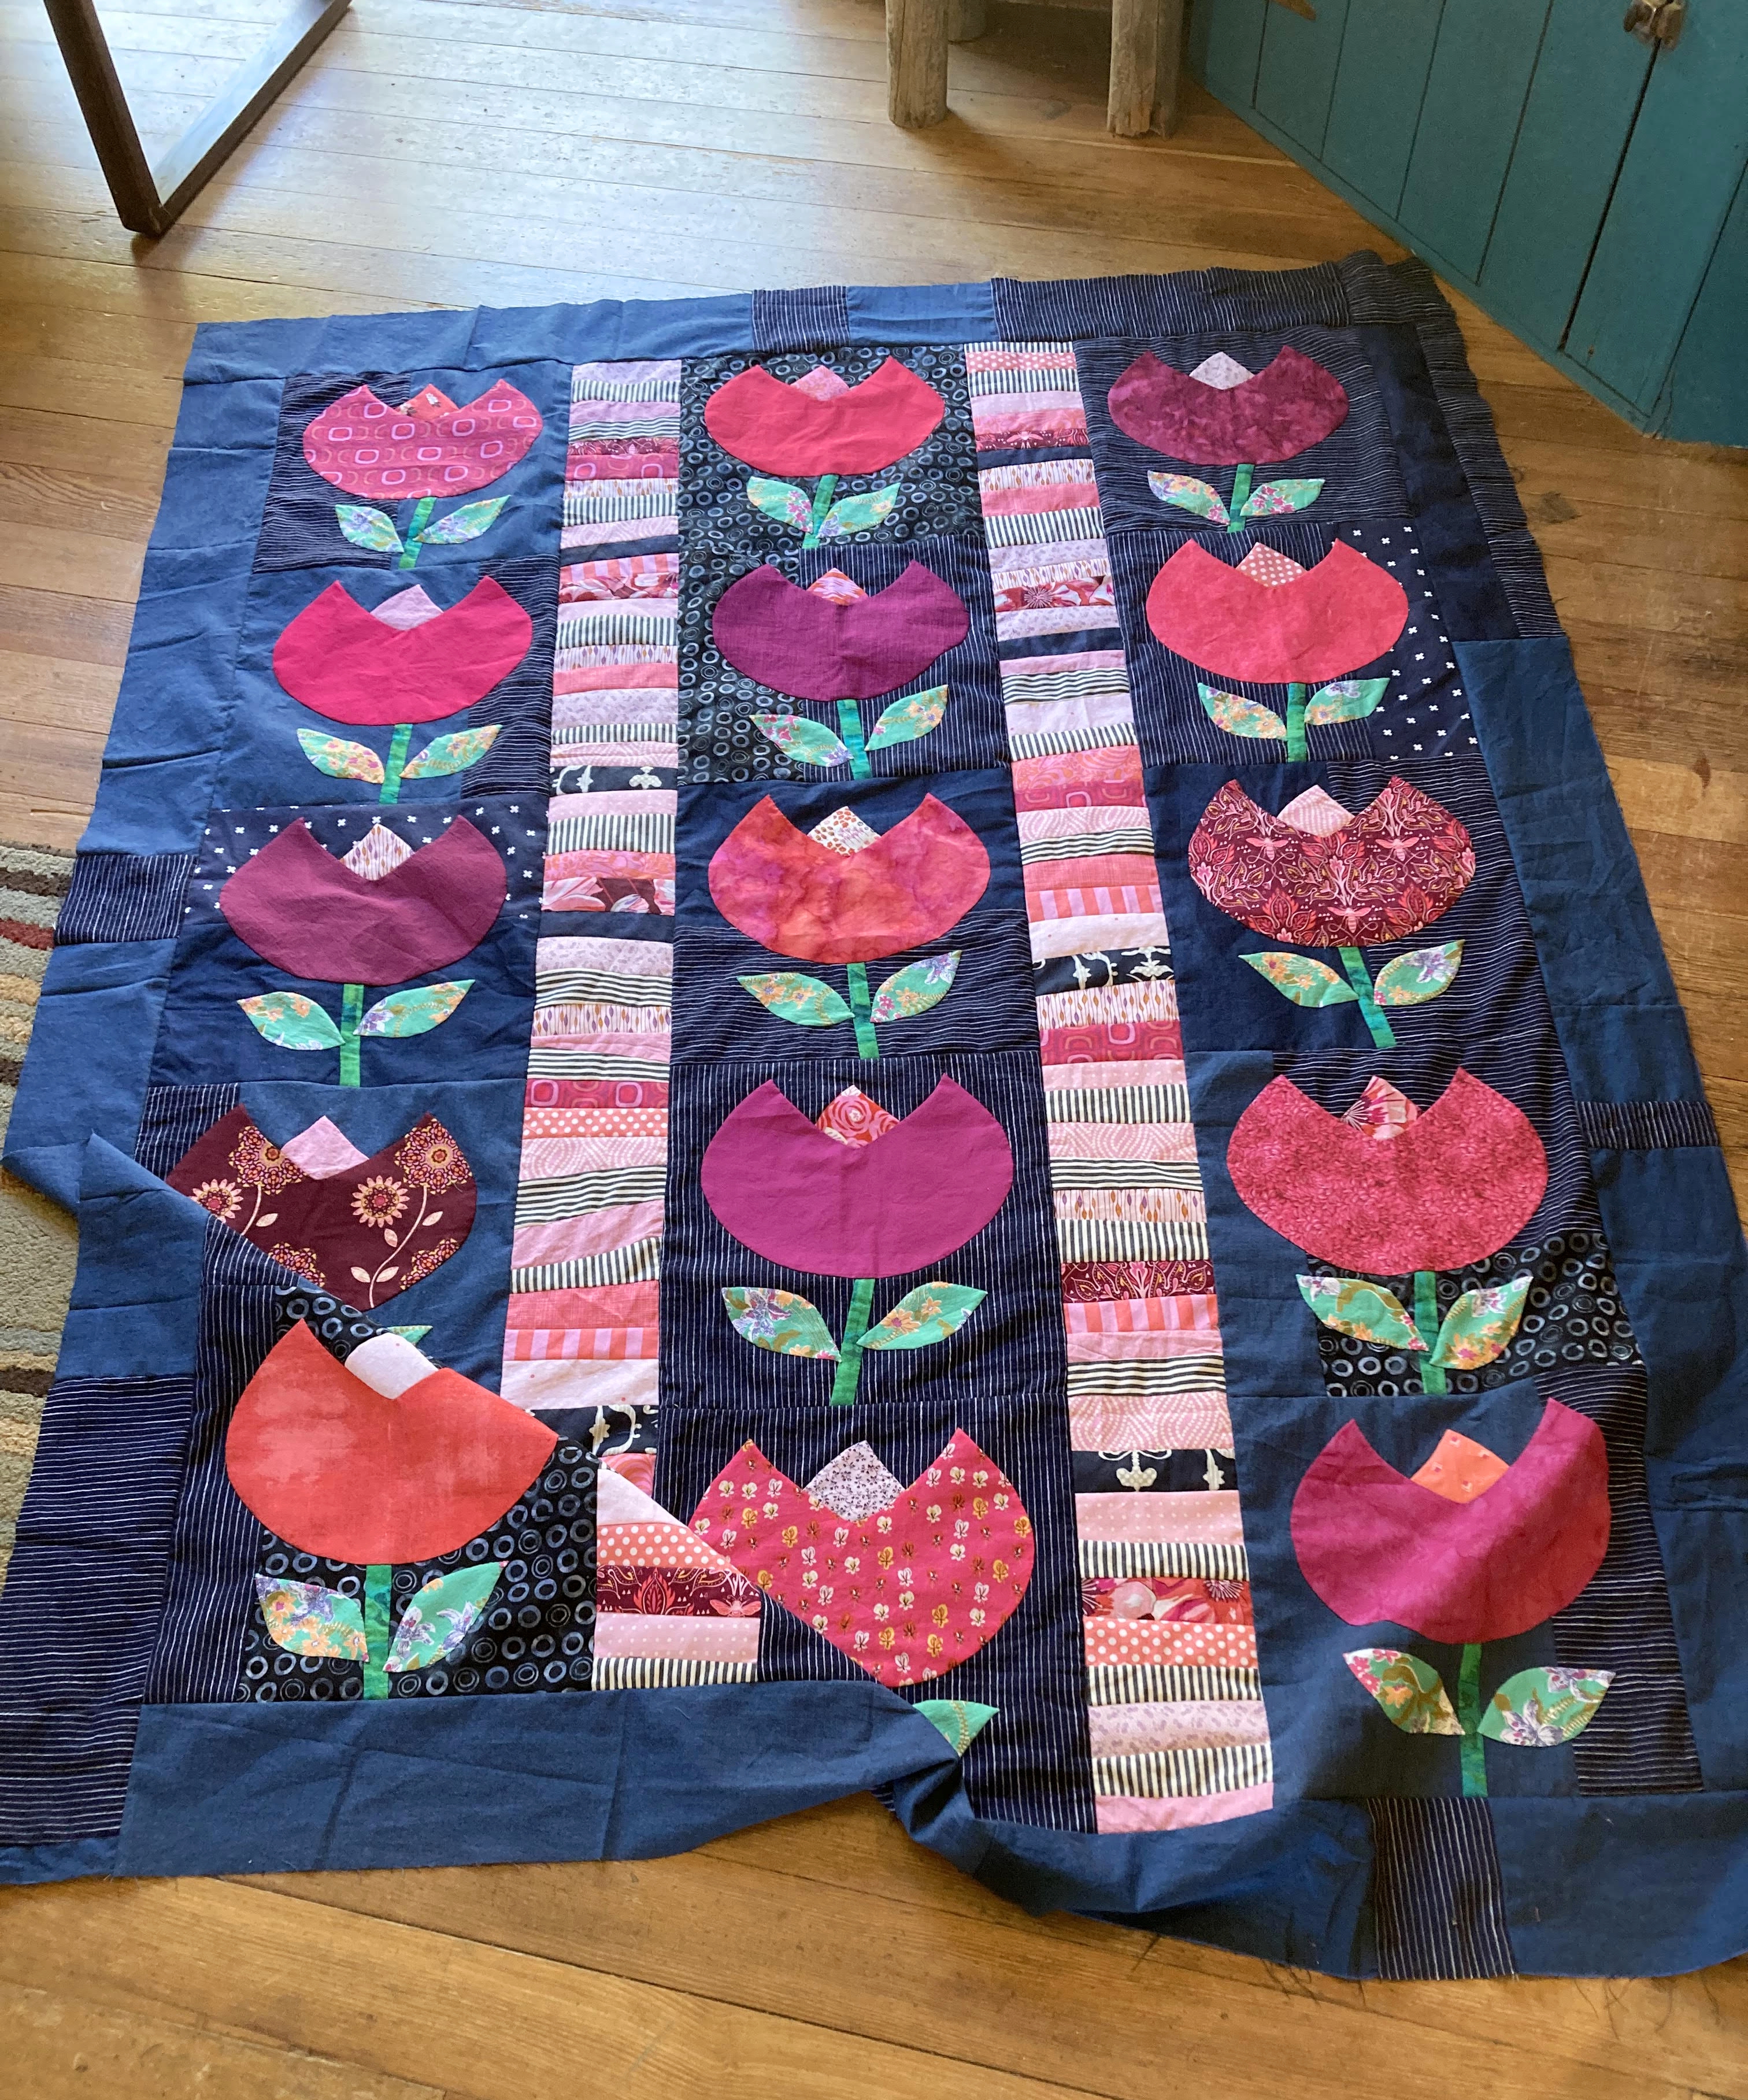
Flower Power is a Completed Quilt Top!

One of the things that I was determined to accomplish in the past week, was to get to completed quilt top stage with 'Flower Power'. There was an idea or two from the initial scribblings, but in the end, as usual, the quilt made all the decisions.

Improv. strip sets
First up, there needed to be some space between at least some of the applique blocks. It was easy to decide on some easy, breezy improv. strip rows. As you can see, I made short little stacks of sewn together, free cut strips. Not too off kilter, but just enough to give a bit of character.

The reason you cut strips longer than needed
The wonkiness can usually be increased or decreased depending on how the strip set is lined up for cutting. For these rows, I decided to let it be a subtle thing. In determining the colors for those rows, I have to say, it was mostly about percentages. Less than 10% of the darker blue and darker pink/reds and lots and lots of the very light pinks and blue/white shirting stripe. I wanted a very light, airy feel to that part of the quilt in order to help make the moody blues look richer, and hopefully, *fingers crossed!, make the tulips pop even more. Mission accomplished!

Not quite done it says.....
The entire color palette was based off of the floral fabric pictured below. Here I was auditioning the fabrics for a possible outer border. Such a bad idea. Uggh! The quilt practically screamed in agony. It was so sad. I seriously longed for a scrappy sawtooth border before adding the floral 'cuz it just seemed meant to be, but yeah. Sometimes you just have to move on.

This is not a good look
There was not going to be any floral anywhere and the sawtooth border idea flamed out quickly too. Name a single color that might possibly work well in the pieced border position without seriously challenging the tulips preeminence? Uh huh. I couldn't do it either.

Keeping the borders intersting
So there you have it. Super simple border addition or nothing at all. You know me, the gotta-love-a-good-border-gal. I had to do something! In the final ruminations, I impulsively started cutting up all the leftover blue fabric pieces. Anything that was 4 1/2" wide or better was cut and eventually joined into long pieces for the outer border. 

Feels good to use up the scraps
I like the subtle detail in piecing of the blue solids verses the one dark striped shirting. Just makes it a little bit more interesting than if it was cut and sewn on out of a single yardage. And I basically used up all of the leftover shirting too! Score!

Love the look of the improv. strips
In fact, there was a total of three upcycled shirting fabrics used in this quilt, which felt kind of awesome. The darkest stripe had to be soaked for close to three days prior to cutting anything out as it bled and bled and bled. Gotta watch out for that with the darker hues!

Looking cozy
In the end, this quilt ended up looking similar, but different, to the original inspiration. My border {almost not a border} makes the tulips float a little. It gives them space to breathe and feel comfy. I love how Flower Power definitely also looks like a sibling to LeAnn's lovely quilt. So sweet! We each took elements of the original to make up our own version, while striving to keep a lot of the first quilts joy and charm intact. Obviously, the strings in my quilt are in the sashing rows rather than the tulips, but the scrappy vibe still remains true. And no, we didn't come up with this idea together. We just both happen to have a great love for antique/vintage quilts and often use these as a jump start for our own projects.

Flower Power quilt top is finished!
53 1/2" x 68 1/2"
Another item checked off the list is the Lillabelle applique blocks. Only nine blocks total, so it didn't really take an enormous amount of time. Very happy to have them moved on to the next phase though, 'cuz I really am soaking up the yummy color palette on this one!

All ready for the next step!
Next up for a quilt top finish is the Roman Stripe quilt after the spontaneous applique renovations. I have been feeling so very blah about this top. No ambition whatsoever to get it in the hoop and bring it to a true blue finish. Now that this applique has jumped on, all of a sudden I'm thinking it might could be next in line?

Looking so much happier!
What? The applique is over the top, silly and really kind of awkwardly primitive looking. Still, it fills my heart with gladness and makes me smile just looking at it. Will others feel the same? Who knows. The important thing is, I feel lots better about getting it to a finish someday and potentially gifting it. Yay! 'Chrysalis' is starting to come into it's own!
Chrysalis applique detail
The current quilt in the hoop is actually Love Apples. I know. It's only been in the drawers for a year or so! I just wanted needed something virtually decision-free in regards to the hand quilting. This definitely does the trick. Free-style Baptist fans are such a good over-all texture to any quilt that won't necessarily soak up detailed, fussy looking quilting stitches. 

Latest quilt in the hoop
This is one of those quilts started in an attempt to use up something abandoned by another quilt. In this case, it was the peachy pink scrappy rows that didn't have a home any longer. Many of you would have probably dumped them entirely, but I just didn't feel right about that. Too many good fabrics involved! Before the hoop, the overall effect is a fairly gawky looking quilt, but wow! Look at how quickly things change with the Baptist Fans emerging. Now, all of a sudden, it's looking like it could be one of your best friends snuggled up for a good coze!

Love Apples getting sandwiched and pinned
Okay, on to those Individual Quilting History questions I'm trying to answer with every post this summer.

2. At what age did you begin to learn to sew? Do you remember at what age you began to piece? When did you learn to quilt? How old were you when you made your first quilt? Why did you learn at this particular time? Were there any special difficulties?

I learned to sew from my mother somewhere around the age of 10, perhaps younger. For sure, I learned to sew on buttons etc. before she ever introduced me to the sewing machine work. By the time I was a teenager, I could competently sew my own dresses etc. It was mostly due to her endless patience in answering my questions and always encouraging me to try every more complicated patterns! As explained in the previous question, I first started quilting when I was in my early 20's. The absolute first quilt was a baby coverlet and the very first, full sized real quilt, a rail fence style quilt. Then I promptly returned to making very simple baby coverlets.

I didn't truly learn to 'piece' until later on. In the late 90's, when I was 28 years old, a few ladies that I spent time with asked for pieced blocks for a wedding quilt. That effort mostly baffled and frustrated me, as I was still using scissors to cut things out. It did lead to making a couple small children sized quilts, mostly with big squares of denim, corduroy and/or flannel!  Then, when I was 29, there was a group of ladies in our church who started gathering to swap quilt blocks and/or make 'challenge' blocks in the winter months. 

Home Sweet Home
My mother promptly bought me a rotary cutter and rotary mat for Christmas. Woohoo!! Quilt piecing horizons were flung wide open! Except that I was a fraidy cat and kept all piecing efforts very basic for the longest time. So dumb. Squares and rectangles for me, thank you very much! 

The quilt in the picture above, was probably the fourth full sized quilt I had ever finished. This was 2001 when I was 31 years old. It was the first time for making the effort to piece blocks to join in with any swap or challenge blocks that I had won. And.... this was my first real attempt at making blocks that included triangle shapes. Well, I had to use a triangle shape to make my Home Sweet Home challenge block didn't I? And then, notice the house blocks in the borders? Yep! I was inspired to add little town houses and cottages along the edges of the quilt. Uh huh. The border stuff happened early on too. 

This is also when I started seriously dabbling in my love for applique. Playing with different techniques. Along with the little stars and heart block, every single house 'challenge' block has a little applique addition {or two} done by yours truly. Some people had already added a bit of applique, but I didn't let that stop me from adding more where I thought needed! I had to do it on the down-low too, 'cuz some of those gals would have been offended. My thinking was, 'The blocks are mine now. I can do with them what I want!'

I'm super glad that this quilt is still hanging around as it ended up being a showcase for everything that was being learned up to this point. Making and swapping blocks with others definitely pushed me to learn good coping strategies in regards to ending up with equal sized blocks. Also, it quickly pushed me into learning how to make individual block colors play nice with all the other tricky colors in a group setting. Getting those blocks wrangled into an interesting looking quilt pushed and shoved me to get the whole finished-quilt thing properly figured out.*whew!  No more sewing three sides of a quilt and turning it inside out and putting ties in to hold things down! How to make things lay flat and square. What batting to use. How to make and sew on binding! Things like that. Good times!

Wednesday, July 6, 2022

Orphan Annie Gets a Border

So this is Orphan Annie with the first border. From the start, I kept thinking that Dogtooth borders might be a good design, especially using the lightning design. That just sort of seemed like the thing to do and I haven't used that layout in forever! If I was thinking more about black or pink for the borders, well, that idea quickly got shut down.

First border on Orphan Annie
When it became evident that the quilt wanted more of those lighter shades of green, I didn't really know what to do. So many of them have been used up at this point! I scrambled around and eventually found some strips of the green batik, leftovers from a recent quilt backing. Thankfully, I had enough yardage of the blue fabric for the relief/contrast color.

Auditioning the borders
I picked a size of quarter triangle that looked 'about right' and just started cutting. Didn't worry about measurements to exactly fit to the quilt at all. After sewing several long lengths of triangles together, then it was time to audition.  To my disappointment, in the initial layout, nothing looked right except for the arrangement in the previous picture. Perhaps I was going to need to add coping strips all the way around to get the proper look?  It was almost enough for me to throw up my hands and try and start over, but you know how it goes. This was an orphan block quilt. Why does it have to look incredible? That gave me just enough impetuous to sew on the first border surround--all in a log cabin style, one border after another.

Orphan Annie is a completed quilt top!
When it came time to sew on the second border, I went ahead and did another 'layout', mostly just checking to see where each border might need to start--with a blue triangle or maybe a green? That's when I tried the 'lightning' dogtooth border look once again, and to my surprise...., it looked really good at the sides of the quilt. Like, amazingly good! Not all the way around the quilt, which is kinda odd, but still. Then I fiddled and fiddled and fiddled, trying to get the corners to look okay. Soooo frustrating. 

Loving the crazy pieced corners
It was only after a couple times of leaving and coming back that I realized the problem. I was attempting to get the corners to come together in perfect pairings and/or the lightning layout in perfect repeats. This quilt was actually wanting a more disordered and make-do look. When I let go and started cutting the edges and sewing the rows with that specific idea in mind, the last rows went together swimmingly. 

Looking across the quilt
And yes, there are definitely areas where the borders fall in a more precise arrangement. That's okay. But believe me, when I say it is totally by accident {and perhaps the fact that my triangles were all cut to the same size}. The thing that really struck me was how much I LOVE the make-do look and yet, over and over and over, I continually fight against that very look in my own quilts. Now, you might see something different in what I turn out, but never think that it just comes naturally. Oh no. It's all very much a work in progress around here!

Looking very cozy
My youngest brother and his wife recently sold their home by the river {hard to raise little kids by a whitewater river}and bought a small cattle farm. During the big move, they had to decide what to take, what to keep as the farmhouse there is fairly small. Anyway, long story short, they called me and asked if I would like to have this brand new sewing table {still in the box}. Yessss!!!

A new sewing table!
Since my sewing machine is slightly larger than the standard size, my husband had to cut a little bit more room in the opening. It's been interesting getting used to having my sewing machine flush with the sewing table and honestly, I'm still not 100% sure that I love that part. It sure looks good though! Always fun to get something new to try out, especially when there's no money involved!

Trying out the new sewing machine position
I finally went ahead and started chain piecing the wedges for the Grandma's Fan blocks, cut out sometime during the winter. There's a lot of blocks in the quilt {over 90?} and so I haven't been in a huge hurry. I'll probably sew the fans onto the background by hand, but now I'm dithering over which color to use in the background position. Lots of white in this quilt and mehh... you know how I feel about that!

Starting to sew the Grandma Fan blocks together
Got all the leaves cut out for the Flower Power blocks. Love the punchy vibe! It's a vintage floral I picked up at a quilt show many moons ago. The last time I used a chunk of this fabric, it was probably in 2018. Very good fabric, but the purple in it goes a very long ways. Wish I could get better pictures of these tulip blocks, but to date, they have been extremely uncooperative.

Flower Power blocks looking better with the leaves
In other news, we have had a rather rough couple of weeks. Some friends in our church were involved in a dispute of sorts and were killed in their home. During Covid, they got more and more interested in going off-grid and getting away from people, resulting in them buying property in a fairly remote area. It was all very shocking and so very, very sad as they were 'salt of the earth' sort of people and the least likely people you could imagine this happening to. 

Only one frame left to go!
Our church members took food, for over a week, to the daughter & husband in the home where she was housing the surviving grandmother and other grieving family members. The grandmother was also living at the remote location at the time of the tragedy, and had thankfully managed to run away and hide. She was severely traumatized as you can only imagine. It's surreal and mind blowing this could happen to such good people. There was lots to be done as to relocating animals and plants etc. and much more needed in the weeks ahead. Obviously the grandmother will not be comfortable living there now and the house will have to be cleaned up and sold. My husband was asked to officiate the memorial services and our church members rallied around and provided a dinner afterward, all on the Saturday of a holiday weekend. So much love and really, so very little we can do for them. It's hard when tragedy strikes close to home with people we genuinely care about. I cannot even imagine how devastating it would be to be the daughter, mother, father, grandparents in this situation. 

As usual, when times are hard and there is lots of heavy thinking to do, I tend to pick up the hoop and put in the hand quilting time. Many times through the years we've been married, my husband thinks longingly about living off grid and 'getting away from it all'. If nothing else, this event proved to us that when the world is in such a state of apprehension and turmoil, there is not a lot of safer places to be. I wasn't even going to mention any of this, but it has made me feel very sad, lethargic, helpless, moody--you name it. So yeah. Don't feel sorry for us. We're not the ones who got our lives upended in a brutal, senseless manner. We are absolutely, positively looking forward to getting to spend a week with our kids and grandkids here in a couple weeks. I'd say it's a very good time to bring on the hugs!


Thursday, June 23, 2022

I'd Say There's Never Too Much Applique, But of Course That's Not True!

I started on these flower blocks a couple months ago. Didn't get very far, very fast as I was really supposed to be finishing up other applique blocks. I might get spread thin with all the quilting projects, but I don't like a lot of opened ended applique. Just stresses me out.

Starting on the next round of applique
Anyway, right about the time that I was doing the prep work for these blocks, LeAnn over at Nifty Quilts posted her new tulip quilt. As I was looking at it, the style of flowers and the general layout really jumped out at me. Just too funny! I don't have the book 'Georgia Quilts' where she got her original inspiration, but I have looked at that quilt many times before. Pinterest? One of my other old quilt books? Not sure, but looky, looky, my doodling for this 'Flower Power' quilt obviously comes from the same exact inspiration! LeAnn's quilt is exciting and fresh, such a joy to look at. I'm a big fan of her work in case you couldn't tell!

Unlike her, I'm starting with mostly upcycled shirts for the backgrounds of my flowers, then digging in the stash for everything else. There is a piece of floral that I intend to use for the border or perhaps the inside strip sashing bits. We'll see. I do lots of pondering and turning things over and over in my head before even getting to the auditioning stage. Thus far, I am loving working with these bright pops of color. Simple applique plus bright, happy colors and it feels like an instant mood lifter! p.s. Don't be dismayed, there will be leaves attached at some point....

The loosey goosey notes & ideas
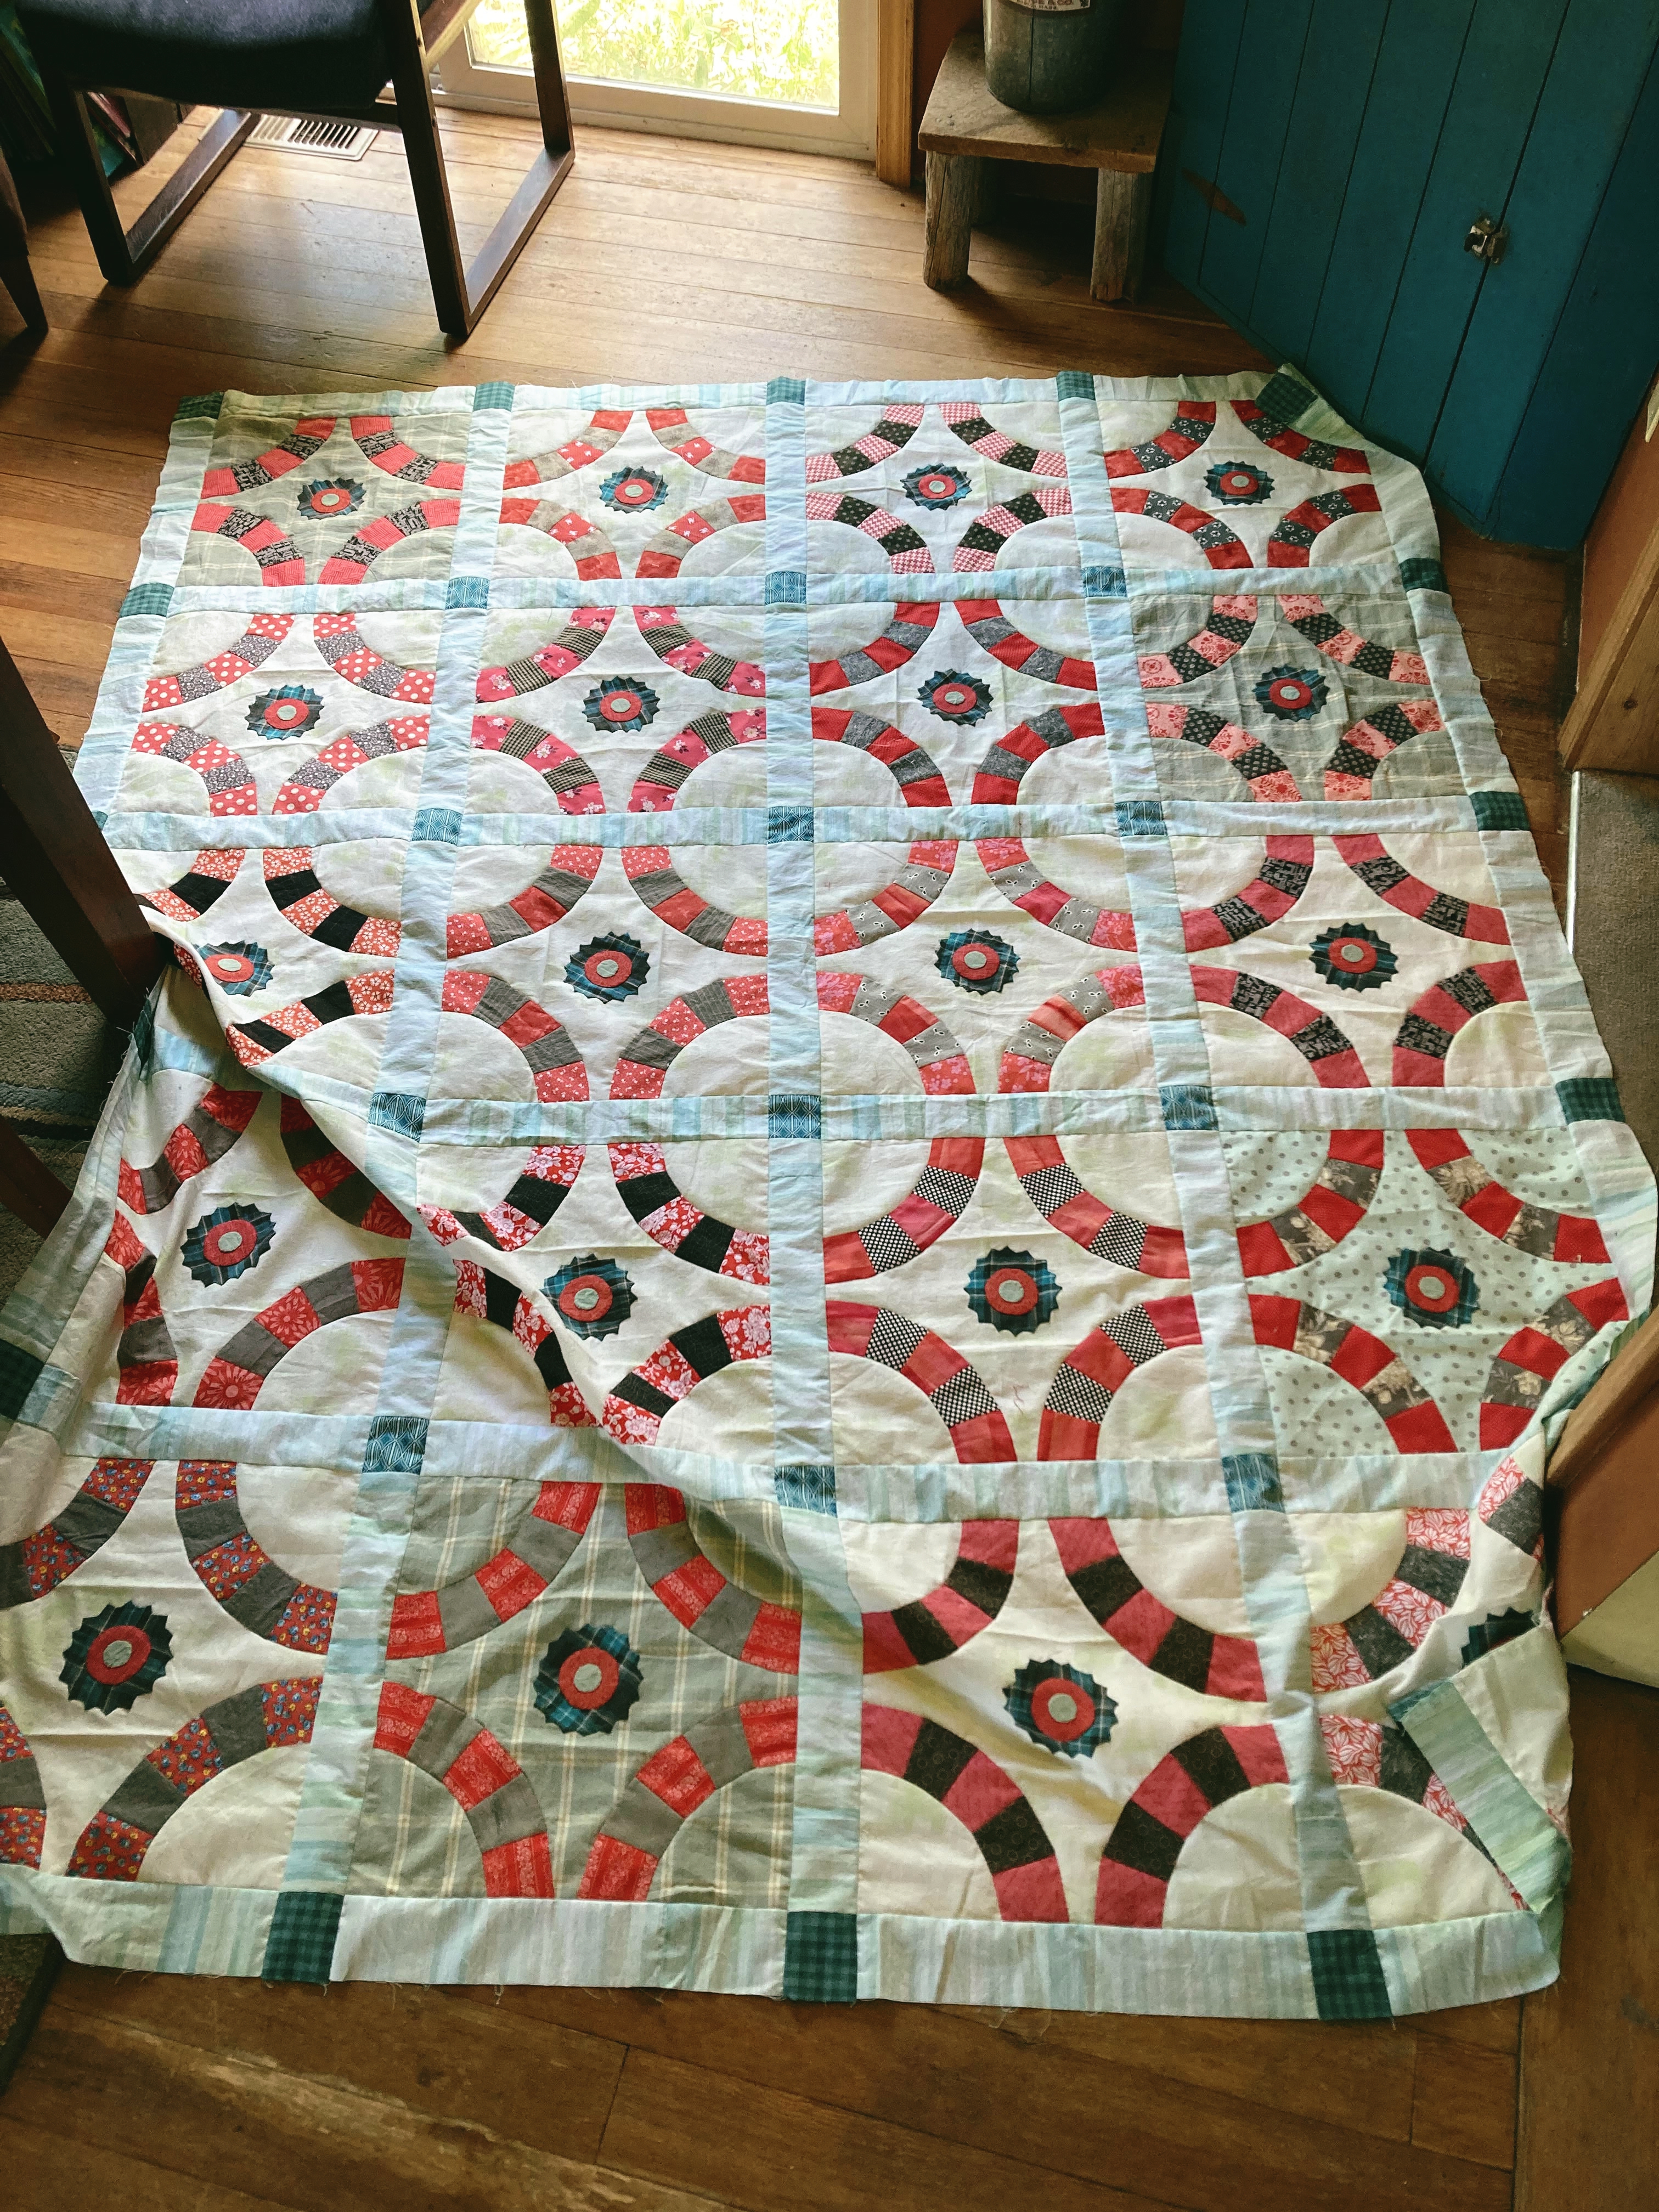
Sooo... this Ring Around project was the applique project getting in the way of Flower Power. Lots and lots and lots of time involved in the hand stitching and with 20 blocks? It can get a little boring at times. I piled the blocks up in an obvious spot in the quilt room just to help keep me motivated.

Looks so much better like this than hiding inside a tote...
Then there came the day when I had all the blocks done and tada! four rows sewn together too! Still not feeling especially pushed to plow through all the work to bring it to a quilt top, but eventually it all came together.

Waiting for a little more sewing time
During the original auditioning, I fiddled around with the sashing fabric {and even the cornerstones} probably more than I should of. It just didn't seem right that the quilt needed something so unassuming. There's a point sometimes where you wonder if your heart just isn't in it at that particular time of auditioning and then you realize.... This quilt really doesn't want something with a big, clever statement in that exact spot of the quilt. Ooookay. Message received!

The off-bacgrounds help make it interesting
In the end, to get the result needed, I actually flipped the sashing fabric over and used the backside. Uh huh. You can do that. I loved the nuanced stripey look to the fabric, but it needed to be toned down and let the applique blocks do their thing. The wonderful thing about the backside of the fabric {besides fading completely away} is the fact that it comes across more blue than green in those super subtle striped bits. With that, now the quilt has a lovely glow that somehow helps ease the aggressive bite to some of those rings. 

What is it about the color coral with blue?
Originally, I figured the cornerstones would need to be a black fabric, but that looked absolutely hideous. Coral and gray were also a non starter, and then I was left with some form of green or blue. Thankfully I had a couple pieces of teal fabric that fit the bill. The print was a little iffy on some of the pieces that I auditioned, but eventually I found the two fabrics that made the quilt do a little nod of appreciation. Yes, it could have been been one fabric instead of two, but I didn't have enough of the piece that ended up in the middle of the quilt. And that was the favorite, hands down. Had to be used somewhere! Which, interestingly enough, also helped add to the cozy glow of the quilt. Funny how sometimes all our little choices add up to something we don't even realize is building!

The second quilt in the Melon Patch series
It feels really good to finally get the abandoned background blocks from Melon Patch into something that helps make those center medallions shine. That sweet plaid fabric was from one of my youngest sons shirts that he wore quite a bit. One that I loved on him. Didn't want to just toss it away! There was a quilt in the book 'Mixing Quilt Elements' by Kathy Doughty that served as the impetuous for moving forward with these backgrounds, and though this quilt isn't exactly the same, many elements are very similar! Instead of her wedge templates, I cut my own from an acrylic template bought at JoAnns. Much easier and also, the wedges were a better size for these specific blocks.

Doesn't appear to need a border
Overall, I am very pleased with the look and feel to this low-key, but bursting with character, quilt top. At first I tried very hard to get the wedge quarter rings to match up exactly, but then I just gave it up completely. What am I doing? Why even bother? The sashing space helps transition  the 'Ring Around' effect tremendously and I'm certainly not someone to squawk if it's not perfectly perfect. Yeah. Not. Very. Important. At. All.

Original fabric pull
Another thing that I've done this week is something that happens pretty much all year long. It happens when I'm in the mood. When I'm stalling. When I'm down in the dumps about pretty much anything. When I can't get the motor started to put in the real effort and work of quilting. Whenever. You know how it is. You pull a couple stacks of marinating fabric stacks and attempt to fine tune. Let your subconscious  do its thing and just try to stay out of the way.

Adding a bit of spark
In the first picture is a stack of fabrics all chosen with the intention of trying to use up some of those bitter, brick reds that feel so very hard to get used up. Funnily enough, I actually liked the original stack almost enough to get started on a brand new quilt project during the winter. Then I dithered, second guessed, felt queasy in my gut and thought, 'no.... there's something not quite right about the blend'. I've approached it at least twice since then and had zero luck changing things up. It seemed content to be stuck.

Filling in the details
Earlier this week I pulled the stack out again and immediately decided that it needed some of those lighter blue/greens. Hmmm... could it be because I was just knee deep in those precise colors finishing up a quilt top? Hum, hum, humming along, I quickly added the salmon pink upcycled shirt {recently acquired from a thrifting excursion}. Perfection! Then it was obvious that there needed to be more of those super light pinks for a better transition. 

Maybe a tiny bit more depth with the green
And then some yellow gold hopped on for a ride. Not just any yellow mind you, but the exact perfect shade. So important to have a tiny bit of spark! And then it was a step back to peruse the effect. Hop on a chair and look down at the fabric on the counter. Hmm... Yep. Needs just a little bit more of the darkish shades of greens for impact. 

So yeah, that's pretty much how I work with the fabric stacks. As I'd said before, they rarely come out of the stash totes ready and raring to go directly into a new project. A little bit of fiddling here and there over several months {or a year} until finally, a day comes when the combination seems wholly complete. A big oops that I didn't use to recognize in my fabric gathering, is the tendency to dull things down and go for the soft, overly muted look. And then rush it directly into a quilt! The colors this happens with most often is usually a lot of the same colors that I wear. I don't even think to deeply about it in the moment! Quilt-making requires a bit more finesse though. Thankfully, I've learned to take the time {however much that is} to get things right. This stack seems good now. Belated it may be, but finally starting to see some cozy vibes happening!